A Thread with handy utilities for the PC. As I find other useful tools, I'll add to this Thread. If anyone knows of any useful utility programs on the PC or Mac, please post a Reply with information and a link.
Automatic Video Resolution Changers
A couple different utilities to automatically change screen resolution. Older PC games require a 640x480 display. Windows XP, Vista and Win 7 only drop resolution to 800x600 when using the Slide Bar. Sometimes running in compatibility mode with 640x480 still does not work to get a full screen display out of the older game. An automatic resolution change can easily be done. For lower resolution games that do not display correctly it is cumbersome to go into the display settings, select video adapter to go below 800x600, list all modes, change the resolution and then back again once exiting the game. A lot of steps just to play a retro game!
First, be sure the PC video card is set to display in FULL VIEW or PANEL FIT SCALING Mode. This alone might do the trick. However, sometimes when lower resolutions are selected, the image is shrunk or displayed to one side.
Display Resolution Changer Automatically
Older PC games require a 640x480 display. Windows XP, Vista and Win 7 only drop resolution to 800x600 when using the Slide Bar. Sometimes running in compatibility mode with 640x480 still does not work to get a full screen display out of the older game. An automatic resolution change can be done.
Download Display Changer: http://12noon.com/?page_id=80
After installing Display Changer, a few command lines are needed. I put together a simple BAT File that prevents the multiple clicking to run an older game at full screen. This allows automatic resolution change, running the game and then switching the screen resolution back to normal.
1. Download and install Display Changer from the link above.
2. Copy and Paste the text in the Quote below into your favorite Text Editor such as notepad.
3. Note the install path of the Display Changer utility in the text, change accordingly.
4. Change the "game.exe" to the file name of your game.
5. Save as a BAT file, for example: "DISPLAY CHANGE.BAT" in the same folder as the installed game.
6. Open Start Menu, select properties of the game Shortcut and change to run the Bat file instead.
A description of the lines below
Line 1: Sets the display to 640 by 480 resolution.
Line 2: Runs the game.
Line 3: Pauses the Bat file. (This is needed for windowed games)
Line 4: Sets the display screen back to normal, in this case 1024 by 768 resolution.
CRTGAMER post of a BAT File Resolution Fix wrote:"C:\Program Files\12noon Display Changer\dc.exe" -width=640 -height=480
game.exe
pause
"C:\Program Files\12noon Display Changer\dc.exe" -width=1024 -height=768
The BAT file will automatically change the resolution and run the game. Once the game is exited, the BAT file is waiting underneath ready for a press of a key to switch back to the previous resolution you set. This can be changed to whatever your default resolution is.

SetRes by IAN SHARPE
http://www.atrandom.iansharpe.com/setres.php
A simple automatic resolution fix is to use SetRes to change the resolution. By creating a simple BAT file to automatically change the screen resolution matched to an older game lower resolution to obtain a full screen. The bat file automatically restores the desktop resolution once the game is closed. The Bat file is set as the new shortcut for a game; the Game Icon can be added to the bat file shortcut in the Start Menu.
The SETRES.EXE file is placed in game directory - BAT file example:
CRTGAMER posted BAT file wrote:SETRES h640 v480
rem program start file name goes here
SETRES h1366 v768
Windows 7 Explorer Edit Bar
Windows Explorer
I like the older Windows XP Explorer Menu Toolbar with the very useful EDIT bar. In Windows 7, the bar is completly missing!
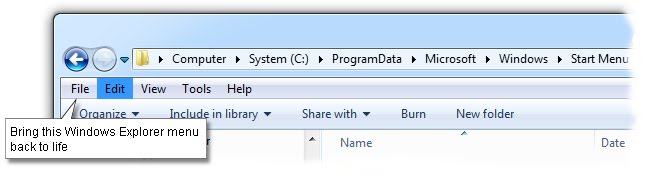
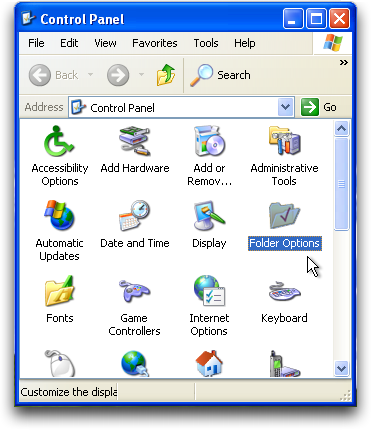
The Menu Toolbar can be enabled after a bit of clicking. Open up the Control Panel and look for the Folder Options Icon.
Click View and then click the check box to Always Show Menus.
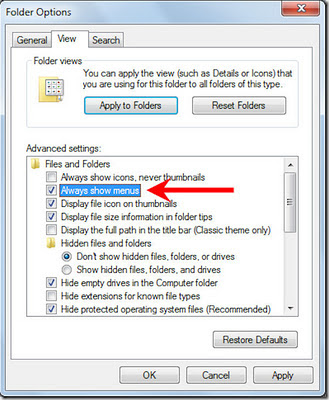
Now when opening up Windows Explorer, the Edit Bar is at the top just like older versions of Windows file explorer. The Folder Options is also readily accessible without having to open the Control Panel again. I swear every revision of Windows in attempt to making the OS more user friendly is less friendly.
Windows 7 Explorer Command Bar Folder Band Tweaker
However, even with the previous fix the Organize Command Bar called Folder Band by Microsoft is still showing. It is actually taller then the Edit Bar and for me useless and taking up part of the folder view screen. I need all the viewing space possible when looking thru a huge folder sub directory in the hard drive. There seemed to be no way to remove it without diving into the Registry. A pain having to Edit, then at a later date Editing again in case I wanted it back.

I found a Freeware program which I personally downloaded and tested out that works beautiful! No editing the Registry and it even gives the Folder Band an Auto Hide mode by hovering the mouse. No installation needed, just run it and reboot. To change the setting, simply run it again and even add as a shortcut under Accessories if you want. I changed its Shortcut Icon to Windows Explorer so it can easily be spotted.
Windows 7 Command Bar Tweaker - http://techdows.com/2011/08/auto-hidedi ... eaker.html

avrame wrote:Figure I might impart some useful apps/tips that I used over the course of my time as a software tester:
- Already said, but ALT in place of restoring the edit bar
- For those that are pro-keyboard and do not want to interact with a mouse while filecrawling/editing, use the 'Menu' key (normally to the left of the Right CTRL key), applies a Right-click action to whatever has keyboard focus
- From renaming multiple file, you can TAB and SHIFT+TAB to navigate between multiple items
Dexpot Virtual desktops for Windows, similar to Spaces for OSX, and Linux. Adds hotcorners if wanted
MizMouse Allows your scroll wheel to take action on whatever is under the mouse cursor, without having to click the window first, useful if you multitask and have multiple windows open
Renamer Simple Renaming utility that supports Regular Expressions. Don't want underscores or CRCs in filenames? One click will do you good on all the files in a folder.

Disable Windows and Caps Lock Key

All these years of playing Windows Mame that stupid Windows Key between CTRL and ALT drove me nuts. OSX and DOS Mame are never an issue but in the Windows environment a real pain!
Short of ripping that left Windows Key out, there is a Registry solution. You can keep the right Windows Key active. There is also a Caps Lock disabler as well a Restore. Reboot for the change to take affect. I know a concern when adding a Registry file, but these work great in Windows XP, Windows 7 and Windows 8.
Enjoy!
Disable Windows and Caps Key - http://johnhaller.com/jh/useful_stuff/disable_windows_key/
MS Disable Win 7 Windows Key - http://support.microsoft.com/kb/216893
Auto Key {Change keys thru shortcut) - http://www.autohotkey.com/
Change Win 7 Caps Lock To Shift - http://www.howtogeek.com/howto/windows- ... d=noscript

Christopher Beam wrote:GOOD RIDDANCE - The long-overdue movement to abandon Caps Lock
http://www.slate.com/articles/technology/technology/2010/12/good_riddance.html
THE END IS NIGH. That's the message Google sent last week when it unveiled its new laptop, the Google Cr-48 notebook. The computer has all kinds of new features—Chrome OS, a simplified design, and free broadband. But perhaps the boldest change is Google's decision to ditch the Caps Lock key. In its place is a Search button, denoted with the image of a magnifying glass. Users can still designate the search key as the Caps Lock—they just have to take the time to change a few settings. But the default is that if you want capital letters, you have to hold down Shift.Caps Lock had become an outdated scourge. Modern-day personal computing—surfing the Web, writing school papers, chatting online—doesn't require nearly as much capitalization. As of 2010, the most-common Caps Lock users are enraged Internet commenters and the computer-illiterate elderly. The key's location makes it a frequent target for an aCCIDENTAL STRIKE when your pinky reaches for the "a."


Spyware Removal
One thing that every Windows PC needs is a Spyware Remover. Getting rid of all the malicious marketing intrusions can really speed up the performance of your PC. Most Malware is Spyware, Virus programs though can be very damaging are not as common compared to Spyware.
As in any Spyware removal routine, be sure to be booted in Safe Mode by tapping the F8 key during startup.

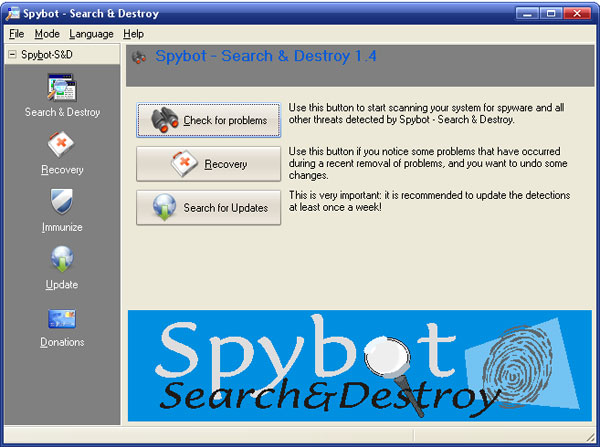
Spybot - Search & Destroy
I have used this freeware program for many years. It has both a Spyware remover and an Immunizer to block Spyware from reinstalling. What I really like is the control of when I want to run the scanner and the behind the scene blocker without the nag screen.
Spybots currently is at a 2.4 version. Still Freeware, but now there are deluxe online versions for purchase that include Anti Virus. Time will tell if Spybot becomes a nag screen "buy the update" as Norton and McAfee has done over the years.
https://www.safer-networking.org/
Spybot for private use - Why use the Free Edition?
If all you require is to be able to scan and remove malware and rootkits from your system. Or if you want to protect your PC by immunizing your browser and hosts file, the ‘Free Edition’ is the choice for you. If you are a more experienced user you can also check various ‘autostart’ locations using the ‘Startup Tools’. Spybot 2 can scan single files or specific folders and unlike other software it doesn’t matter if the file is located on your local drives or on a network share. Spybot 2 comes with its own whitelist which helps to identify if files are legitimate or not. This useful addition helps to speed up the scan. Even though this fully functioning product is free of charge you can still get free support by emailing our support team.

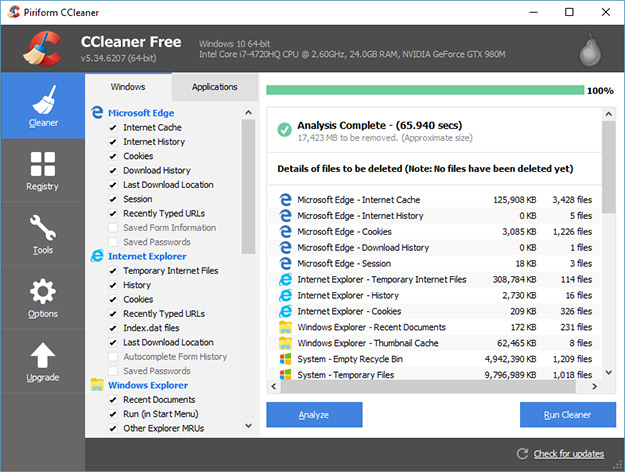
CCleaner
Another Freeware and very sweet utility. Very handy in removing all the hidden temp files making your browser more quick load snappy.
https://www.piriform.com/ccleaner
CCleaner Free or Professional or Professional Plus 4 In One
Windows 10, 8.1, 8, 7, Vista and XP. Including both 32-bit and 64-bit
CCleaner is the number-one tool for cleaning your PC. It protects your privacy and makes your computer faster and more secure. Is your computer running slow? As it gets older it collects unused files and settings which take up hard drive space making it slower and slower. CCleaner cleans up these files and makes it faster instantly. CCleaner erases your browser search history and cookies so any internet browsing you do stays confidential and your identity remains anonymous. CCleaner’s patented registry cleaner clears out this clutter to make your PC more stable. Many programs run silently in the background when you start up your computer. CCleaner helps you get to work, or play faster by letting you disable unneeded programs.
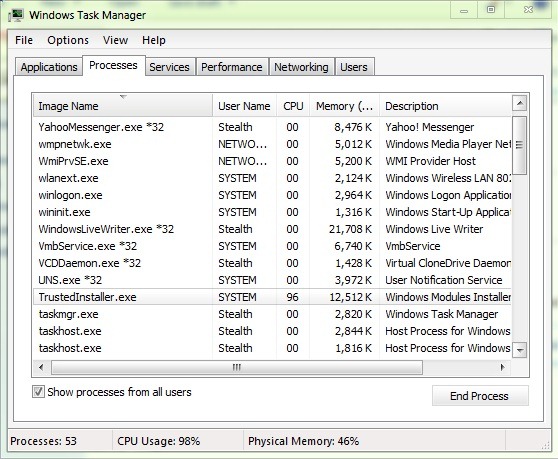
Windows Trusted Installer Disable
Microsoft automatically scans the drive in the background for updates. You can disable it thru Windows Update. Even doing this, (Press CTRL SHIFT ESC) I could not turn off the TrustedInstaller.EXE file which possibly could be a Spyware. This file really takes over CPU usage slowing down everything!
I searched online and found multiple methods thru easy checking of blocks to control this intrusive built in Microsoft Spyware. Combined the various methods into text quoted below.
The following fixes are intended for situations where trustedinstaller.exe causes problems due to the Problem Reports and Solutions history maintained in Windows 7. Check thru all three methods to ensure that TrustedInstaller is disabled.
Method 1: Clear Problem History
Follow these steps to clear the problem history report:
1. Open Action Center by clicking the Start button Picture of the Start button, clicking Control Panel, and then, under System and Security, clicking Review your computer's status.
2.Click Maintenance, and then, under Check for solutions to problem reports, click View reliability history.
3. Click View all problem reports.
4. At the bottom of the Review problem reports page, click Clear all problem reports.
Method 2: Stop the Windows Module Installer That Runs Trustedinstaller.exe
a. Click onStart, in the Start Search box, type “msconfig” without the quotes and then press Enter.
b. Click Continue when the User Account Control prompt is displayed.
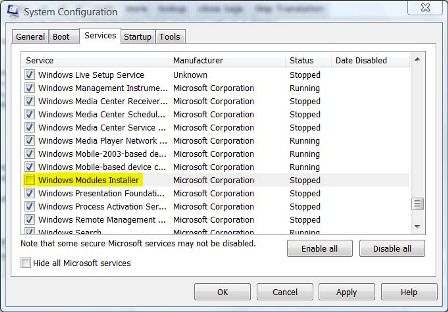
c. In the System Configuration window that is displayed, open the Services tab.
d. Locate and clear the Windows Module Installer check box.
e. ClickOK save your changes and exit the dialog box.
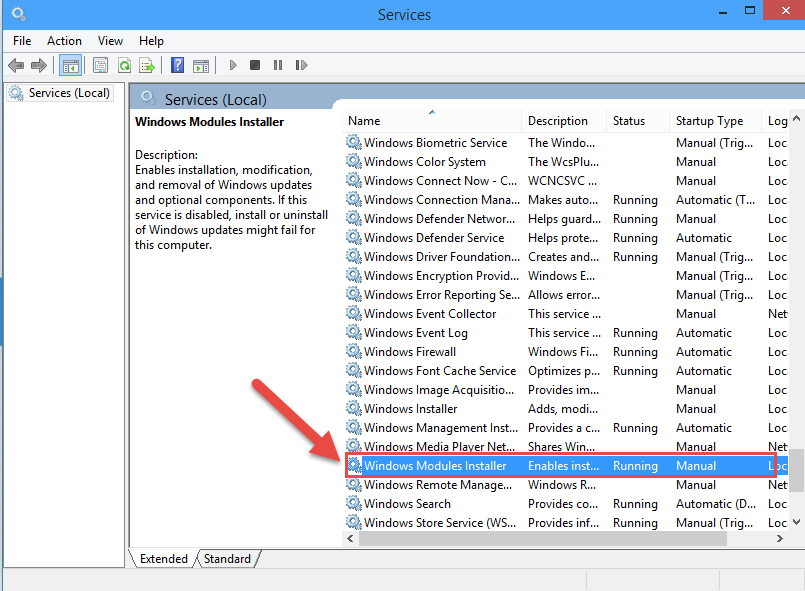
f. Next, open Services window by typing “services.msc” without the quotes in the start search field.
g. Double-Click on Windows Module Installer.
h. Change the Startup type of Windows Module Installer to Manual or Disable.
i. Click Apply.
Method 3
This method shows you how to Start/Stop Windows Modules Installer from Services.msc.
Locate Windows Modules Installer observe his current status and open to make changes.
From General tab you can Start/Stop and change the Windows Modules Installer.
To finish press ok button and close Services window