fast's geekhouse in progress

Discuss Your Gaming Environments and AV Setups
fastbilly1
Site Admin
Posts: 13775
Joined: Tue Apr 17, 2007 7:08 pm

Re: fast's geekhouse in progress

Post by fastbilly1 »

Computer Area

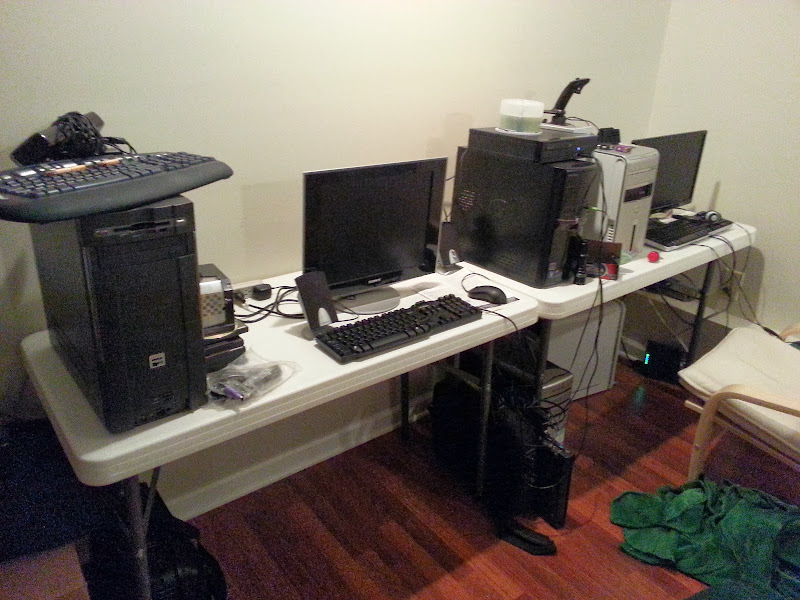
As many of you know, my wife and I are both big PC gamers. So we have multiple PCs setup. I would love to have all the boxes rackmounted, and just have monitors setup for 8 players like a computer lab in a college, but that is something for down the road. Right now for our tables we are using two Lifetime 4x2 mightylite tables:
Image

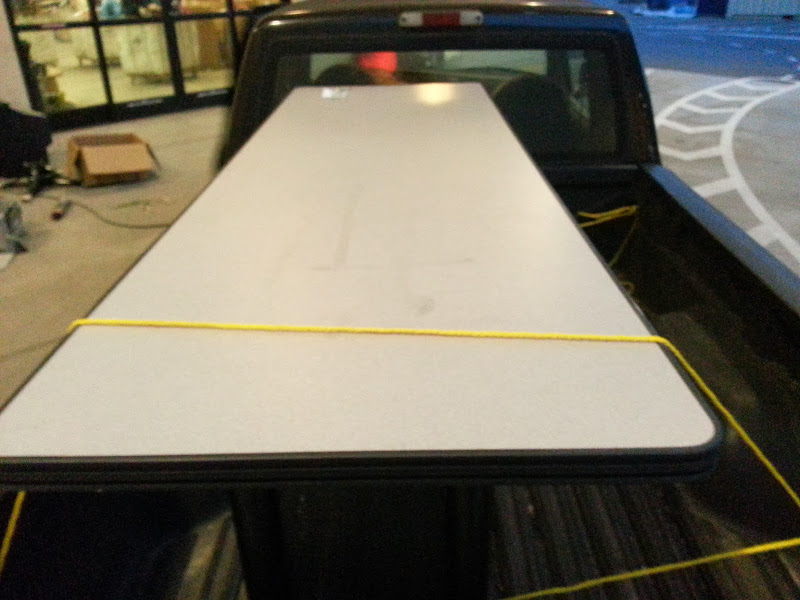
And while that works fine they are just a tad too tall. It did give us plenty of space for our towers, cables, whatever we were working on, and a spare tower on the end. Well last Saturday after having breakfast with some of our friends we found a Computer Training Table at Goodwill for $50.

Image

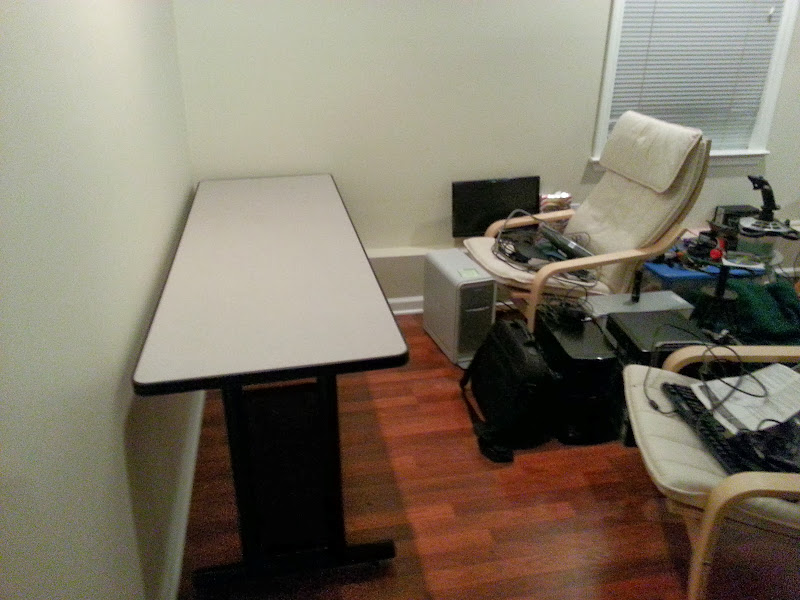
Being that a six foot training table the legs for this table usually sell for around $200, this was a steal. Sure it is two feet less than our current table setup, but that is ok, those last two feet just had that P3 in the cool case on it.

Like everything bought a Goodwill, we took it home and gave it a solid bath in a combination of Windex, Mighty Orange (which is an industrial cleaner and degreaser), and some work with a magic eraser and it was clean. And in place:
Image

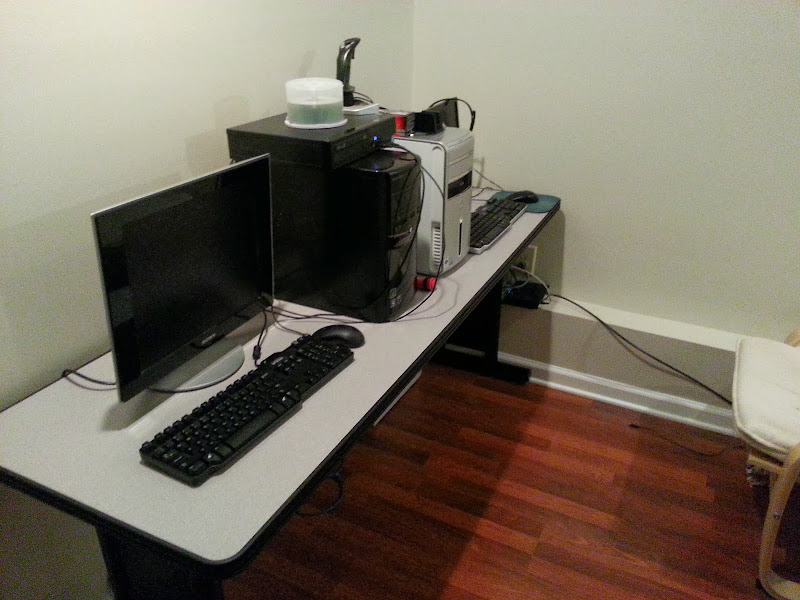
About an hour of cable wrapping and routing later and we have this:
Image

Which wont be perfect until I figure out exactly what I am trying to do with it.

But for now, computer table is installed and all four main pcs are back to being operational.
User avatar
Hobie-wan
Next-Gen
Posts: 21707
Joined: Sat Aug 15, 2009 8:28 pm
Location: Under a pile of retro stuff in H-town
Contact:

Re: fast's geekhouse in progress

Post by Hobie-wan »

Those chairs are super comfy, but I'd think they'd be leaning too far back plus the arms keeping you pushed further out. Not being able to scoot would bug me too. How do you manage?
fastbilly1
Site Admin
Posts: 13775
Joined: Tue Apr 17, 2007 7:08 pm

Re: fast's geekhouse in progress

Post by fastbilly1 »

If you notice on the far wall there is a tray built in about a foot up. Those are centerblocks that go all around the base of the room (except the wall the PCs are on). Which is great for cable management, but a pain for everything else. So what I do is put my mouse pad and mouse down on the tray and I can lean back in the chair and use a old tower as a footrest. The table now is a good four inches lower than the old setup so it is easily possible to game on the table as is, but when I get our 32inch tv/monitors up here leaning back will be the way to go. My wife will either use a breakfast in bed tray or a nearby sidetable for her mouse.

That said, good office chairs are the next upgrade to the area.
fastbilly1
Site Admin
Posts: 13775
Joined: Tue Apr 17, 2007 7:08 pm

Re: fast's geekhouse in progress

Post by fastbilly1 »

Hanging Art:
So this is a small update, though mostly a warning. If you go cheap on your picture frames you may have to install the wire yourself. Many years ago I got lucky and bought three original 1965 CBS posters for their lineup. These are posters that were framed in the lobby of CBS affiliates around the USA. Then I cheeped out and bought $30 frames on Amazon. But my wife decided it was time to put stuff up on the walls so out came the power driver, a big ruler, and a lot of hoping.

The first one is easy enough to put on, pick a point near the top, screw it in. I measured down 4 inches on the first one, then eyeballed the rest after realizing it was not terribly important. However, the second one being even is a trick. So my 24inch ruler came to my rescue:

Image

By putting one side in the middle of the screw hole hangers and then lining up the other side to roughly the same point. You get pretty dang close. Then after you wire it up you can adjust to make it level. Not a terribly difficult thing to do, but if you are not expecting it, it is about an hour of fussing to figure out.

Image
[Since the image is grainy, the three posters are for I Spy, Get Smart, and The Man from U.N.C.L.E., sadly the fourth poster from this set is Bonanza and the originals sell for $400ish on ebay whenever it pops up].

Our gameplan for the rest of that wall is to either build in bookcases between the posters or mount pachinko machines between them. Either way it will be fussed with and overplanned...

So lesson learned, cheap frames are ok if you are willing to do the work of mounting your art and installing the hanging hardware.
User avatar
the King
Next-Gen
Posts: 1028
Joined: Wed Mar 18, 2009 2:22 pm
Location: Hockeytown, USA

Re: fast's geekhouse in progress

Post by the King »

fastbilly1 wrote:
the King wrote:Fun thread. Wished I would of documented more of my household projects. I guess maybe at the next house


I enjoyed your thread as it was. You had alot of neat concepts that I will hopefully be able to implement here.

And R2s dome is in too rough of shape for him to travel outside for too long.


You can fit a 5 gal keg of homebrew in him too. I actually drove around for a week like that. Got a lot of double takes. I actually meant I wished I would of documented more work and the progress of that work at my house( not just my basement) like you are doing here and not necessarily to share, just to have. Keep up the good work. Enjoying your sharing. Always looking for ideas!
fastbilly1
Site Admin
Posts: 13775
Joined: Tue Apr 17, 2007 7:08 pm

Re: fast's geekhouse in progress

Post by fastbilly1 »

I didnt think about a keg in him...thats actually awesome. Itll be like Bar2-D2 poorer brother:
Image
fastbilly1
Site Admin
Posts: 13775
Joined: Tue Apr 17, 2007 7:08 pm

Re: fast's geekhouse in progress

Post by fastbilly1 »

Raised beds
So Saturday was our first bright and sunny day where we were at home so that means house projects. Thanks to winter storms, our backyard fence needed new pickets, our gate has always been a bear, and my wife needed atleast two more raised beds for the garden this year (well that and a fence). So with our projects ready we headed off to the Home Depot to load up. $200 later we had the back of my wife’s car looking like this:
Image

Since our fence is a standard issue privacy fence, repair is about as boring as anything else related to it. So we installed a dozen new pickets and put in 200ish new screws into the trouble areas, that’s all yall probably care to know. Now our gate is alittle over three feet wide, made solidly out of wood and has sagged very badly since we bought the house. Saturday morning I was looking at it and my lessons from This Old House kicked in – the crossbrace was installed wrong. So thirty seconds with the powerdriver and:
Image

And now it doesn’t sag nearly as much and require you to lift it up to move it at all. It still does sag, enough that it opens and a normal sized person can squeeze through, then alittle push to open it all the way. And truth be told, I like that a lot, since 90% of the time it is just me getting through with handtools. So remember kids, when your gate sags, make sure your crossbrace is installed low on the hinge side and high on latch side. If not, fix that before buying a gate kit. I was going to buy the wood to make a new double door gate instead of the big single door one if it did not fix it enough.

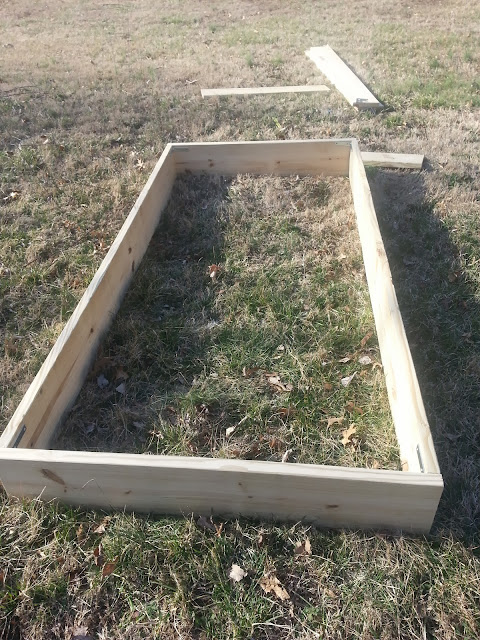
Now on to the fun part of the post, raised beds. Our house came with one bed that is 5ftx10ft with corner brackets instead of posts. This is not an ideal bed layout, but we figured we would keep with the style of the other. However we went with 8 ft 2x10s instead of 10ft giving us 8ftx4ft beds instead (my wife’s truck is at the farm so we are stuck with the SUV for transport right now). All of the wood is cedar, since it is naturally rot resistant and should last 10 years outside.

Each bed is:
Three 8ft 2x10s – one is cut in half
Four 4inch L brackets
Eight 1 inch deck screws
Twenty 2inch deck screws
Cost was roughly $35 per

So after I cut two of the boards in half with my jigsaw (eventually I will buy a circular saw) we carted everything out to the construction area:
Image

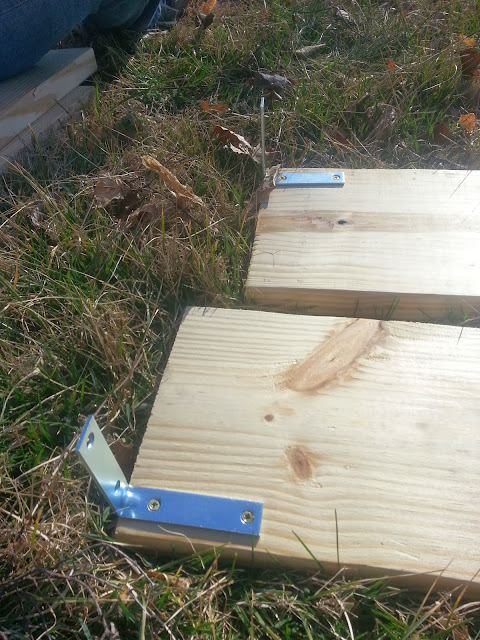
A quick series of screws gave each 8ft board an l bracket:
Image

Some two person finagling got each side attached and after about 10 minutes we ended up with this:
Image

And another 10 minutes and we have this layout:
Image

So roughly $70 in for two functional raised beds is not a bad return. We are filling them with some uniformly cut brush and covering that with a mix of compost and manure from the farm (note why the truck is down there, well that and it needs a new brakeline installed). Why are you putting cut up wood at the bottom of the bed you ask, well the answer is simple. There is a German farming technique called Hugelkultur or Hill Culture. This technique is best explained here:
http://www.permaculture.co.uk/articles/ ... ugelkultur
But it really breaks down to that the brush holds water and nutrients. So you use it for the base and over time, as the wood decomposes, it adds other benefits to your soil. Since we just cut down an Apple tree and have lots of Birch deadfall, it is a perfect way to not only get rid of the brush, but turn it into something better. Soon Victory Garden 2014 will be go.

That’s not it from the Garden though, we still have to assemble a “deer resistant fence” (which right now looking like it might be made out of 1 inch EMT conduit in a six foot tall L with a two foot overhang) and then ofcourse harvest. But I have some robotics ideas I am dying to try out if I can get them operational.
fastbilly1
Site Admin
Posts: 13775
Joined: Tue Apr 17, 2007 7:08 pm

Re: fast's geekhouse in progress

Post by fastbilly1 »

So long time no update. Geekhouse is still in progress, but wife getting a promotion and a couple family health problems have put the big projects on hold. But this weekend my wife was out of the house most of Saturday and Sunday so I got to clean up my workshop, finish some projects and get started on some new ones.

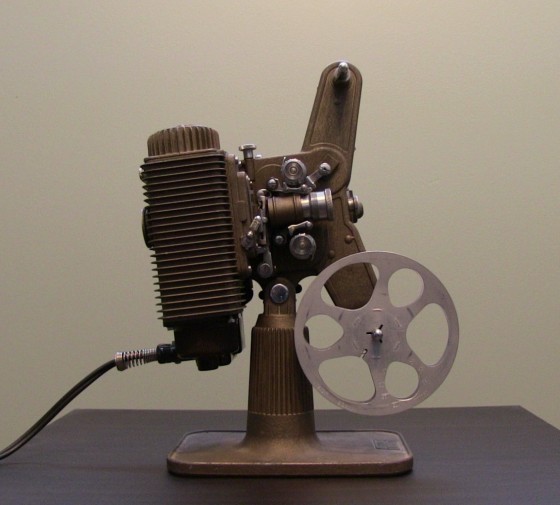
Since I do not have pictures for them, I finally fixed my Revere 8mm Silent projector. A couple years ago I got two of them, a mid 40s and an early 50s model, but both had issues. The 50s one has a bad lamp fixture, but good motion, the 40s one has bad motion but a good lamp fixture. I tried to swap the lamp fixture, but they are different sizes with reflectors so I had to swap the motions. Two months of tinkering later, the 40s one works, intermittently. It looks a bit like this:
Image
Sure it is a budget projector that takes 20 feet of throw to give you a 30inch image, but watching movies on film is just special. Now I have functioning 8mm, Super8, and 16mm, projectors, and a repairable Pathe, 9.5 - if I buy the specialized tools.

Server Radio Tower
But on to something more important, in the PC build thread I proposed an ideal thought. Several weeks ago I picked up a Sony SUS-590 hifi equipment tower:
Image
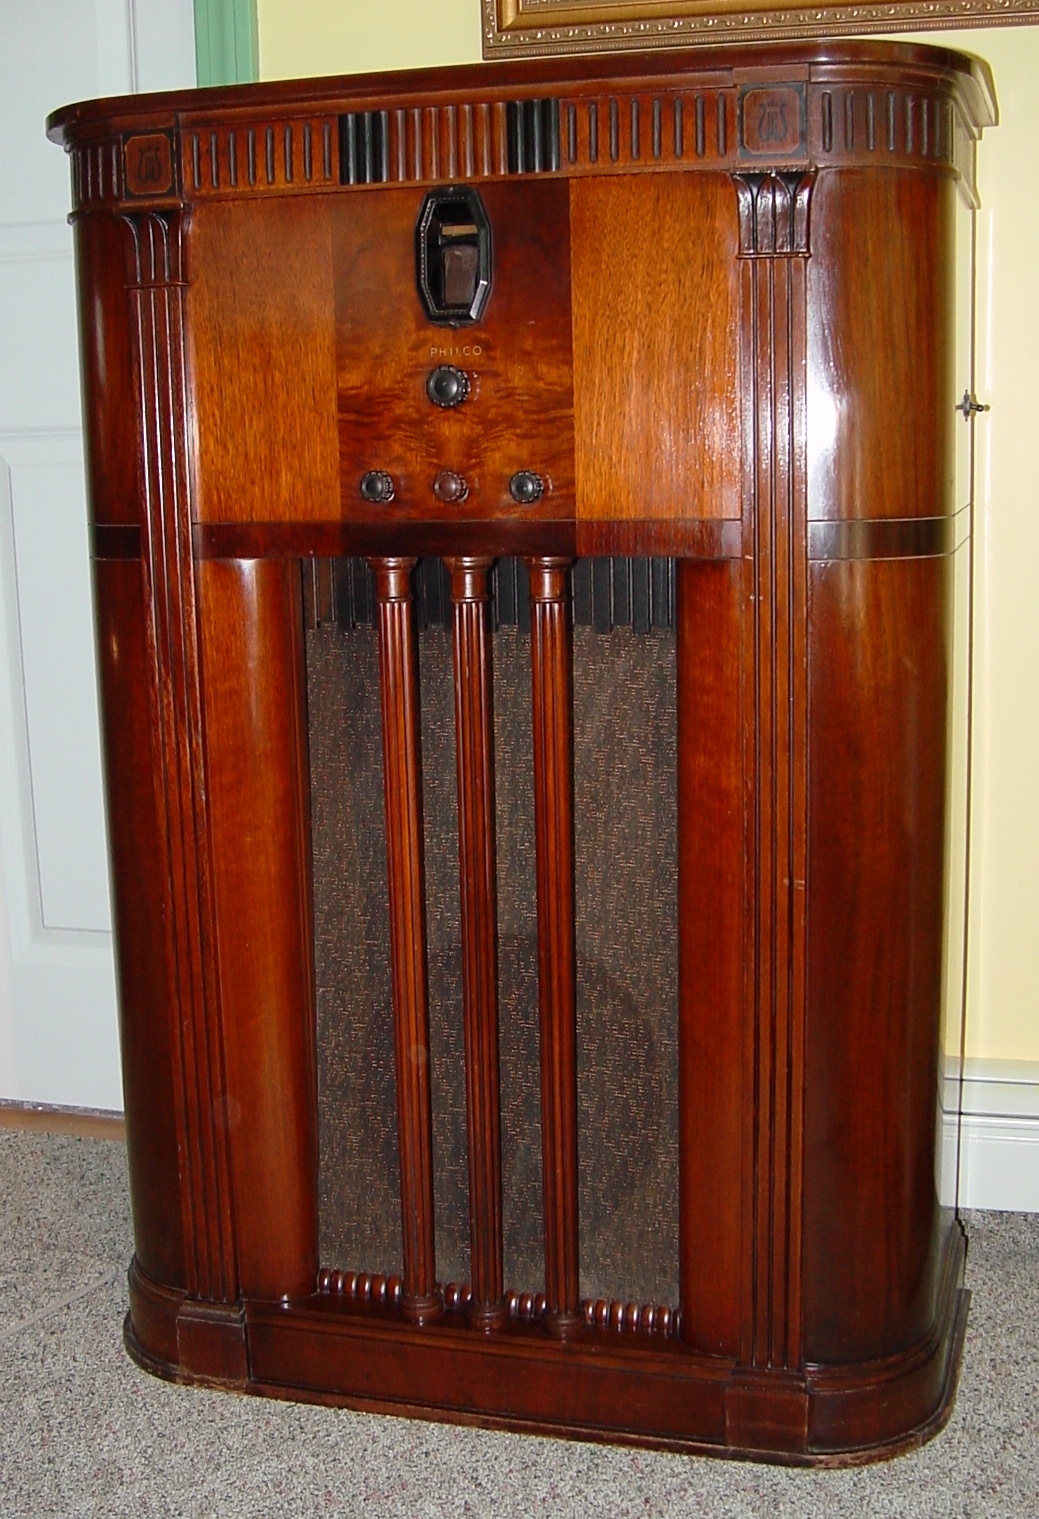
And I plan on adding some shelves and mounting pcs on sleds, much like how people with candy cabs add MAME pcs. But I cannot stop there. For those who don’t know, I am a huge fan of Cathedral and Tombstone radios and have several both functioning and retrofitted radios in my house. So I could not keep that big glass door on the front. So I decided to make a floor radio inspired by a radio I will never own, a Philco Model 16x:
Image
For those not familiar with the brand name, Philco was an inconic radio producer from the 20s. They dominated the cathedral radio area with the Baby Grand, created a battery bypass for the portable industry, and created the Predicta tv line, with their former employee Philo Farnsworth. They were huge, until the 60s when they filed for bankruptcy due to some bad government and highend private sector deals and got bought by Ford. History lesson aside, I spent a good bit of time theorizing how to make the cabinet look like a radio, atleast a toned down version of it.

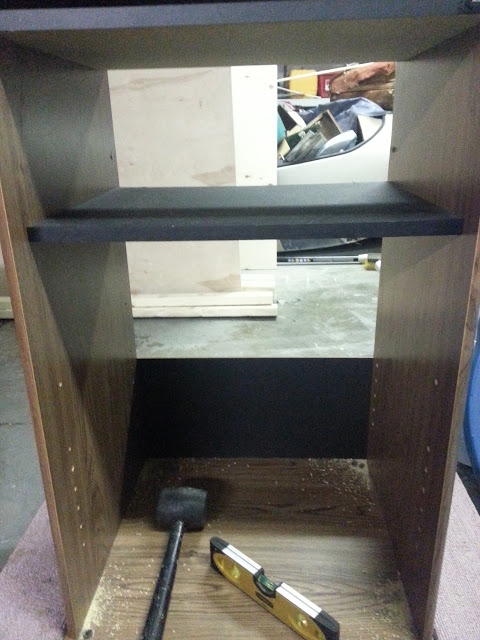
So to accomplish this, the first thing I needed to do was add a new shelves. So after about five minutes of math, this was finally accomplished:
Image
I can use existing holes for the other two shelves, I just had to add one much higher. Each pc has 7x13x17 inches of space (think of it like a mid tower case on its die), so there should not be any heat problems. Any time you do this kind of retrofit, you have a handful of invaluable tools. A good spirit level/bubble level and a rubber convincing device are my go to’s. Sadly, I did not measure the holes before hand, so I have 6mm holes, and all mounting pins for shelves are 5mm. So I am going to have to make all my shelf supports. But that’s down the road.

So when I had a gap in the rain, I fired up the truck and headed to Home Depot and did some damage. I am currently building some found object puppet for one of my wife’s friends:
Image
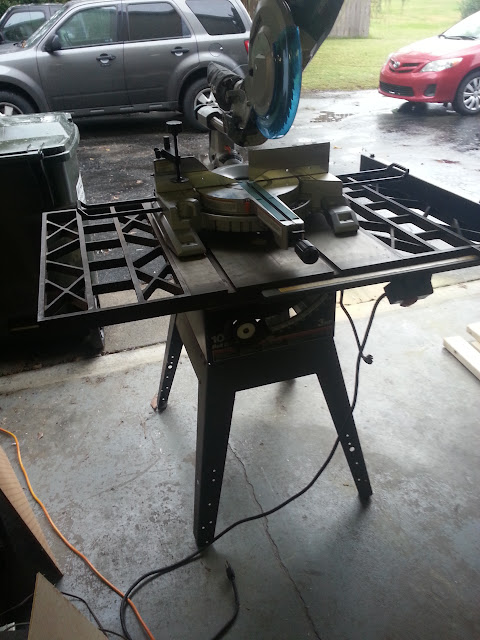
So I had to buy pvc, and various bits and bobs. But a sheet of ¼ and a sheet of ½ inch Birch plywood headed home with me, along with some fancy trim, and eight (mostly straight) 2x4s. I booked it home and got the first sheet into the garage as the rain started up. So most of Saturday was spent doing work with the PVC while I let the wood dry back out. Sunday after church I got started. Table saw in place, I fired it up and the second the wood hit it the board jumped. For those who do not know, when a 4x8 sheet of wood jumps, it is bad, like could kill you bad. Luckily, it did not hit anything other than the saw horses. I looked at the blade, dull as dull can be. So instead of listening to the teaching of Norm Abram, or just making another trip to Home Depot for a new blade, I channeled my inner racketman and did what I had to:
Image
Ok so that is alittle bit of a lie. I cut the sheets with a circular saw, then used the sliding miter saw to clean it up and get it precise. And before anyone gets on me about it, there was a towel under it, and it was clamped down with pipe clamps when I used it.

So first to be measured up was the trim. This is basic pine chair rail/window trim, cut to length of the gap. When in place, you will get a feel for what it is going to look like:
Image
I have a stain that matches the original wood, so it should look like one piece when it is done.

I then cut some of the ¼ inch ply into the sleds. Now I know what you are thinking, ¼ is going to be too flimsy. But for how often this is going to move, it should be fine. And remember, each of the sleds sit ontop of the ½ inch shelves. So a quick test fitting with old equipment, and we get an idea of how it is going to sit:
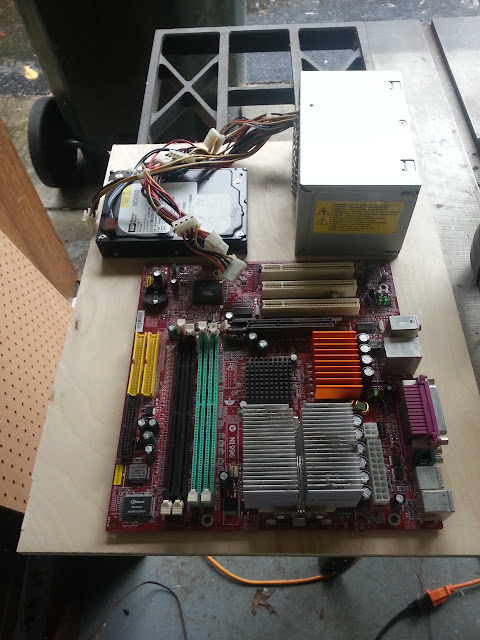
Image

So I cut out the rest of the sleds and shelves, and a mock of the door out of ¼ inch. I am debating on using the existing hinge, but if I can find the proper height piano hinge, I will go that route. Right now I am debating on how to orient the motherboards, and if I need to mount the GPU horizontally above the other cards on its own small platform. If I rotate the Motherboard 90degrees, I can mount the Harddrive and SSD above the PSU and the GPU can just mount like normal. I will know better when my PCB feet get in.

So right now, I am tossing ideas around on the next step. Obviously I need to cut up the mock up door. I am planning on putting four arcade buttons in place to turn on the pcs (it will have two pcs from day one, then two more down the road. But I have no idea what I am going to do to replicate the dial. It will have a gap in space there that will look odd. A USB hub was suggested, but I don’t think it will fit aesthetically. The other Idea I have had is putting in a NZXT Sentry LX fan controller, while it is futuristic looking, I think it will fit.
https://www.nzxt.com/product/detail/78- ... ntrol.html

For speaker cloth, I will be committing a faux pa. Philcos used a chevron pattern as you can see in that earlier picture. I am not a huge fan of that pattern, so I am using reproduction Golden Wheat cloth from Richmond Designs:
Image
I have no idea what radio had this pattern standard, none of my other radios have it, but I have seen it on radios in the past of all kinds. I just think it looks classy.

But for now:
Image


And in a rare double whammy.
Mame Cab Prototype
So talking to mjmjr25, KalessinDB, Majors, and Aaron have been HORRIBLE influences on me over the past few months. But seeing Majors at AWA again made me realize how badly I want another candy cabinet. For those who don’t live in the southeast, Majors is a on and off member here who is the king of mobile arcades. At AWA, he had 21 candys setup, with about 200 games on rotation. He has forgotten more about candys than I know. But since MAME was added to the Internet Archive with a DMCA exemption – making it legaler, I have phased out a lot of my arcade gear and moved back to MAME. So while I would love another Astro (which is currently a MAME cab but has a 1 slot Neo just waiting for its new monitor), I decided to go another route.

MAME cabs are usually plagued by control panels from hell. It is as if most people do not think through that how it is going to look when they add a 4 way, two 8ways, a spinner, and a trackball on the same panel. The word in the BYOAC community is Frakenpanel and it has been a fear of mine for a while that I was going to create something hideous like that. So I have been tossing around panel ideas for years. Candy cabinets have a variety of panels that you can swapout, but they are costly and actually take a good bit of time to swap. So I was wondering how I could make a panel system that would be rugged, varied, protect the controls, and above all allow us to play games the way they were made to be played. When talking to Majors at AWA about his headless Astro it hit me. Make the entire control panel swappable, not just the controls area.

So after a lot more planning than I care to admit, I got my idea going. It is a box frame made out of 2x4s, with a gap in the front, so I can slide a panel into it to lock it into place. It is the same height as an the control panel of as a Sega Candy (26 inches), but with an exposed monitor. This way, if your monitor dies, you just grab another TV. Tating will take seconds, not minutes. And if you want to run a game on an LCD, then on an CRT, so be it. I will have ZD enconders mounted inside the cab, with molex connectors coming out to the CPs, and a pc at the bottom for now. Another advantage of this system is that if I hack up a controller (or get two Blissbox 4 plays), I can adapt it to any console ever made.

So enough talk without pictures, unlike mjmjr25, I don’t run out of clamps:
Image
And in about half an hour I took three and a half 2x4s and made this:
Image
Which quickly became this:

Image
Soon it will have a top and sides made from that ½ inch plywood (once the tablesaw gets a new blade) and then the fun begins of making panels. This is the proof of concept version, sure it is held together with wood glue and screws, but the next version will get pocket holes (aka kreig jigged).

The big plan is to make two of them, with a dozen panels. But if this one holds up, I might end up with three and the 37inch 4:3 plasma I will never be able to sell, might get tated and attached to a 4x4 pole to hold it up behind this one. Can you say awesome Tempest setup?
mjmjr25

Re: fast's geekhouse in progress

Post by mjmjr25 »

Nice, man. Looking forward to the cab project. My project time for the year just went away - freezing temps at night means no more stain, poly, or glue. I really messed up some doors I had built trying to finish them when it was 45 during the day and then 20 at night :/ --- So, i'll be living my project days through you for the next 5 months...

Do you have a Kreg jig already? I've done so many pocketholes the last 10 years i've stopped using mine entirely - it's there, but I don't use it. Yours if you want it, just ping me.

Saw those garden beds too - my wife really wants some. She did the garden in a series of large plastic planters in our driveway this year - the only place that gets enough sunlight for most veggies. We're going to have to bite the bullet and take down some trees. Your place looks to have some good open field areas (assuming that's your land in the plant box pics).
fastbilly1
Site Admin
Posts: 13775
Joined: Tue Apr 17, 2007 7:08 pm

Re: fast's geekhouse in progress

Post by fastbilly1 »

mjmjr25 wrote:Nice, man. Looking forward to the cab project. My project time for the year just went away - freezing temps at night means no more stain, poly, or glue. I really messed up some doors I had built trying to finish them when it was 45 during the day and then 20 at night :/ --- So, i'll be living my project days through you for the next 5 months...

We are in the 30s at night right now, but it gets up to the 80s during the day. Aslong as we stay at these temps, I can stain, I just hope to do the bulk of it this or next week. If not, staining takes up to a month to dry. I can glue and paint up to early January though. Mid-Late Jan, Feb, and most of March is right out

mjmjr25 wrote:Do you have a Kreg jig already? I've done so many pocketholes the last 10 years i've stopped using mine entirely - it's there, but I don't use it. Yours if you want it, just ping me.

How do you just freehand it? If I could learn that the jig would not be needed, but send me a paypal cost? You have my info.

mjmjr25 wrote:Saw those garden beds too - my wife really wants some. She did the garden in a series of large plastic planters in our driveway this year - the only place that gets enough sunlight for most veggies. We're going to have to bite the bullet and take down some trees. Your place looks to have some good open field areas (assuming that's your land in the plant box pics).

We own 10ish feet past that furthest out bed (the house in the picture is the neighbor who owns the field), we have calculated that we can hold 30 more 4x4 planters if we take out one pine tree, but we have trouble keeping up with the five beds we have this year. Since that picture, I added four more beds (two more 4x8, one 4x4, and one elongated lazy L for peppers), but we had deer get into it twice this year and destroy our harvest. One of the times we were on vacation and they ate alot of it all the way down. We still got plenty of okra, cucumbers, and tomatos, but no peppers, beans, leafy, or things of the like. We have some root crops still in the ground, they will be picked sometime this week.

Next year, real fence, with a wire at an angle on the top. Its a silly concept, but if a deer gets its antlers in the wire, it usually just turns around. One of my neighbors has this setup and claims they have never had a deer in the garden.

Even though I know you are skilled in woodworking, I still highly recommend adding a metal brace inside the frame, just to be safe. The wood will blow out if it gets wet and then freezes. We lost one because of that already.
Post Reply