mjmjr25's Custom Wood Arcade Cabinet - DONE! 6/17/12
-
AppleQueso
Re: mjmjr25's Custom Arcade Cabinet...(almost done...)
I kinda want to ask you for woodworking tips sometime, but I imagine you're awfully busy.
-
foxhound1022

- Next-Gen
- Posts: 2282
- Joined: Wed Jan 25, 2012 7:20 pm
- Location: The mean streets of SouthTown
Re: mjmjr25's Custom Arcade Cabinet...(almost done...)
Damn internet connection.
Ok, well you could countersink the panel that the aluminum panel sits on, then use flat-head screws; you may have to make the holes in the overlay panel bigger to accomodate, but this would get everything good and flush.
Ok, well you could countersink the panel that the aluminum panel sits on, then use flat-head screws; you may have to make the holes in the overlay panel bigger to accomodate, but this would get everything good and flush.
-
mjmjr25
Re: mjmjr25's Custom Arcade Cabinet...(almost done...)
^Fire away - i'm no pro, but getting better. Honestly, I won't say there isn't some skill involved, but mostly, it is just planning and patience. Patience is the toughest part - and being willing to start something over, even if it means you lost an entire day. Tools and tool maintenance (mostly changing bits and blades) is important too, for sure.
Here is the connectors and cables:
So this is just a Dreamcast cable from a stock controller. The end was cut off the controller and those wires are installed into the CAT 6 connector. I have cables like this for all my consoles.
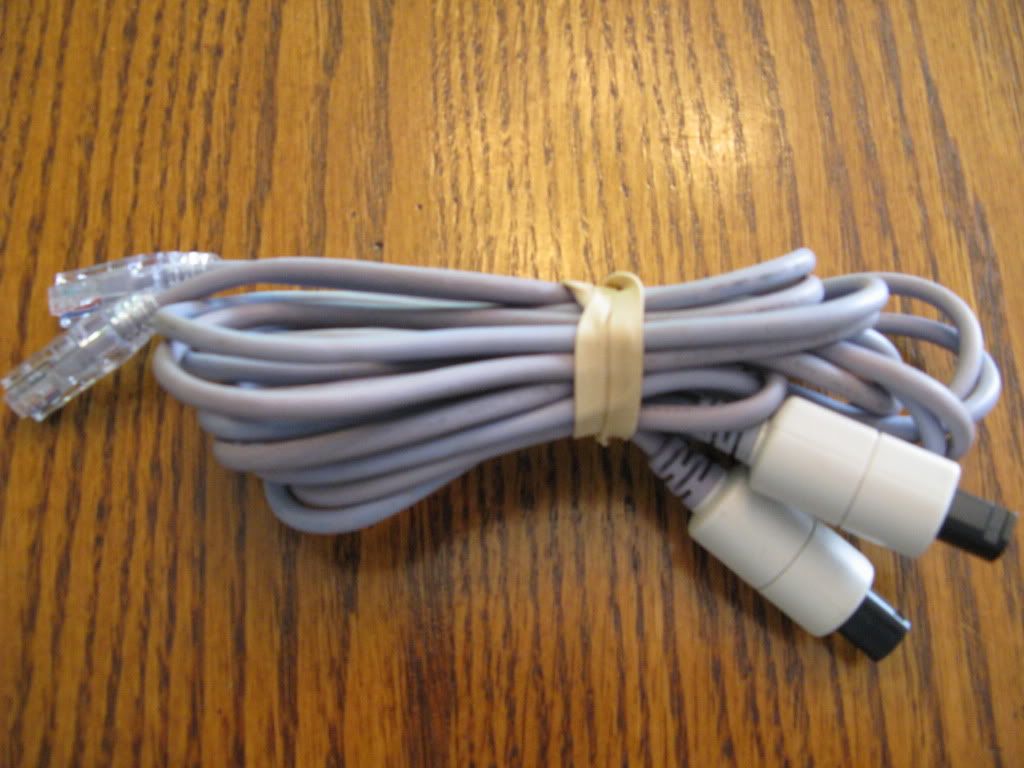
This is one of those controller cable CAT 6 connectors, going into the R45 jack (installs like any ethernet or phone cable). The R45 Jack is permanently wired to the stick PCB, so it's literally just unplug the cable your done with (dreamcast), plug in the Saturn cables, then switch your TV signal from input 1 to input 2, and now your playing Saturn on the same setup.

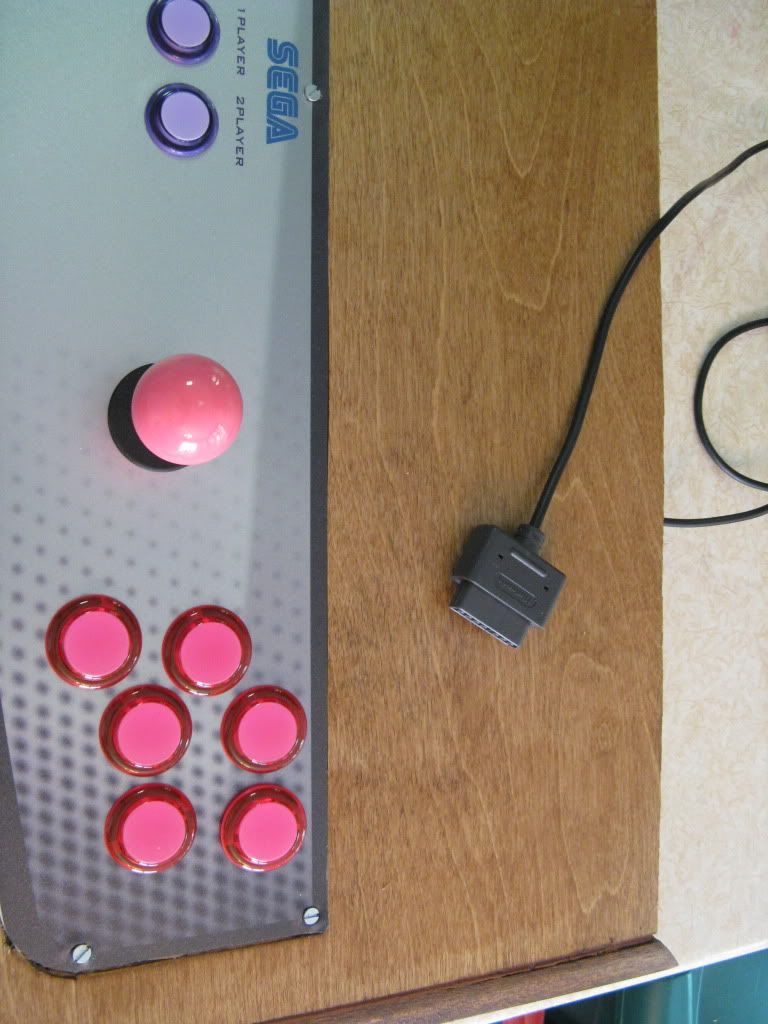
And this is what it would look like if I were using it "outside" the cab. SNES cable comes out the back, like any typical arcade stick and just plug the input into your console. On the cab, the cables actually exit the stick and enter the cab housing through unseen access holes, so it is a "wire-free" appearance.
Here is the connectors and cables:
So this is just a Dreamcast cable from a stock controller. The end was cut off the controller and those wires are installed into the CAT 6 connector. I have cables like this for all my consoles.
This is one of those controller cable CAT 6 connectors, going into the R45 jack (installs like any ethernet or phone cable). The R45 Jack is permanently wired to the stick PCB, so it's literally just unplug the cable your done with (dreamcast), plug in the Saturn cables, then switch your TV signal from input 1 to input 2, and now your playing Saturn on the same setup.
And this is what it would look like if I were using it "outside" the cab. SNES cable comes out the back, like any typical arcade stick and just plug the input into your console. On the cab, the cables actually exit the stick and enter the cab housing through unseen access holes, so it is a "wire-free" appearance.

Re: mjmjr25's Custom Arcade Cabinet...(almost done...)
mjmjr25 wrote:PCB's are McC's. Connection is via ethernet Cat 6 cable leading to a R-45 jack. Sticks are compatible with all of my consoles except PS3 and N64. I currently have cables for SNES, NES, SAT, DC, GCN, PS1 and 2.
Here is the connectors and cables:
So this is just a Dreamcast cable from a stock controller. The end was cut off the controller and those wires are installed into the CAT 6 connector. I have cables like this for all my consoles.
The R45 Jack is permanently wired to the stick PCB, so it's literally just unplug the cable your done with (dreamcast), plug in the Saturn cables, then switch your TV signal from input 1 to input 2, and now your playing Saturn on the same setup.
You might have missed my earlier question, the TWINSTICK mod? Easy with a couple of toggle switches.
Some more clarity on the PCB? How does it detect the cables and send the correct signals for each console?
EDIT
Nevermind, I found it. Okay this is slick, great idea with the connector and individual controller cables! Maybe mount the jacks inside the wood housing?
http://www.focusattack.com/toodles-cthulhu-multi-console-pcb/
Designed by notable FGC veteran Toodles, the versatile PCB can handle a wide variety of modern and legacy consoles including:
PS3
PS2
PSX
PC
Gamecube
Wii through Gamecube controller support (Includes Smash Bros. Mode)
Xbox1 (Not 360)
Dreamcast
Sega Saturn
TurboGrafx-16/PC-Engine
NES/Famicom
SNES/Super Famicom

CRT vs LCD - Hardware Mods - HDAdvance - Custom Controllers - Game Storage - Wii Gamecube and other Guides:
CRTGAMER Guides in Board Guides Index: http://www.racketboy.com/forum/viewtopic.php?p=1109425#p1109425
-
mjmjr25
Re: mjmjr25's Custom Arcade Cabinet...(almost done...)
^yes, that's the one. Amazing little piece. Takes (2) per stick, but well worth it.
Twinstick mod, eh, I have a set of SAT and DC sticks for Virtual On, and never play them as it is.
Twinstick mod, eh, I have a set of SAT and DC sticks for Virtual On, and never play them as it is.
-
Hobie-wan

- Next-Gen
- Posts: 21707
- Joined: Sat Aug 15, 2009 8:28 pm
- Location: Under a pile of retro stuff in H-town
- Contact:
Re: mjmjr25's Custom Arcade Cabinet...(almost done...)
Looking great sir. Just need to sort out the screws, but you already noted that. Some black hex drive countersunk or round head ones would probably work. Blend in with the graphics a the hex would then not give you distracting flat slot lines at crazy angles.
I've never met a pun I didn't like. - Stark
My trade, sale and services - Rough want list - Shipping weight reference chart - AC Power Adapter reference list
My trade, sale and services - Rough want list - Shipping weight reference chart - AC Power Adapter reference list
Re: mjmjr25's Custom Arcade Cabinet...(almost done...)
ROBOTRON - Your Ball Top Arcade sticks would be perfect for it. The mod with a pair of multi pole Toggle Switches will keep Two Player compatibility as well.mjmjr25 wrote:^yes, that's the one. Amazing little piece. Takes (2) per stick, but well worth it.
Twinstick mod, eh, I have a set of SAT and DC sticks for Virtual On, and never play them as it is.
I got all these Console games to work, just imagine all the Mame versions.
ASSAULT Namco Museum 4 (PS1 and PSX Flight Stick)
BATTLEZONE Atari Anniversary (PS1, Dreamcast)
BATTLEZONE Atari Anthology (PS2, XBox)
BLACK WIDOW Atari Anniversary (PS1, Dreamcast)
BLACK WIDOW Atari Anthology (PS2, XBox)
CROSS FIRE Sierra (Dreamcast Vice Commodore Emu)
CROSS FIRE Sierra (Dreamcast Atari 800 Emu)
CRAZY CLIMBER 2000 (PS1)
CYBER SLED (PS1)
ROBOTRON Atarisoft (Dreamcast Atari 800 Emu)
ROBOTRON Williams Arcade Classics (PS1, Dreamcast)
ROBOTRON Midway Arcade Treasures (PS2, Gamecube, XBox)
ROBOTRON X (PS1)
SMASH TV Arcade Party Pack (PS1)
SMASH TV Midway Arcade Treasures (PS2, Gamecube, XBox)
SPLAT Midway Arcade Treasures (PS2, Gamecube, Xbox)
TOTAL CARNAGE Midway Arcade Treasures 2 (PS2, Gamecube, XBox)
VIRTUA ON Sega Ages (PS2)
VIRTUA ON MARZ (PS2)
PS1 Williams Arcade Classics are special and DO NOT NEED THE MOD! Just a simple configuration in the Game Menu that sets the Second Player stick to the Player One Four Primary Face buttons.
Sometimes I overtighten screws to get slots aligned in various projects. I snapped a head off once, should have used Phillips or Allens which at least have four or five corners to pick from.Hobie-wan wrote:Looking great sir. Just need to sort out the screws, but you already noted that. Some black hex drive countersunk or round head ones would probably work. Blend in with the graphics a the hex would then not give you distracting flat slot lines at crazy angles.
Last edited by CRTGAMER on Mon Jun 18, 2012 9:34 am, edited 1 time in total.
CRT vs LCD - Hardware Mods - HDAdvance - Custom Controllers - Game Storage - Wii Gamecube and other Guides:
CRTGAMER Guides in Board Guides Index: http://www.racketboy.com/forum/viewtopic.php?p=1109425#p1109425
-
mjmjr25
Re: mjmjr25's Custom Arcade Cabinet...(almost done...)
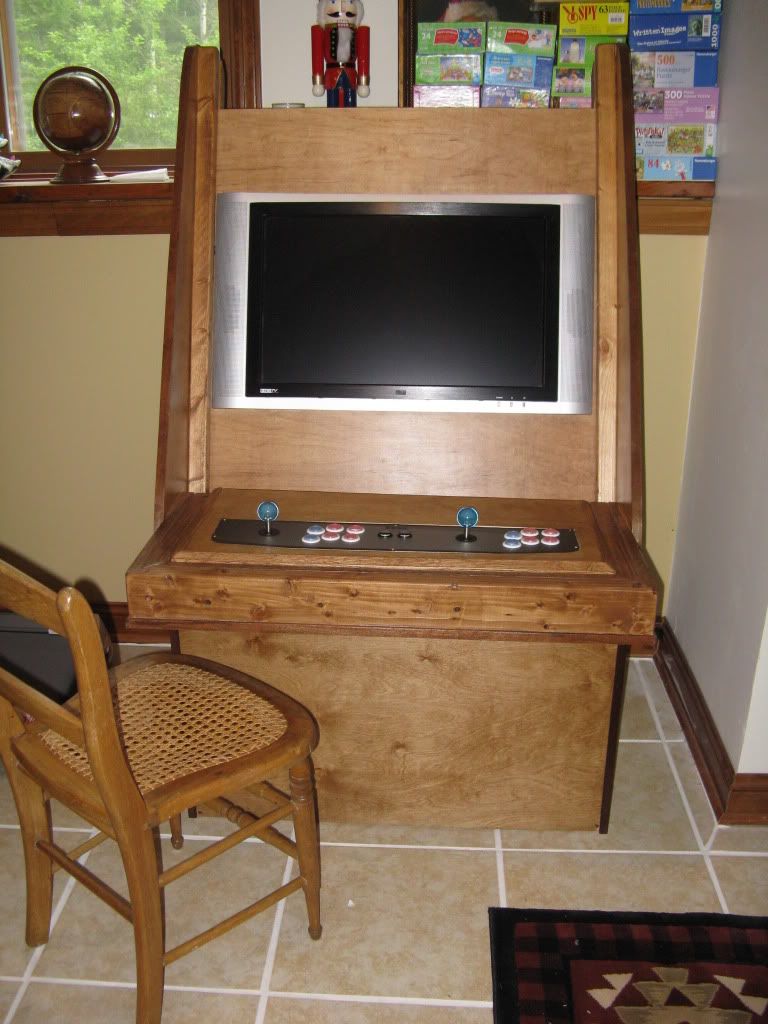
And.........done.
Updated OP w/some more pics:
Updated OP w/some more pics:
-
Hobie-wan
- Next-Gen
- Posts: 21707
- Joined: Sat Aug 15, 2009 8:28 pm
- Location: Under a pile of retro stuff in H-town
- Contact:
Re: mjmjr25's Custom Arcade Cabinet...(almost done...)
Woo, and matched the house decor. 
I've never met a pun I didn't like. - Stark
My trade, sale and services - Rough want list - Shipping weight reference chart - AC Power Adapter reference list
My trade, sale and services - Rough want list - Shipping weight reference chart - AC Power Adapter reference list
-
mjmjr25
Re: mjmjr25's Custom Arcade Cabinet...(almost done...)
Yes, we used the same stain as on the trim in the downstairs family room. Next step...a CAVE poster where those puzzles are 