Burning BIN/CUE and ISO/MP3 Images with Nero
I’ve whipped up a handy tutorial for those of you that are new to burning ISO files for classic console games.
 For this tutorial I am using Nero Burning ROM version 6. Version 5 should work as well.
I am also using the latest free version of WinRAR to extract my game files.
I have included some simple steps and have included screenshots for clarification.
So here we go…
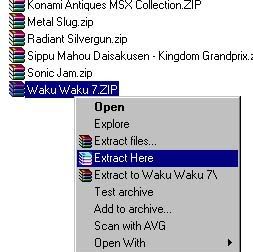
- In Windows Explorers, open the folder on your hard drive that contains your compressed game files.
- Click on the game you wish to burn to select the RAR file.
- Right-click that file and select the “Extract Here” option on the menu. (Screenshot)
- You will now see a box pop up that shows WinRAR’s progress in extracting your game files. (Screenshot)
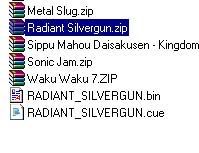
- After WinRAR has finished extracting your game files, you will find a number of files added to the directory you are viewing.
If you have one BIN and one CUE file, that means you have a BIN/CUE image (obviously) (Screenshot)
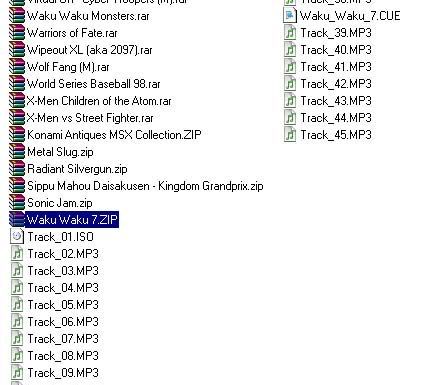
If you have and ISO file, one or more MP3 files, and hopefully one CUE file, you have an ISO/MP3 image. (Screenshot)
If you don’t have a CUE file, you will need to make one, but I will have to leave that explaination for another tutorial - Once you have your files extracted, you need to start up Nero Burning ROM.
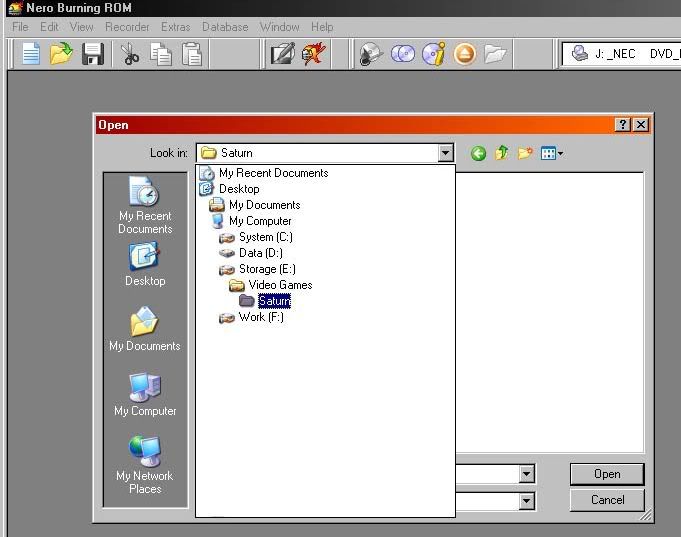
- Once you are in the program, go to the “File” menu and select “Open” (Screenshot)
- In the newly opened “Open” box, you will need to browse for the folder that contains your game files. (Screenshot)
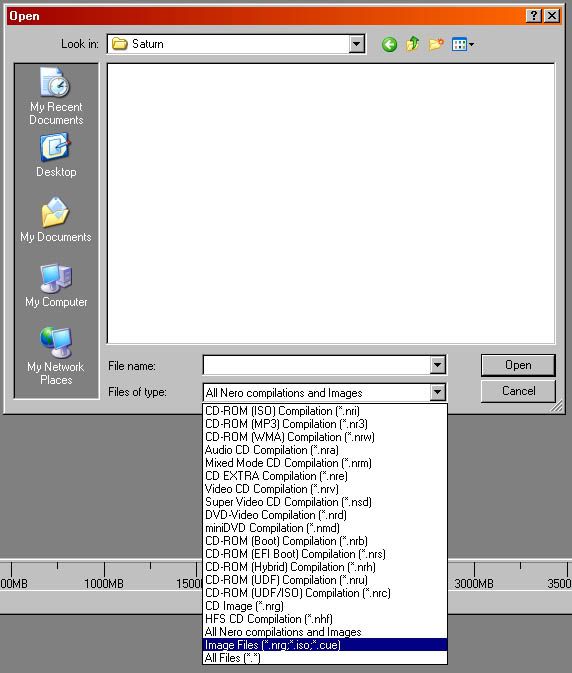
- Once you have reached your folder, you need to click on the drop-down box called “Files of Type” and select “Image Files (*.nrg, *.iso, *.cue)”. (Screenshot)
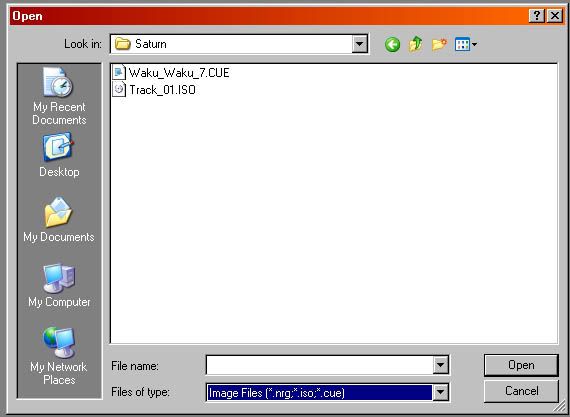
- Now that you have selected “Image Files”, you should now see a CUE file show up in the “Open” box. Double click this CUE file. (Screenshot)
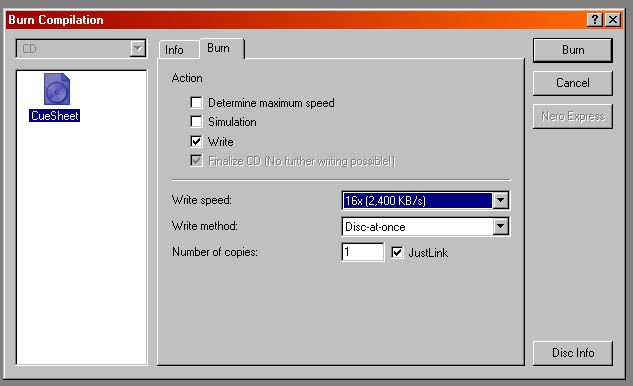
- This will bring up the “Burn Compilation” box. (Screenshot) Make sure you select your desired speed (for older consoles, I suggest staying under 8X) and the desired number of copies. Once you are content with those option, just click the “Burn” button. Then wait several minutes for the disc to burn and you’re done. That’s it!
If you would like to purchase a copy of Nero and would like to help my site out at the same time, check out the Amazon.com link below.
Affiliate programs and affiliations include, but are not limited to, the eBay Partner Network or Amazon Associates.
this tutorial is magic! thanks racketboy!
oh and im using nero version 5 but this still works 😀
glad to hear it!
And thanks for the Nero 5 note!
like GAMESOULjA said
this tutorial is magic!
and i have one Question
i have ISO/MP3 image without the CUE file how can i make one
thanx in advance
first ul need to convert each mp3 to wav, then (with iso and wavs in same folder) load the iso into daemon tools then do a disc to disc copy. :>)
Nah… actually you just need Sega CUE Maker — no more converting to WAV
What about neo geo iso whitout a cue file can i use Sega CUE Maker too…?
it wont let me go under 8x….. whats going on?
Not every drive supports every speed — just select the lowest you can.