I've had this idea for awhile, so decided over the past couple weekends to build a proto-type "cabinet" for an arcade feel in my home. I took about 50 pics at different points and will go through step by step if there is any interest in that. It had to support multiple types of sticks, which is where the "inlay" idea came from, plus it would allow some additional customizing if i'm playing DC or SAT, etc.
Since it was a prototype, I wasn't in perfectionist mode per se. My only real regret in that regard was the paint choices, not colors, but types. I used high gloss everything except the DC inlay, which I used a matte finish, just to see how i'd like the differences. In the future, all inlays will be matte finish, it doesn't look as sharp, but the high glass is going to be much more likely to chip and it also has a bit of a sticky feel to in the humidity. It is easy to wipe down, which is nice, and it looks sharp, but from a performance standpoint, I think i'll like a matte paint better.
The main focus was to have the arcade feel of course, but don't have room for a cabinet in the house (I do in the garage however). So, to do this, I built what you see below. I built it big as I can always shorten the height/width if it feels too big.
Step x Step instructions at the bottom of the last picture:
Time - 20 hours (alot of this was in the 3 inlays i've done, about 4 hours apiece)
Cost - $105 (paint was expensive and I have a ton left)
Size - 40"H x 38"W x 22"Deep
Weight - 62 lbs
So, as stated, I have 50+ pics, but will just show about 7-8 for now at various stages:
The "Cab"
2nd coat of red, some trim - including the "inlay" support trim
1st Inlay
Decal Work
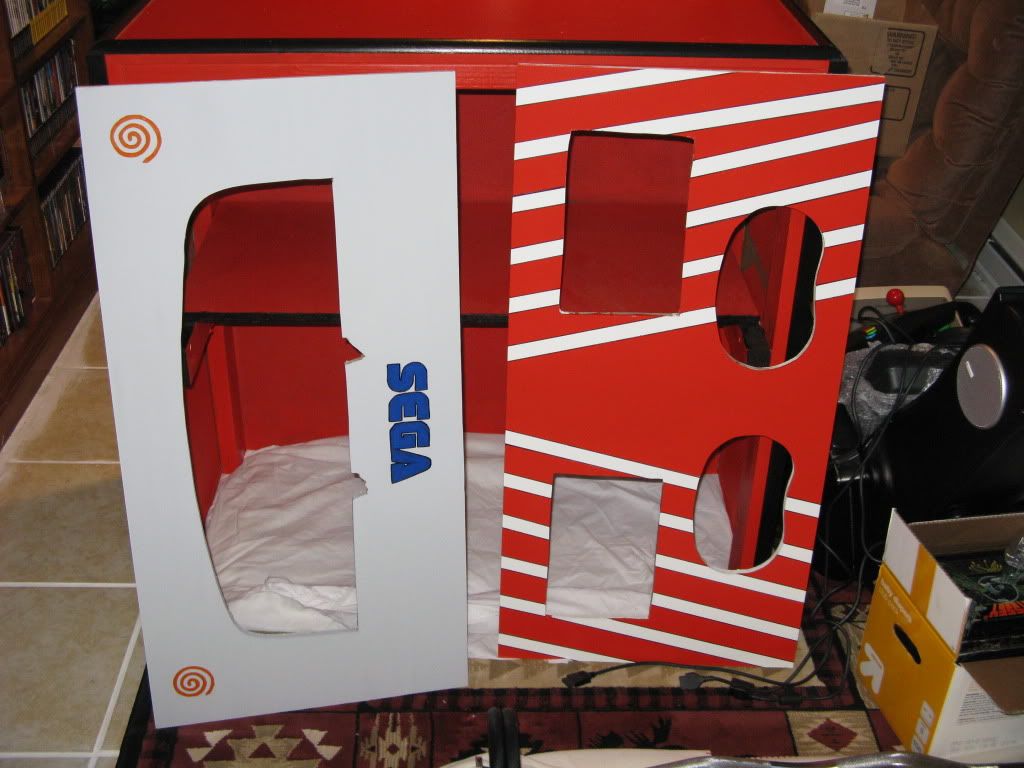
Neo Inlay Detail
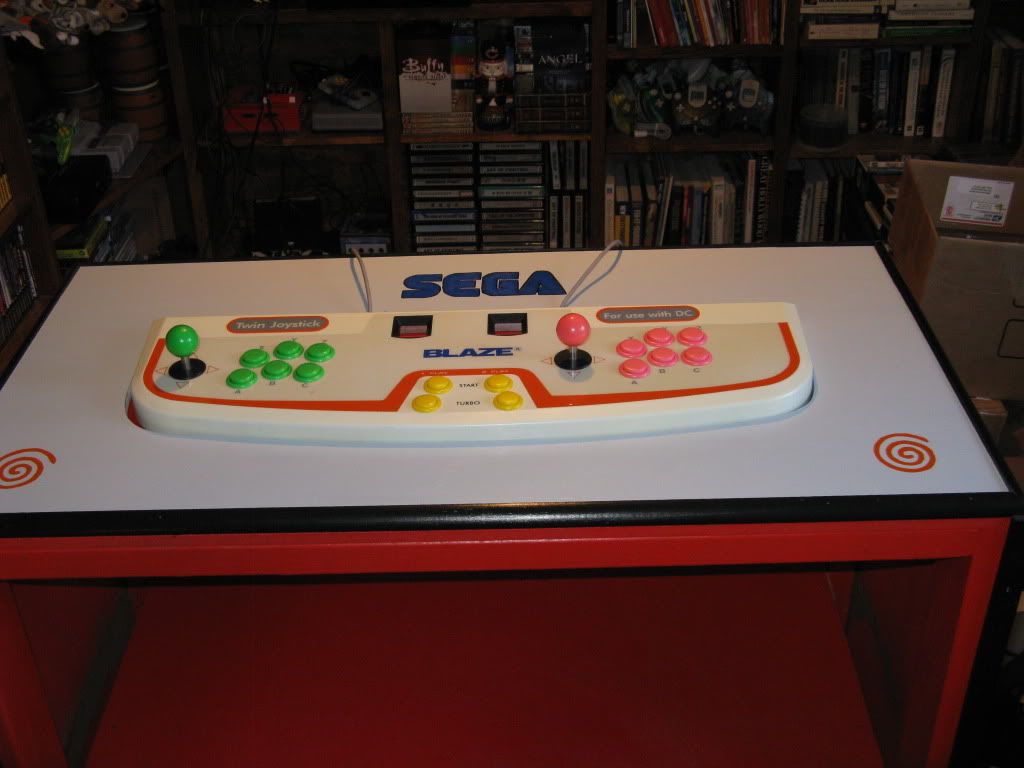
Controller stand in the house, 2 of my inlays
Blaze Twinstick
Neo Geo inlay, arcade sticks for bigger hands, and can reverse for my kids (bean controllers)
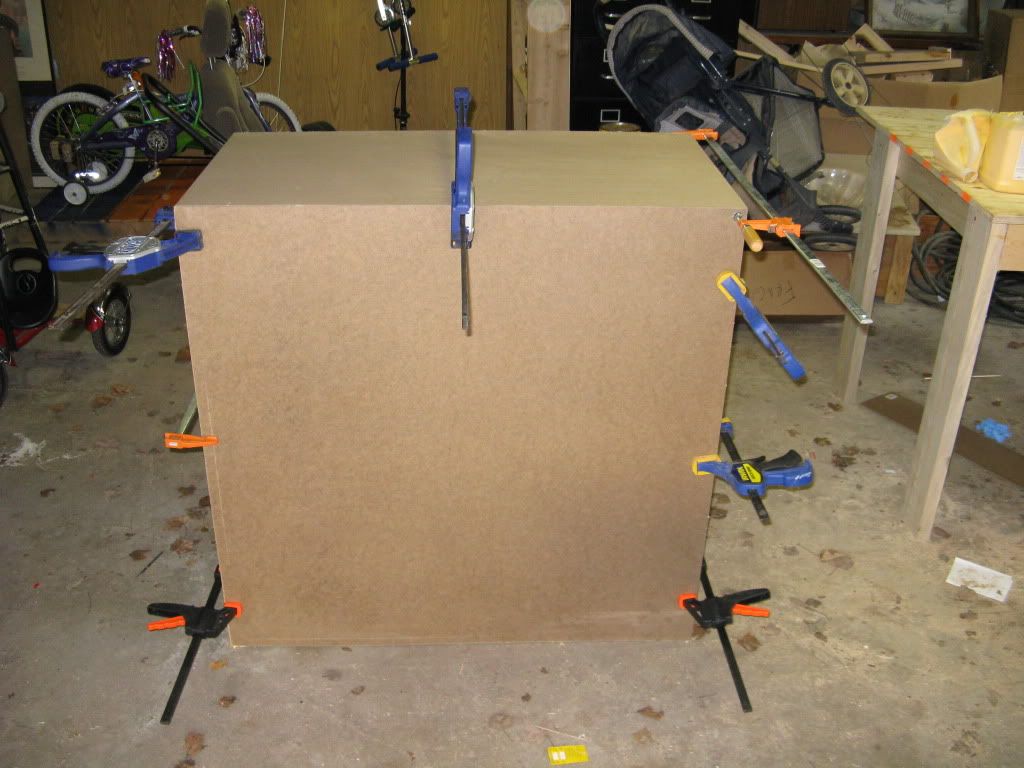
Step 1 - Build a Frame. The thought here was that it needed to be strong enough to support to bigger people putting a lot of tension/weight/vigor into it - yet be light enough to be "portable". So, less wood, stronger joints, and a wide base.
I used 2x4 const. lumber, 4 legs, 4 side rails, 2 brace rails (which also support a shelf underneath).
The legs and the upper side rails were put together with alternating pocket hole joints, using a kreg jig and 2.5" screws. Also each joint had wood glue, main frame together, clamped and dried over night.
Next was the brace rails - again, just 2x4 lumber and joined to the frame, one on the left, one on the right.
Step 2 - Then I applied a top. The top was cut from a 3/4"x2'x4 sheet of MDF (easy to work, takes paint well). Laid across the top of the frame, glued down and fastened w/2" staples (all staples will be covered w/trim later on, so worth it for the stronger fastener).
Step 3 - (3) sides needed to be applied. I wanted strenght, easy to cut, and most importantly light. I used 1/4" hardboard, and simply cut 4x8 panels to the proper specs. Very very light, very strong, very easy to cut w/circular, worm, or jig saw (or table saw preferred).
Step 4 - Middle shelf, determined where I wanted a shelf (about half way up), cut a 3/4" piece of plywood to fit, and glued/screwed into place. Had to use some thicker wood here since it was a wide shelf, 3/4" ply was plenty strong. Again, glued and fastened w/screws (I regret not having painted the inside first, I painted the inside AFTER applying this shelf, and made more work for me).
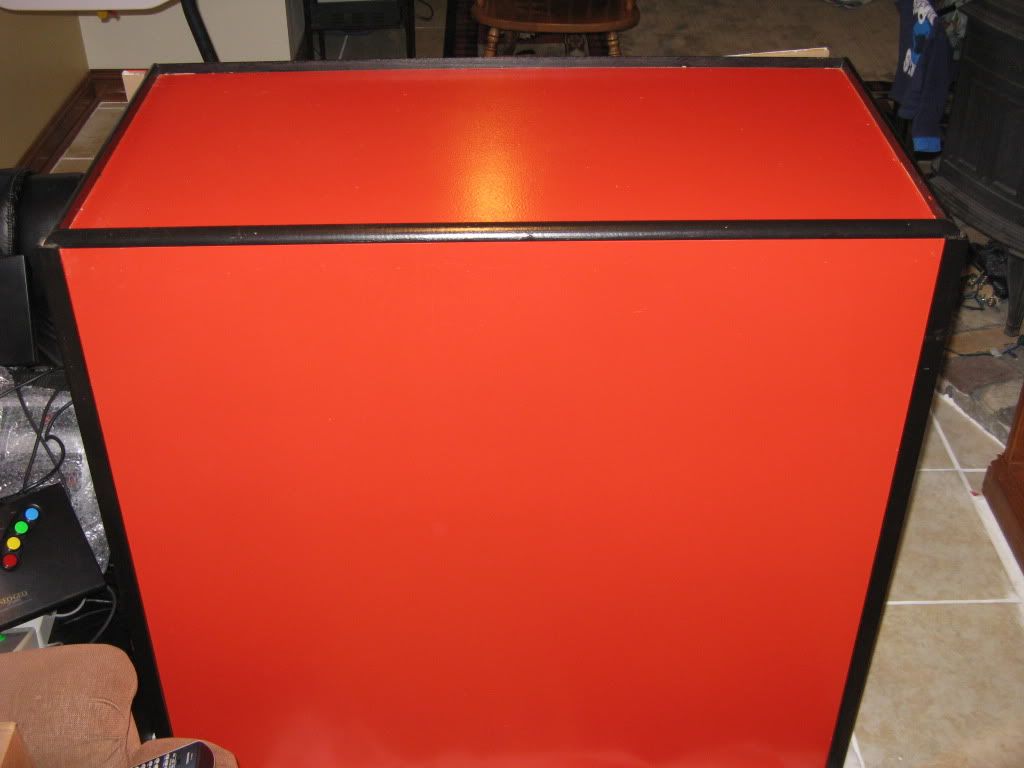
Step 5 - Paint all sides neo red (which is "grenadine" from home depot). I chose high gloss for the sheen and ability to resist staining. However I wish i'd went semi-gloss or matte as it does have a sticky feeling on humid days. The only part you really touch are the inlays though, so i'm just using a matte paint on all future inlays. I applied 3 paints of paint which was plenty, the hardboard and mdf all take paint well. Depending on your hardboard, a quick sanding of the surface will remove the factory overgloss coat.
Step 6a - Cut trim for the sides and the inlay support system. For the sides, I used 2" outer round (which is actually 3/4" on both sides, or 1.5" of coverage). This served a number of purposes, first off all, the black sets off the red, but it also covers your seems where the sides meet, and lastly, acts as one more support for the entire frame. I painted Jet Black (high gloss) prior to applying. I then used lots of glue and 1" fine trim nails.
Step 6b - Inlay trim. 3/4" shoe moulding, painted black. Corners mitered, then all sides glued into place. Very important to cut the miters so that when you apply the trim to the top MDF panel, to set it up so that the Flat Edges of the shoe are facing in toward each other (these flat edges meet up against the flat edges of the inlays).
Again, glued and fastened w/1.25" trim nails (sunk 1/4" into the shoe mould, then "holes" back-filled w/paint). Allow to dry at least 24 hours before test fitting your inlays.
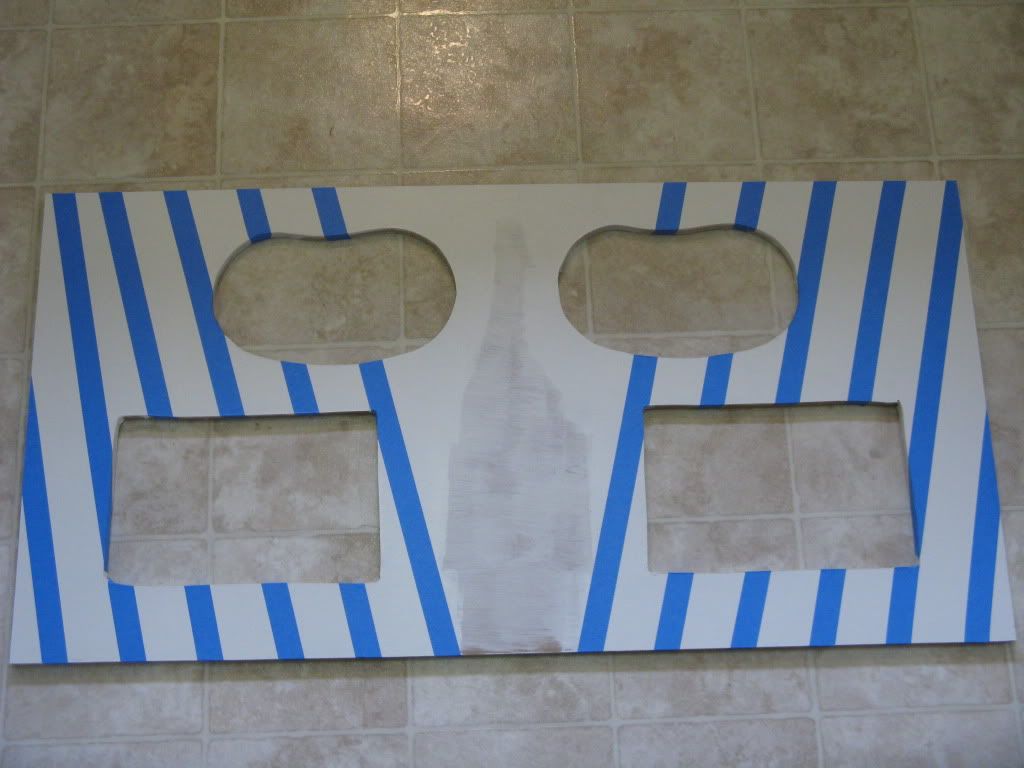
Step 7 - Inlay panels. Again, I used MDF - very easy to work and takes paint well. To cut these, simply measure the inside edges of the shoe mold. It is important to be very exact here, less than 1/16" and the inlay will be loose. I pre-cut 10 inlays, as it's easier to do all at once, even though I don't have 10 diff. arcade sticks that I would want to use at this point. After cutting each one, test to fit (best to cut big and trim off, than to cut short and have a useless board).
Step 8 - Select sticks you wish to use on the stand. Lay them out on a panel, outline w/pencil and cut. To cut, drill a hole near an edge, place your jig saw or hand saw (a dovetail saw works very well on MDF as well and gives you much better control). Cut out and test fit your stick. You want to be a little big (but not too big here) to allow for expansion and so your stick isn't "stuck", just a good fit. I plan on applying some black rubber grips (like the stuff on the edge of your crock pot lid or wiper blades). These create a very snug fit, but not risk of it being "tight" to the point of damaging your casing of the stick.
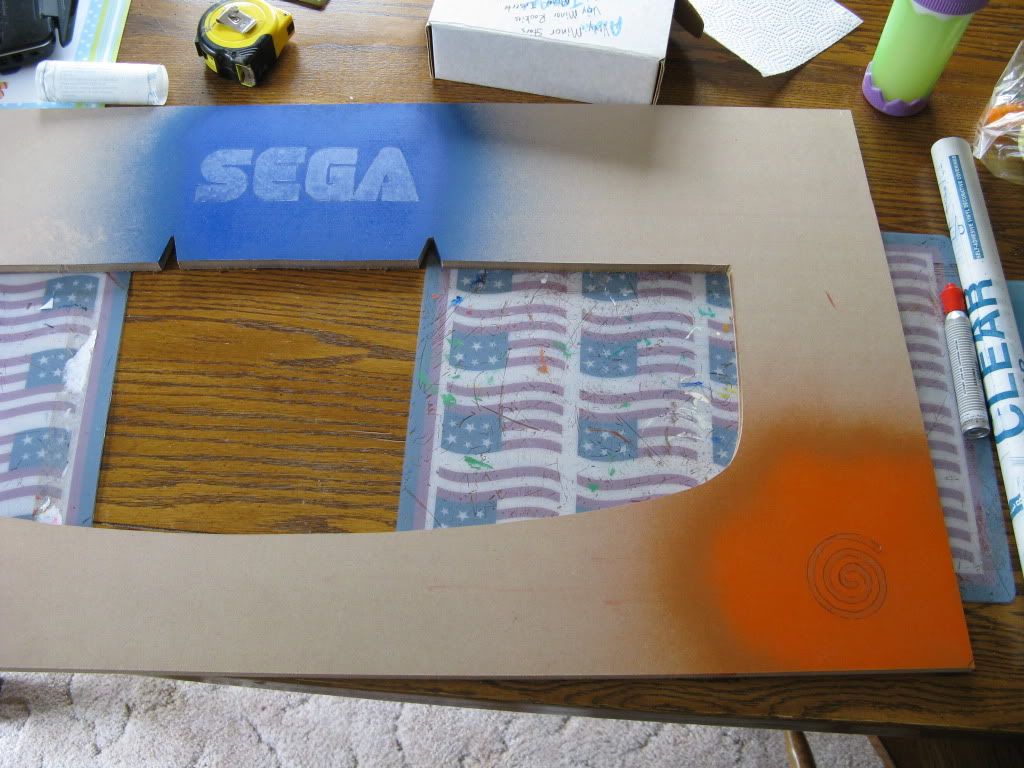
Step 9 - Design your inlay. As this was a prototype, I used 3 different techniques. The first was the blaze stick. I painted the colors of my decals first, then applied a clear sticker (hand cut to match the logo I wanted) and applied that. Then painted the entire inlay. Allow to dry, remove the clear sticker, and the logo appears.
Another technique was to stencil (or handpaint) a logo after a base coat.
A third technique is more expensive, but looks great, vinyl logos. The vinyl logos out today are quite good and shouldn't peel up, however if this is a fear, a coat of polyurethane over the paint/vinyl decal would act to seal it permanently (lot of work and not recommended, however if you do this, be sure to use the same base poly as you used on your paint).
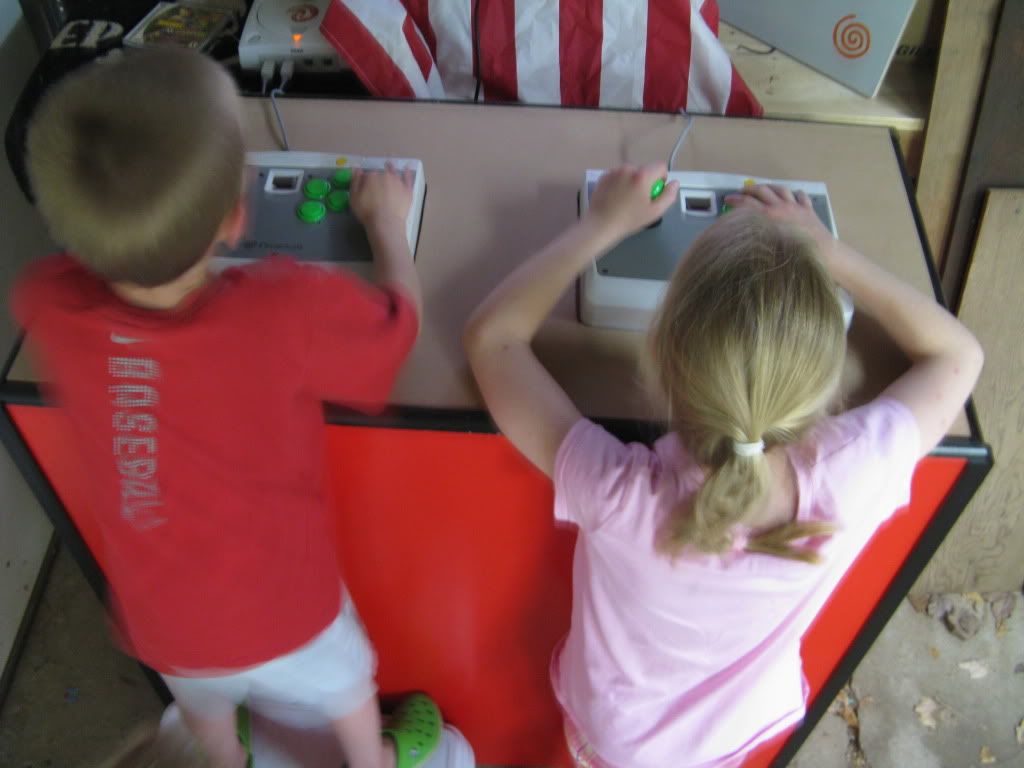
Step 10 - Bring it in the house and starting shooting stuff up!


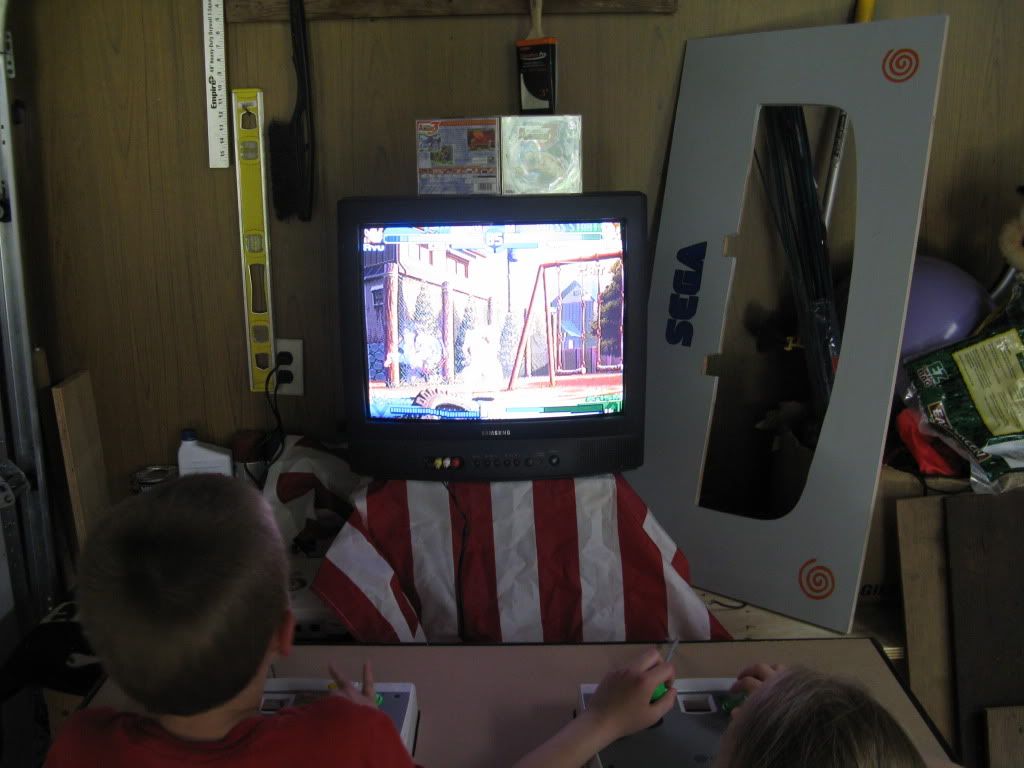
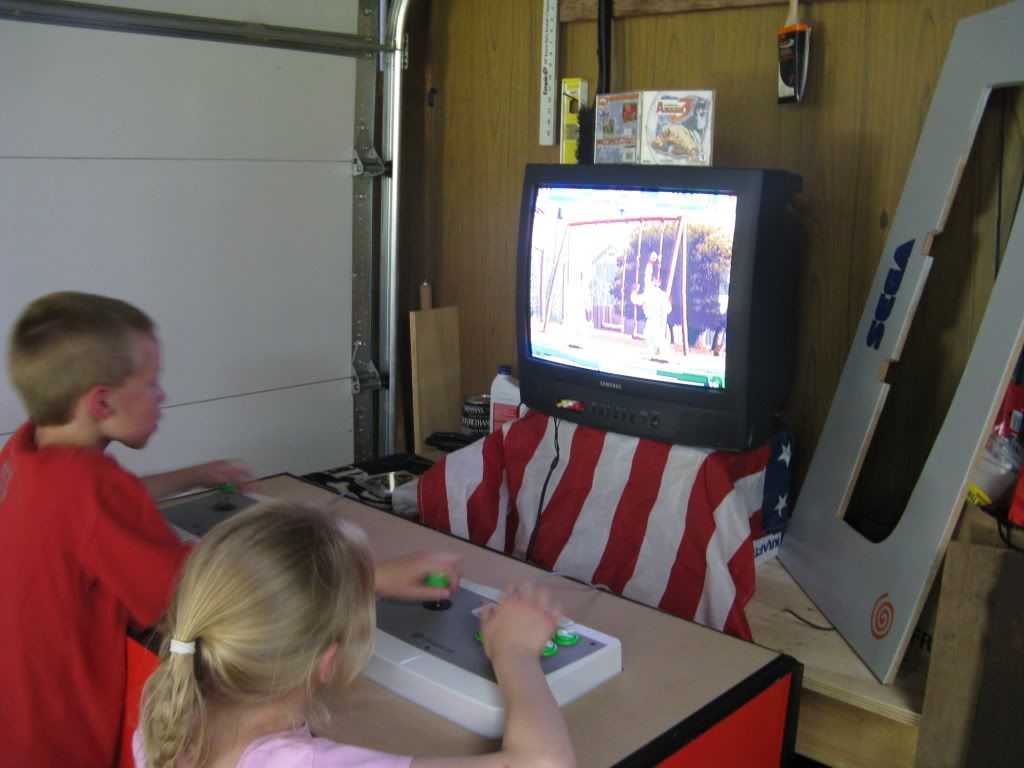
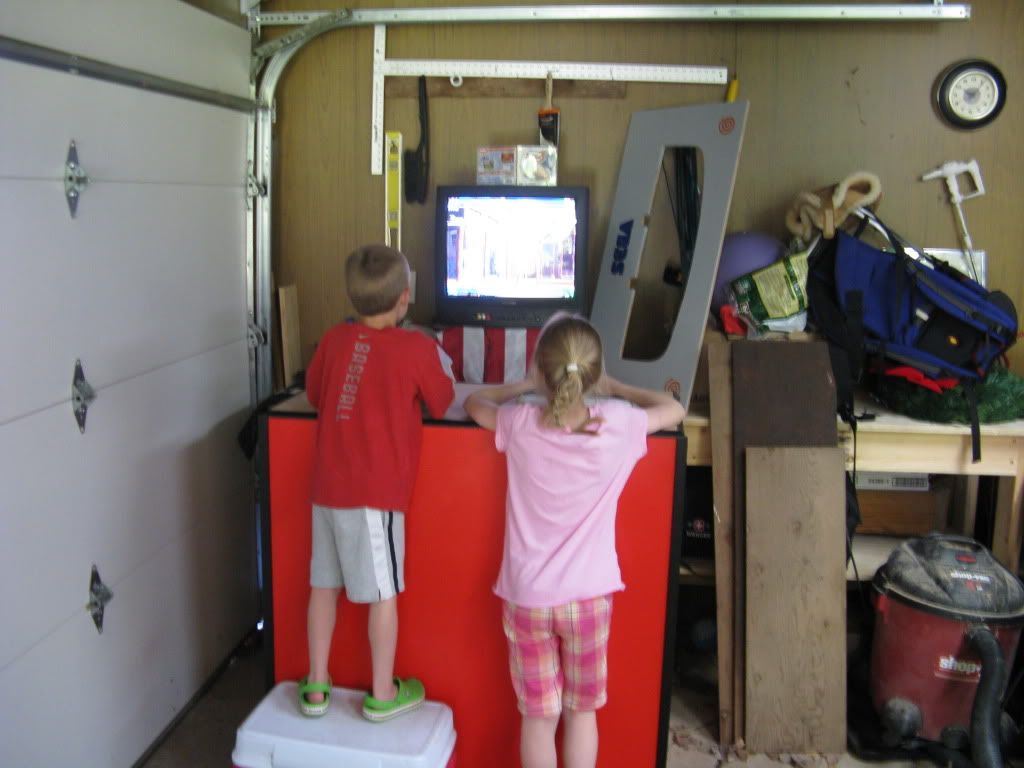
Update 6/9/12. After I acquire my cabs, I really didn't have room for this in the house - so moved it to the garage - where it has sat until today.
I was working in the garage and the kids were with me - but it was "too hot" to play outside, so they were in the garage w/me where it is cooler. However, it made it difficult to get much done, project-wise.
Thus, I brought out a DC and a couple sticks, plugged 'em in to a spare TV (already in the garage), and off they went:
Not sure if this is where i'll keep it permanently, but when I find the best spot, i'll put up some posters and get all the tools, etc, out of the way.
This is a pre-cut inlay I had already made for the Agetec sticks - I haven't painted this one yet.