Downing's SNES-001 Advance II

Discuss all hardware and software modifications
Downing
24-bit
Posts: 138
Joined: Mon Dec 06, 2010 8:34 pm
Location: Capital City, NH
Contact:

Downing's SNES-001 Advance II

Post by Downing »

The SNES-001 Advance II is Complete!

http://www.youtube.com/watch?v=H1lagu9nXKY

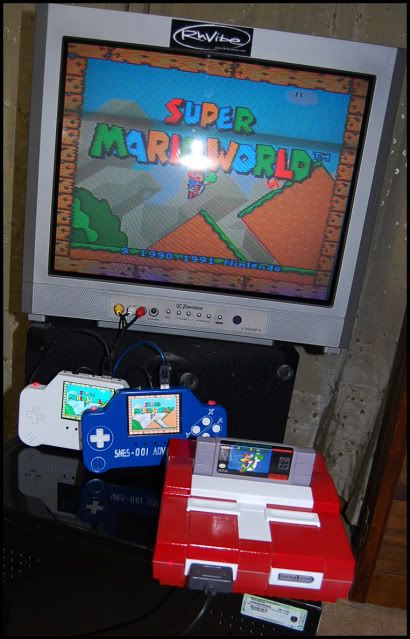
And it's done! After nearly 4 months of off and on work and endless hours effort due to new learning curves and experimentation, the second rendition of the SNES-001 Advance is complete!

Image

Image

Image

Image

Image

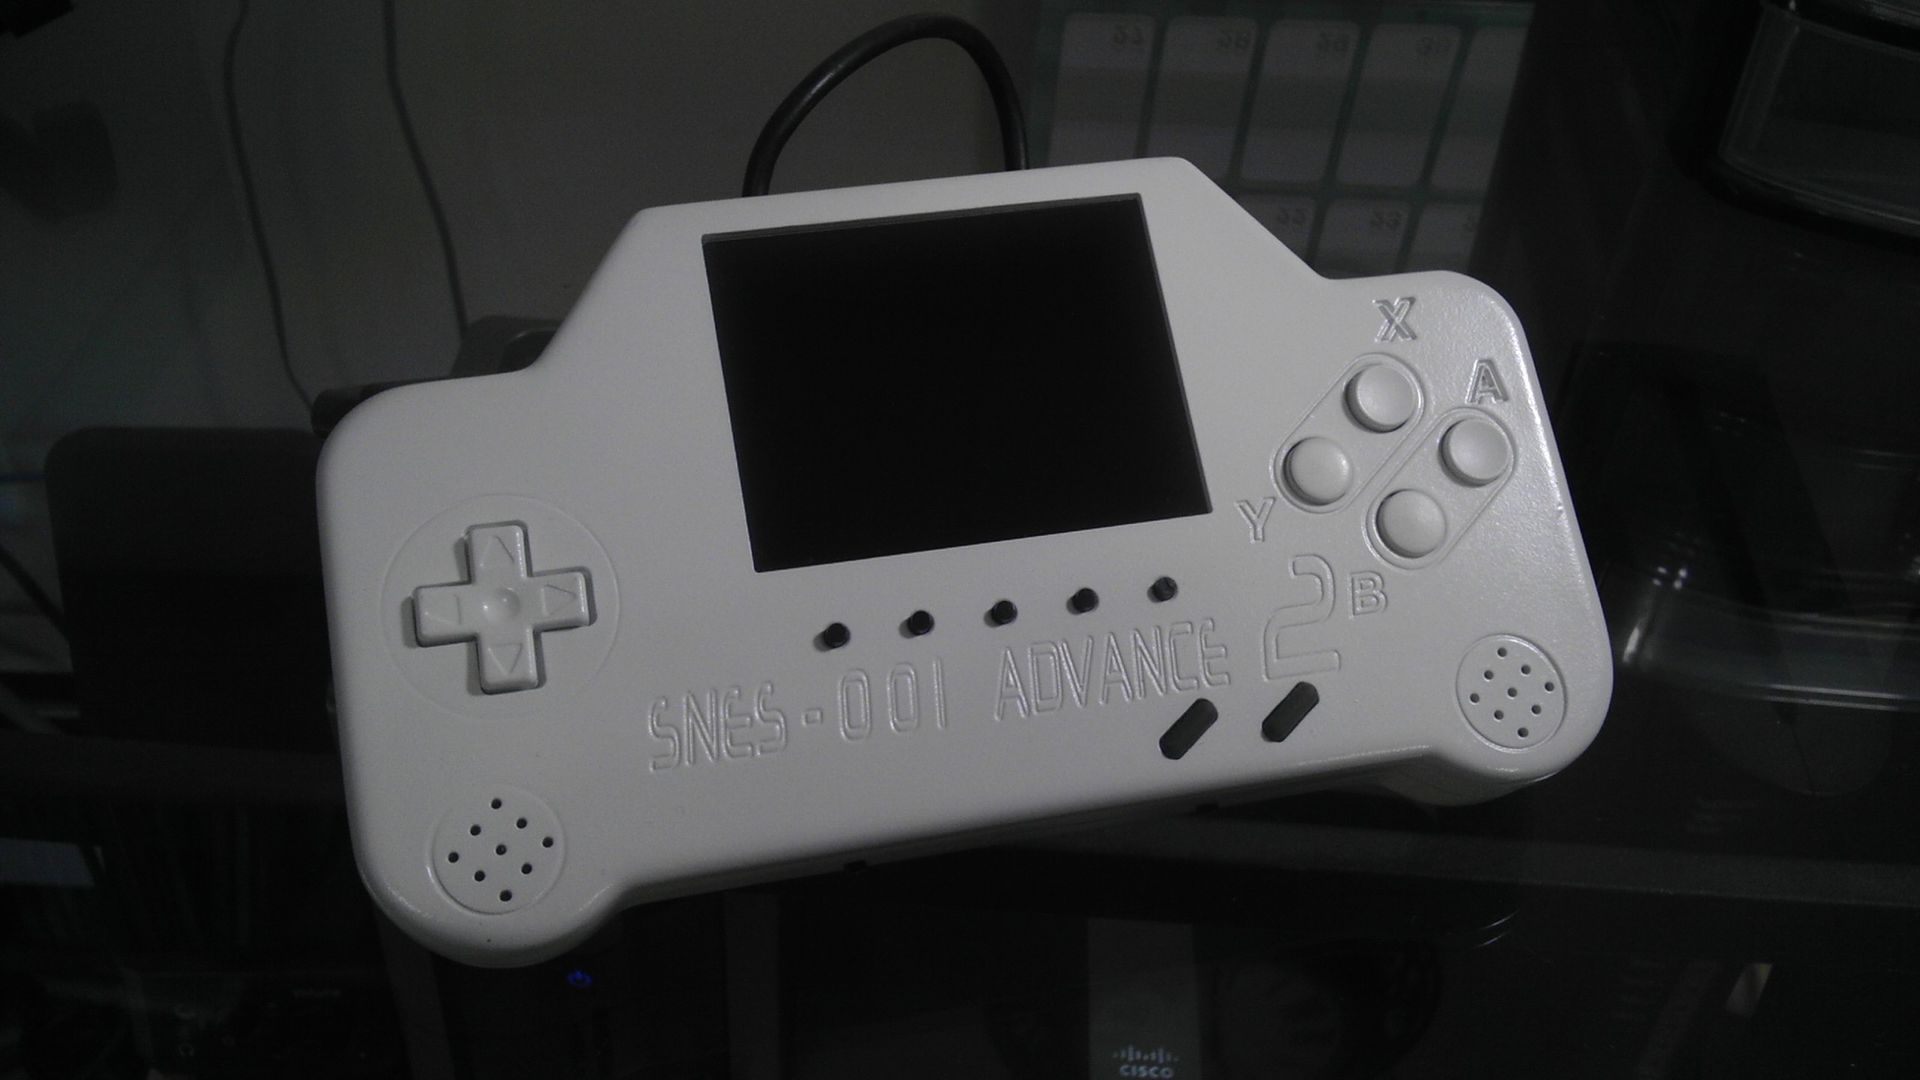
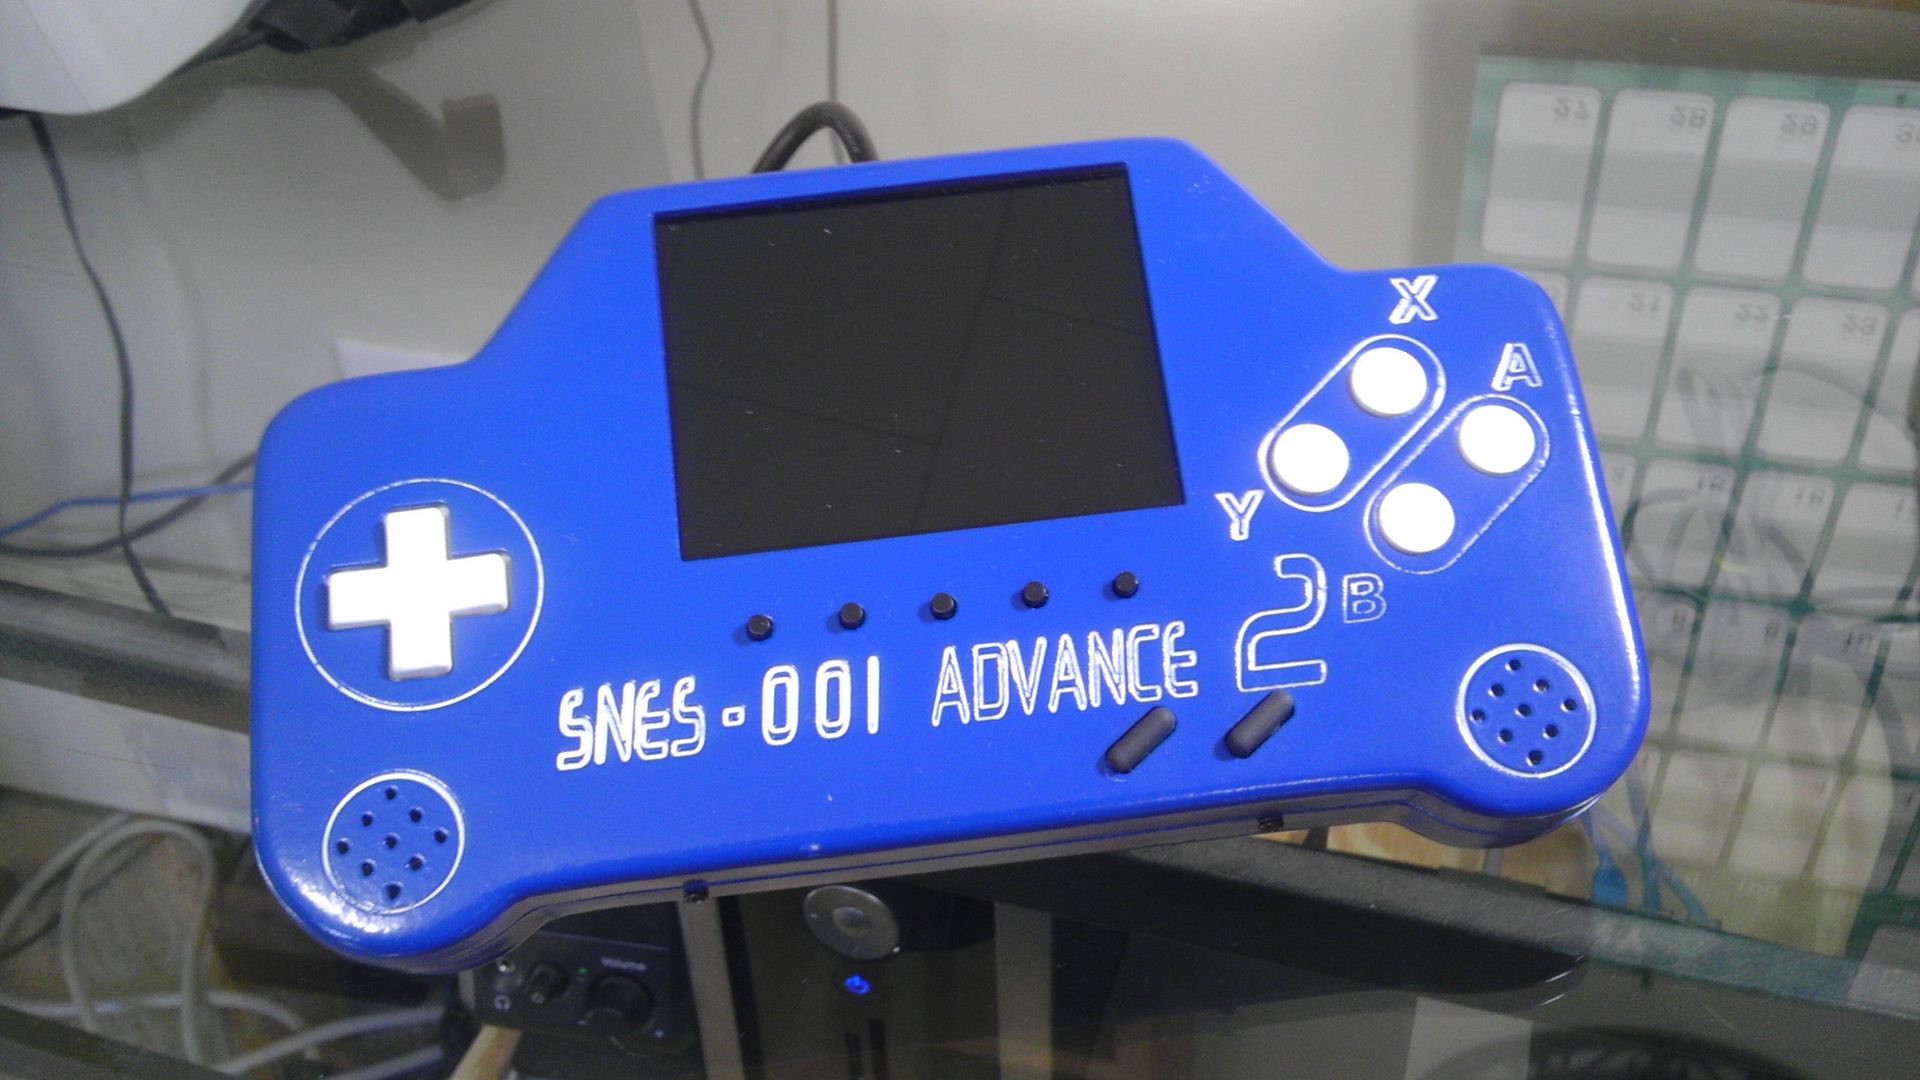
As the work log has shown, this system was produced while utilizing my new tools I have in my new shop. The small tabletop CNC router that I got back in September has been a pivotal addition to my creations and has allowed me to take these projects to new heights.

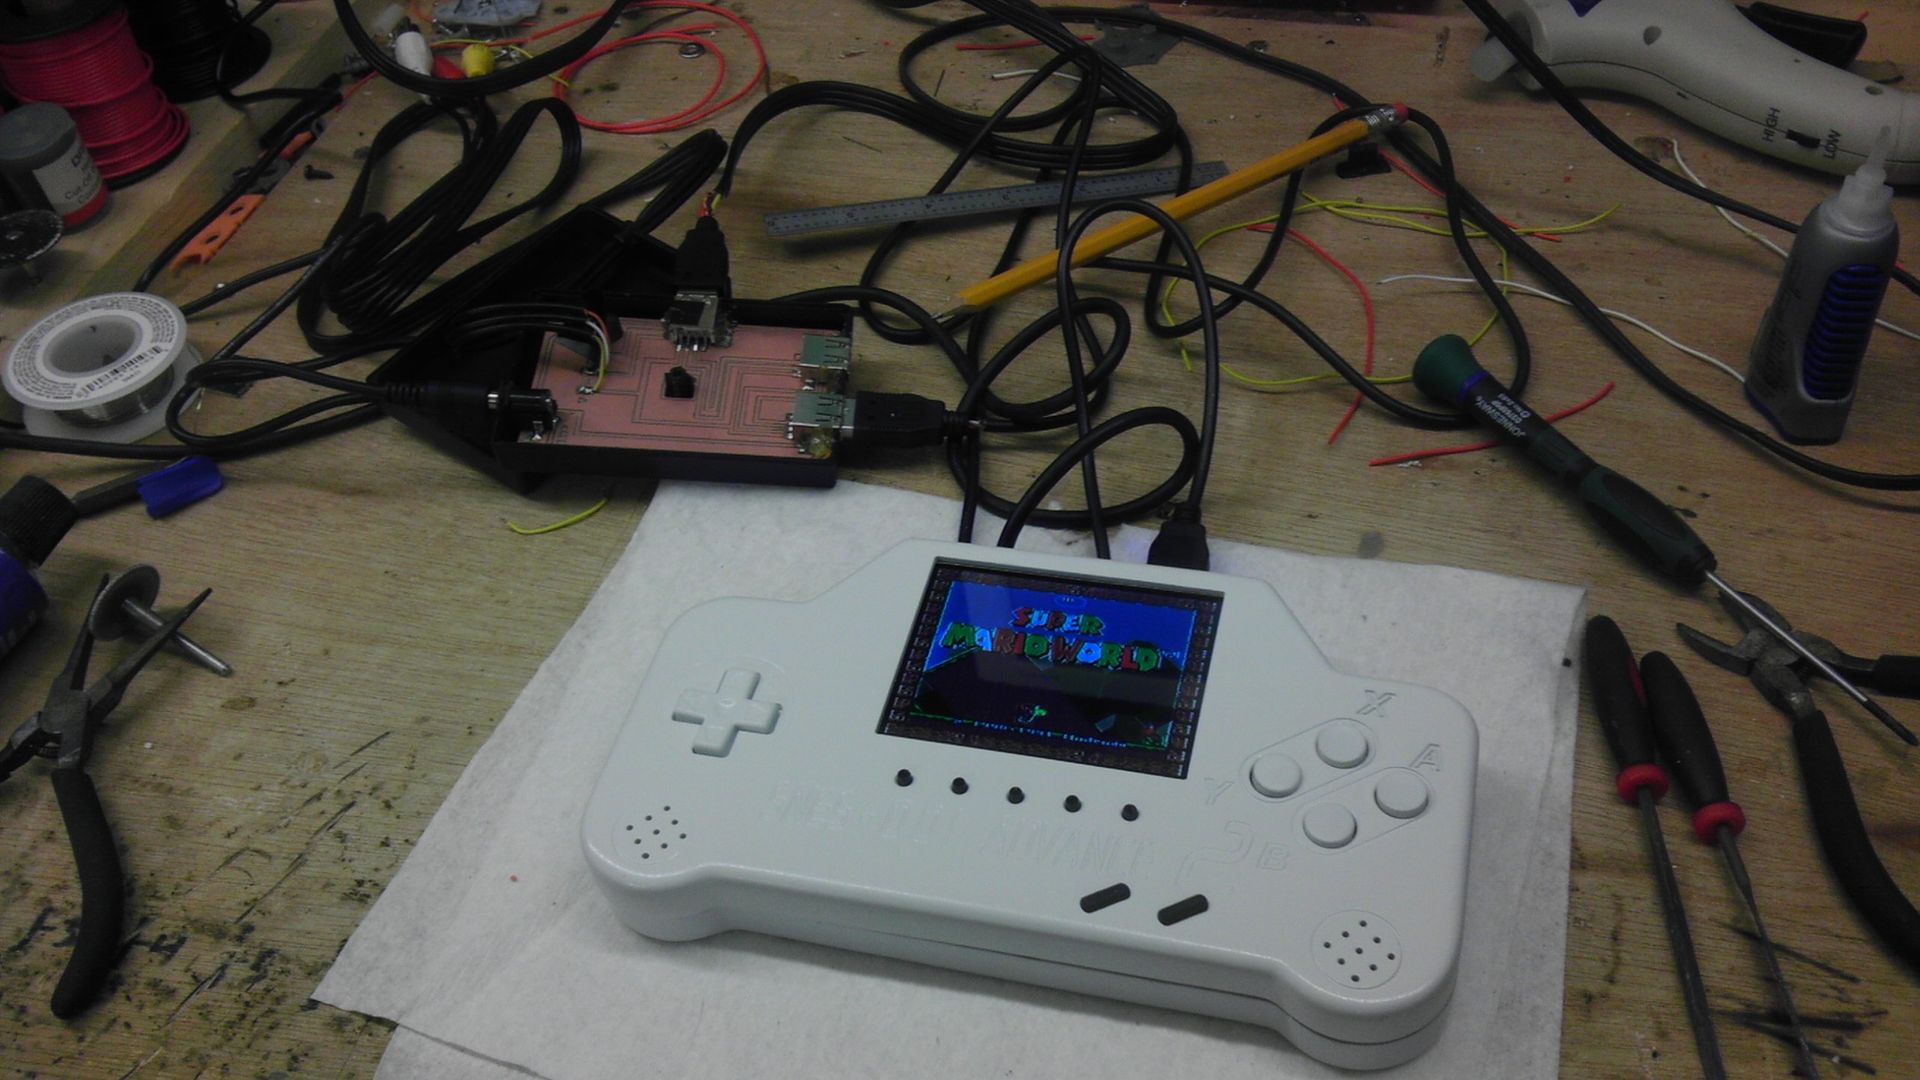
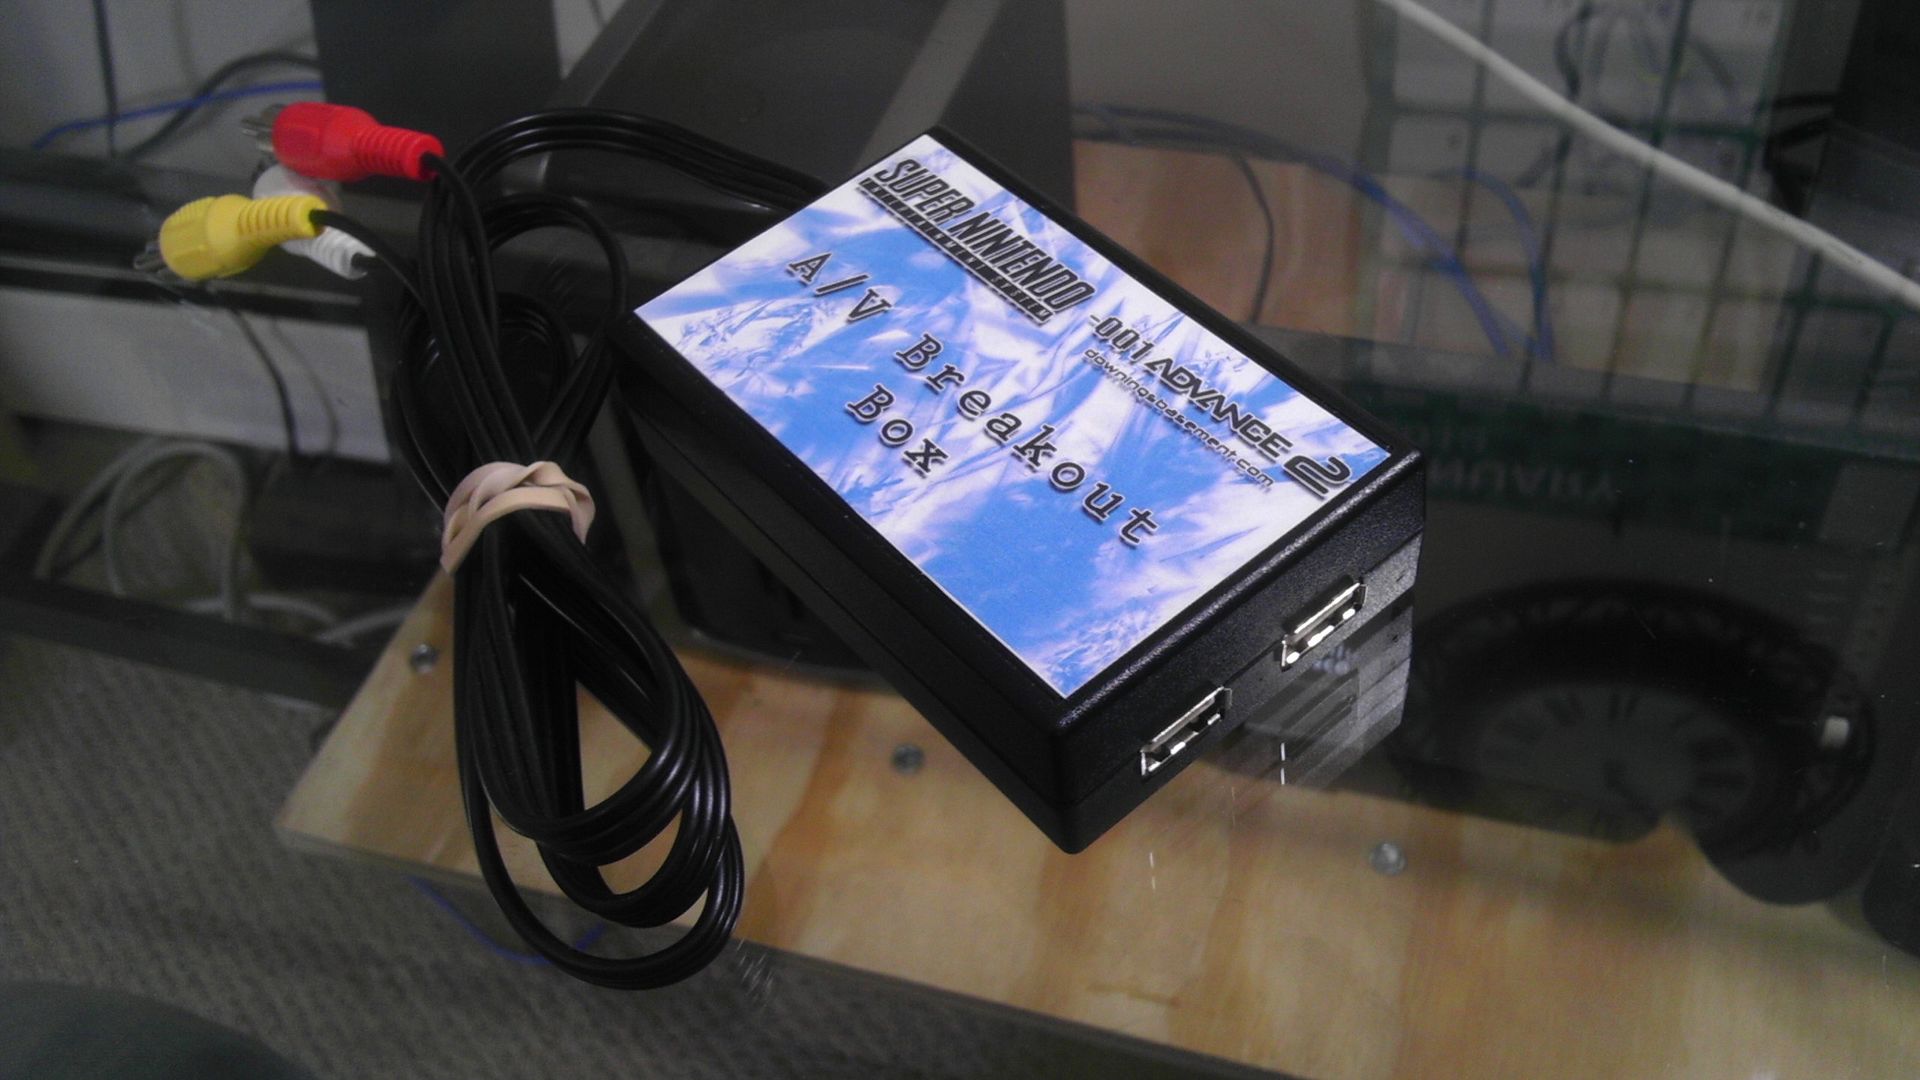
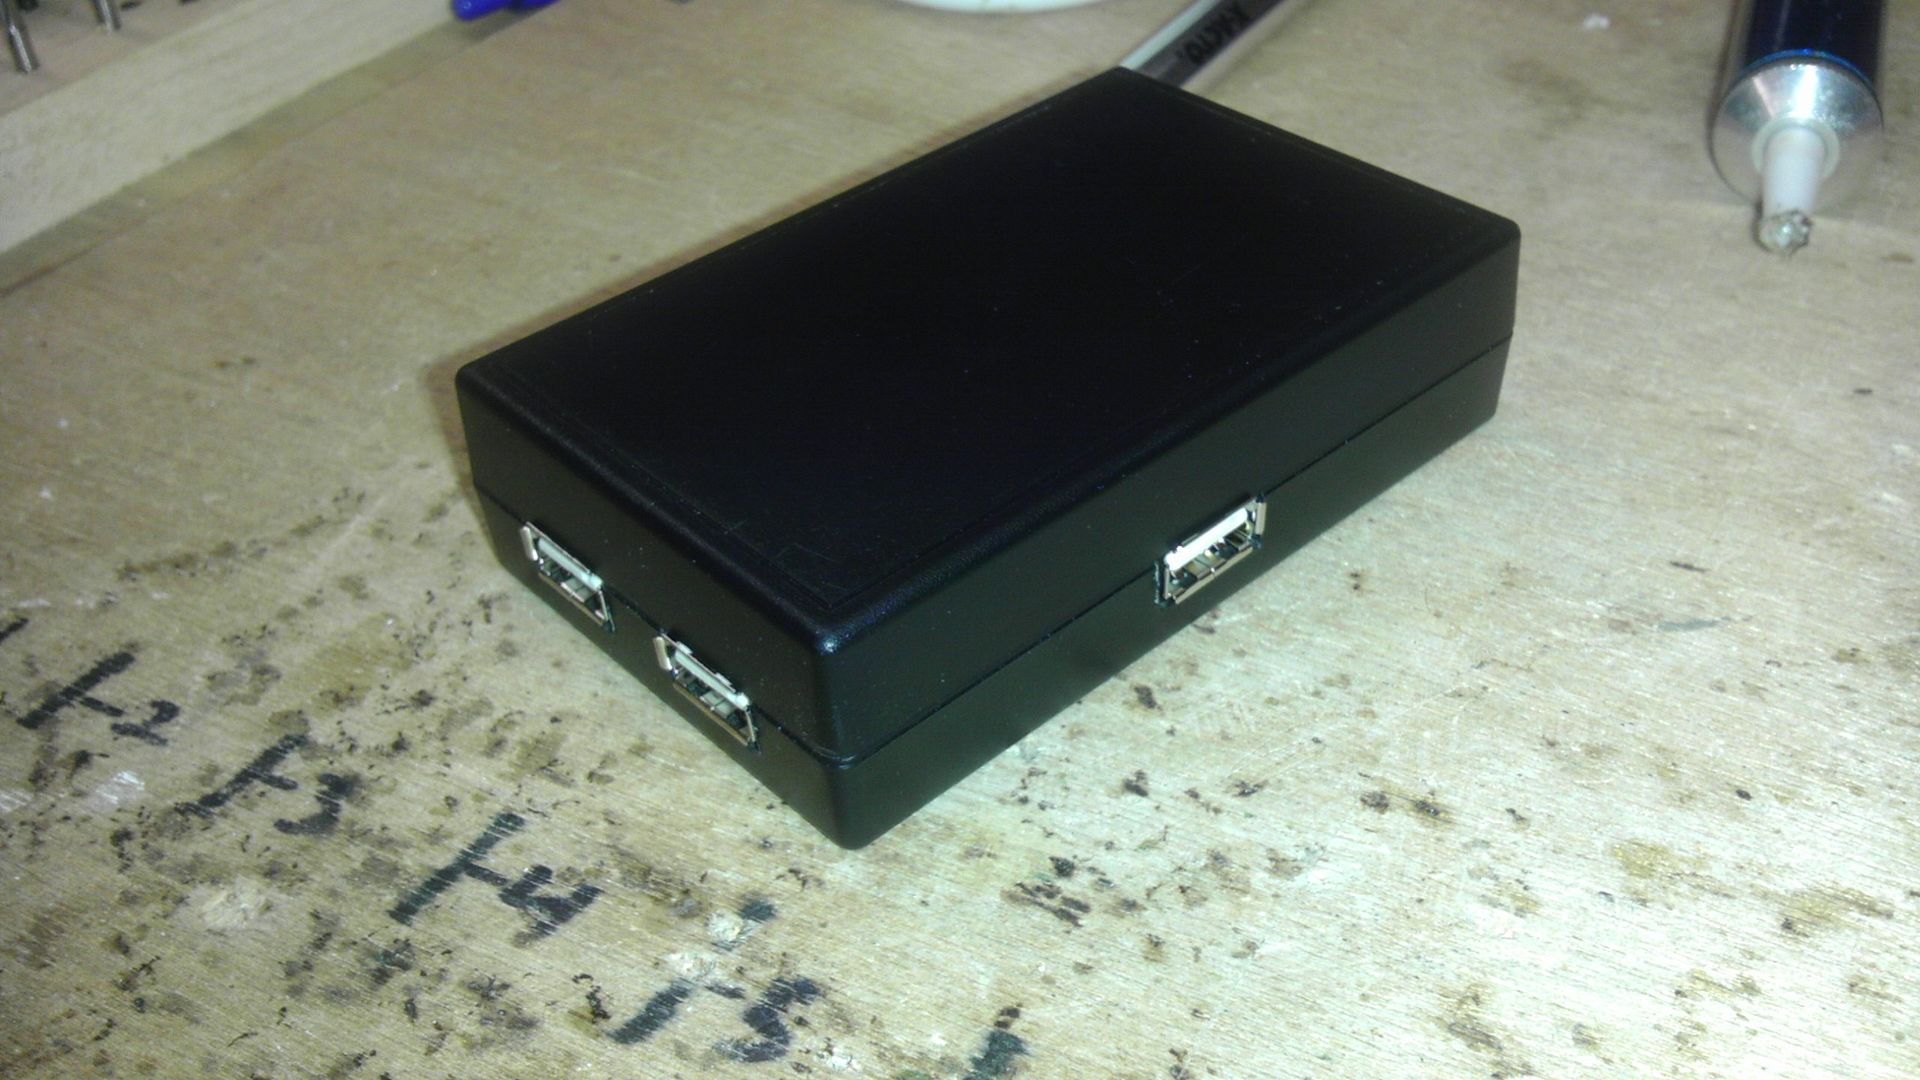
Other than a fair bit more precision on this go around, I was actually able to experiment with the design and milling of my own PCBs. Specifically in this project I used them in replacement of the modder's favorite "rubber tipped" tack switch as well as made a central HUB for the A/V, screen and audio inputs to be filtered out accordingly as well as making a tact-switch array for volume control and screen control options.

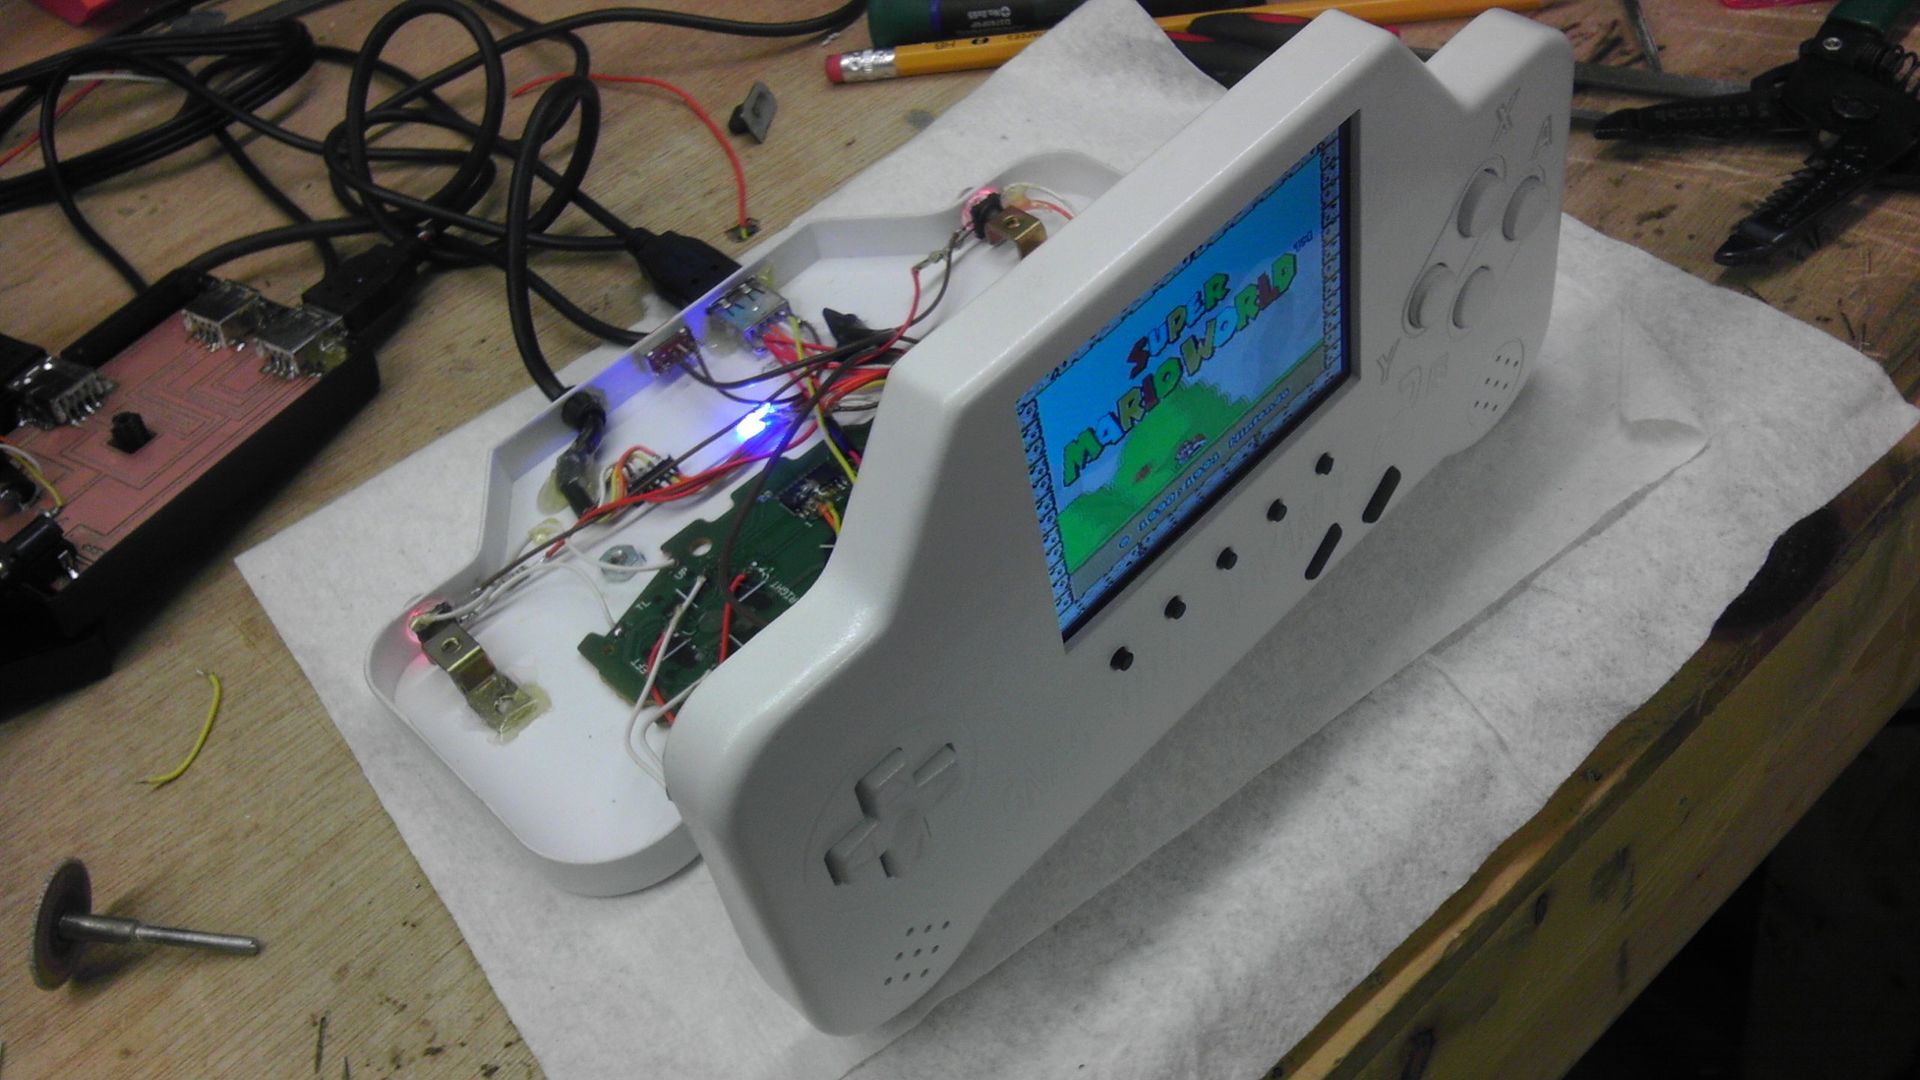
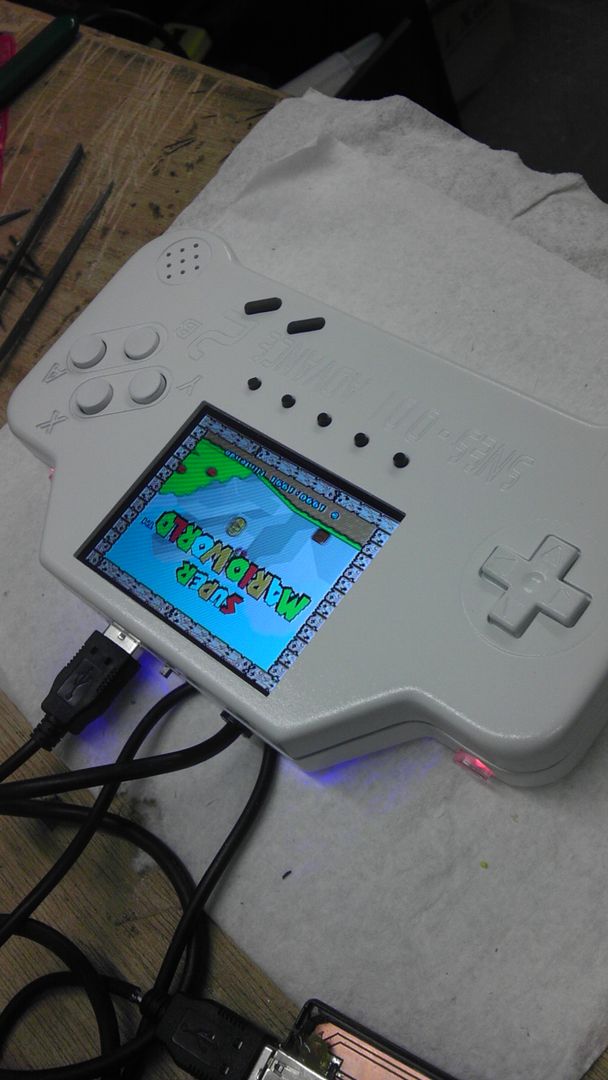
All in all I'm quite happy with how this one turned out. Again, it's still not perfect and does have a couple issues when all three video outputs are being used, but they are relatively minimal. The images are crisp, clear and the sound works wonderfully. At any rate, I hope you enjoyed this and the video has a bit more in-depth analysis of the project and its capabilities.

This is for sale to, so please let me know if you're interested. Or, if you can promote this a bit and get a buyer interested in the system and they buy it, there might just be a small commission in it for you! Contact me for details!


*Start Original Post*


Alright guys, it's been quite awhile between posts for me and I'm sorry, I've just been super busy with another project and working a couple part time jobs in between. Like I mentioned in my commission's post, I started doing another SNES-001 Advance for a customer, but it appears that the deal may have fallen through. However, I was this far into it so when it get's done I'll throw it on eBay or something.

Below are some pics of the progress so far and some demostrate vast improvements over the original design, i.e. CNC and a un-modded SNES other than the paint job. I'll explain in the pics.

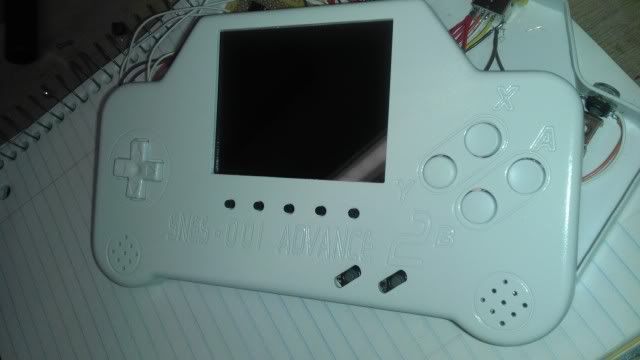
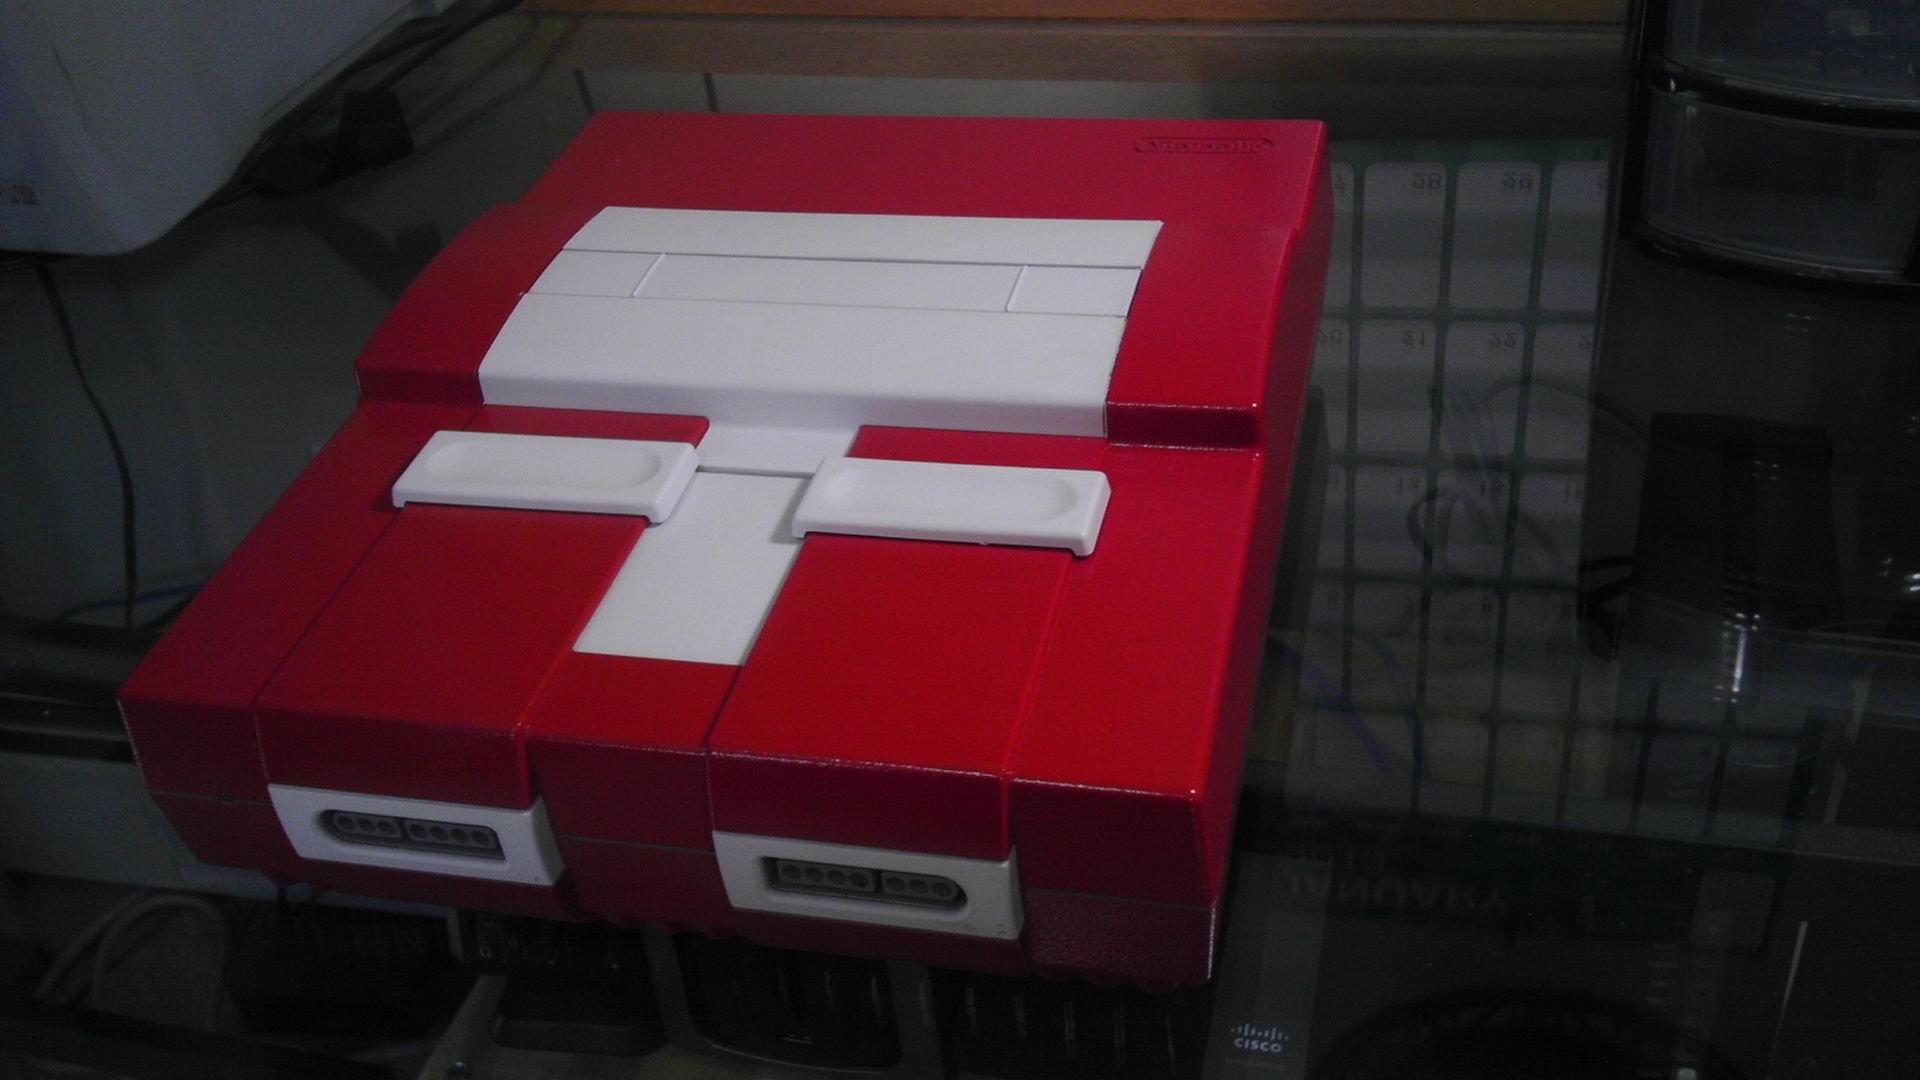
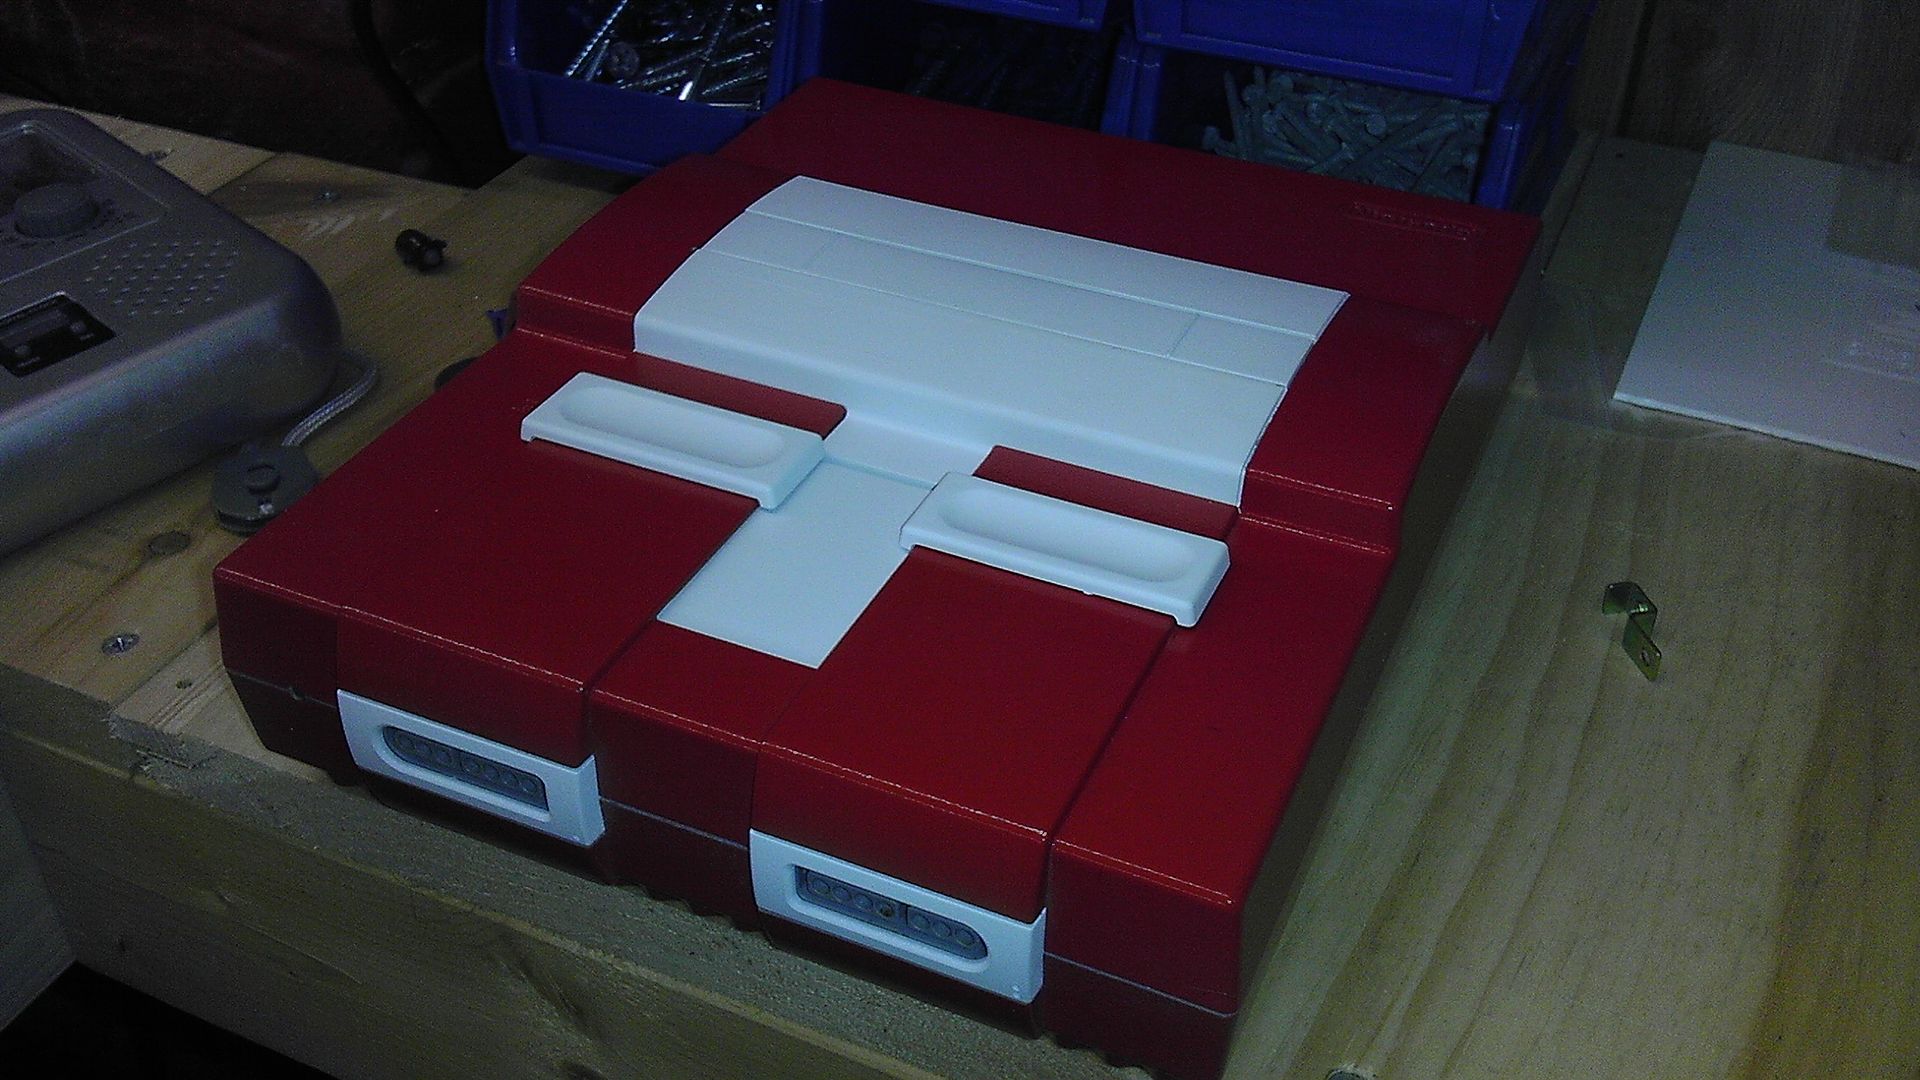
A slightly reversed paint job from the first one, this time the system includes a nice varnish to help protect it better. Notice the big difference here is that there are no additional ports or any kind of alterations to the system other than the paint. I'll explain in a minute.
Image

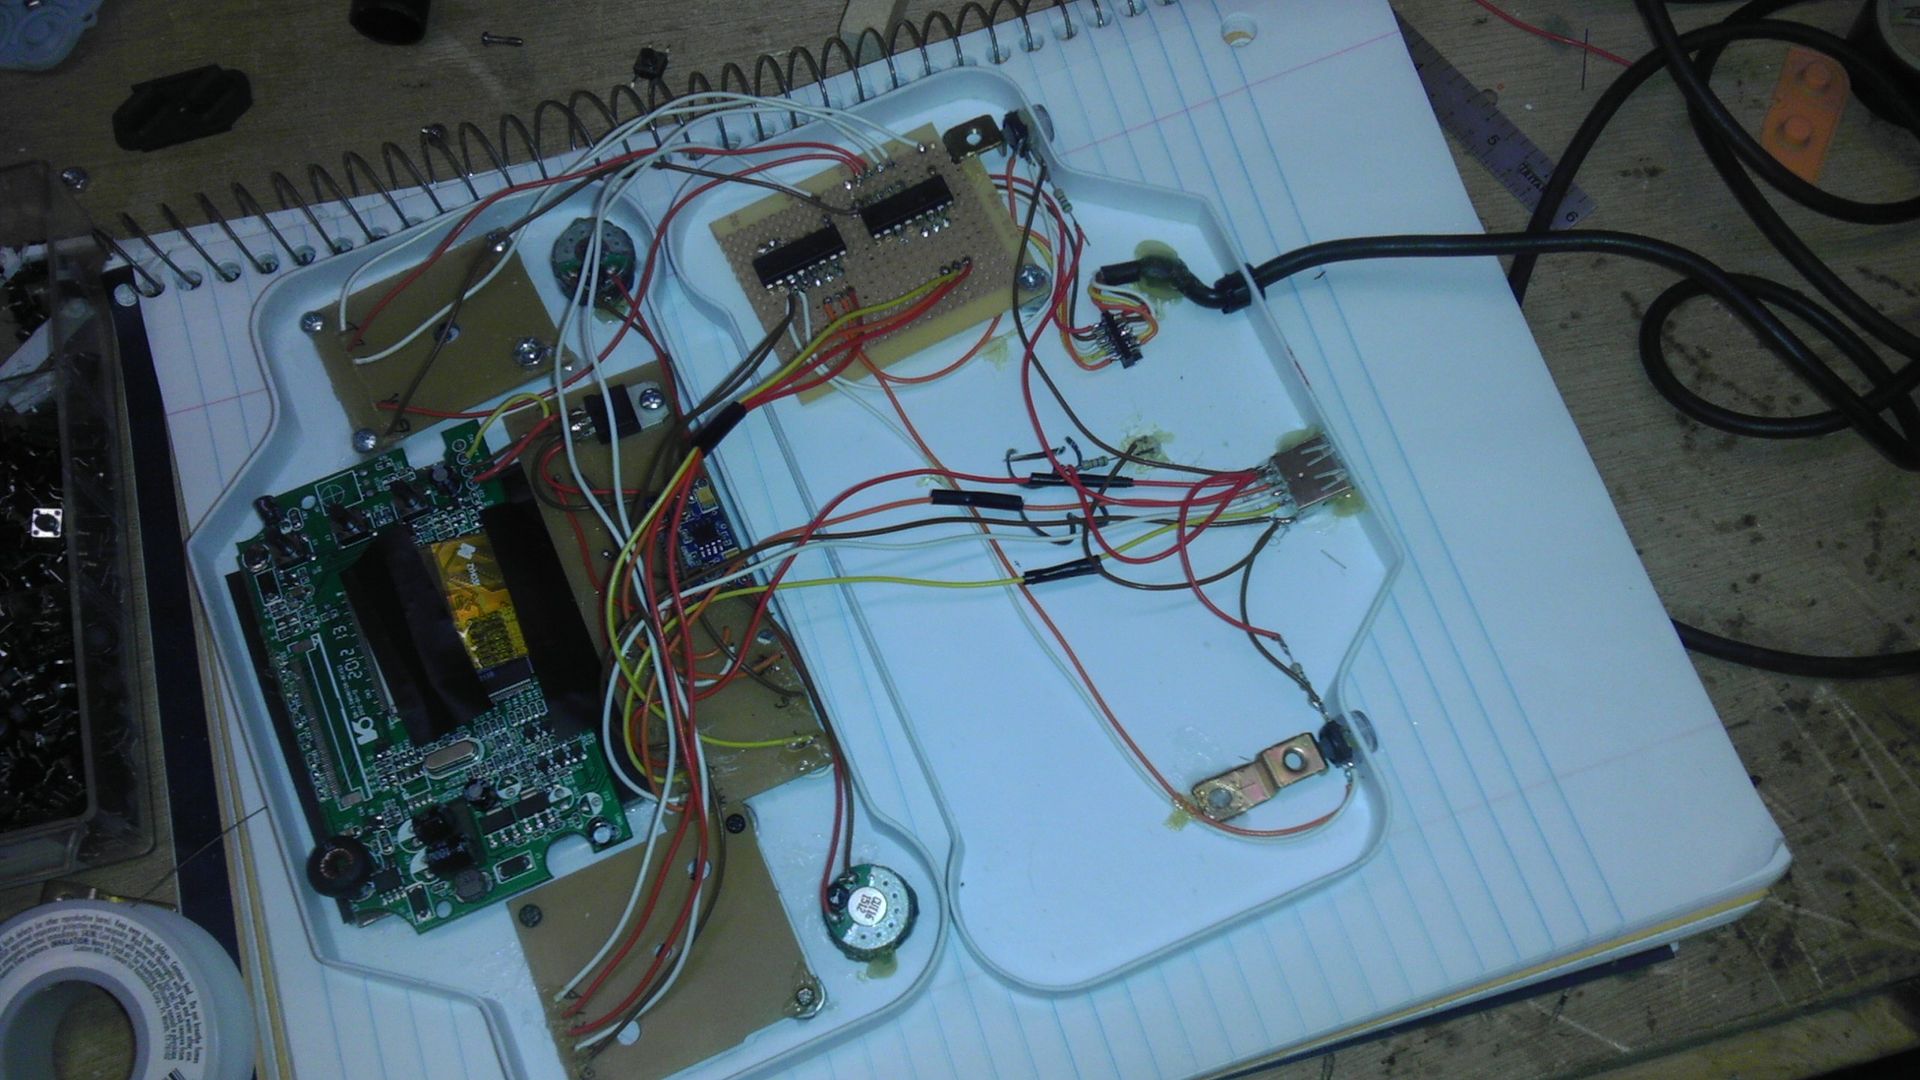
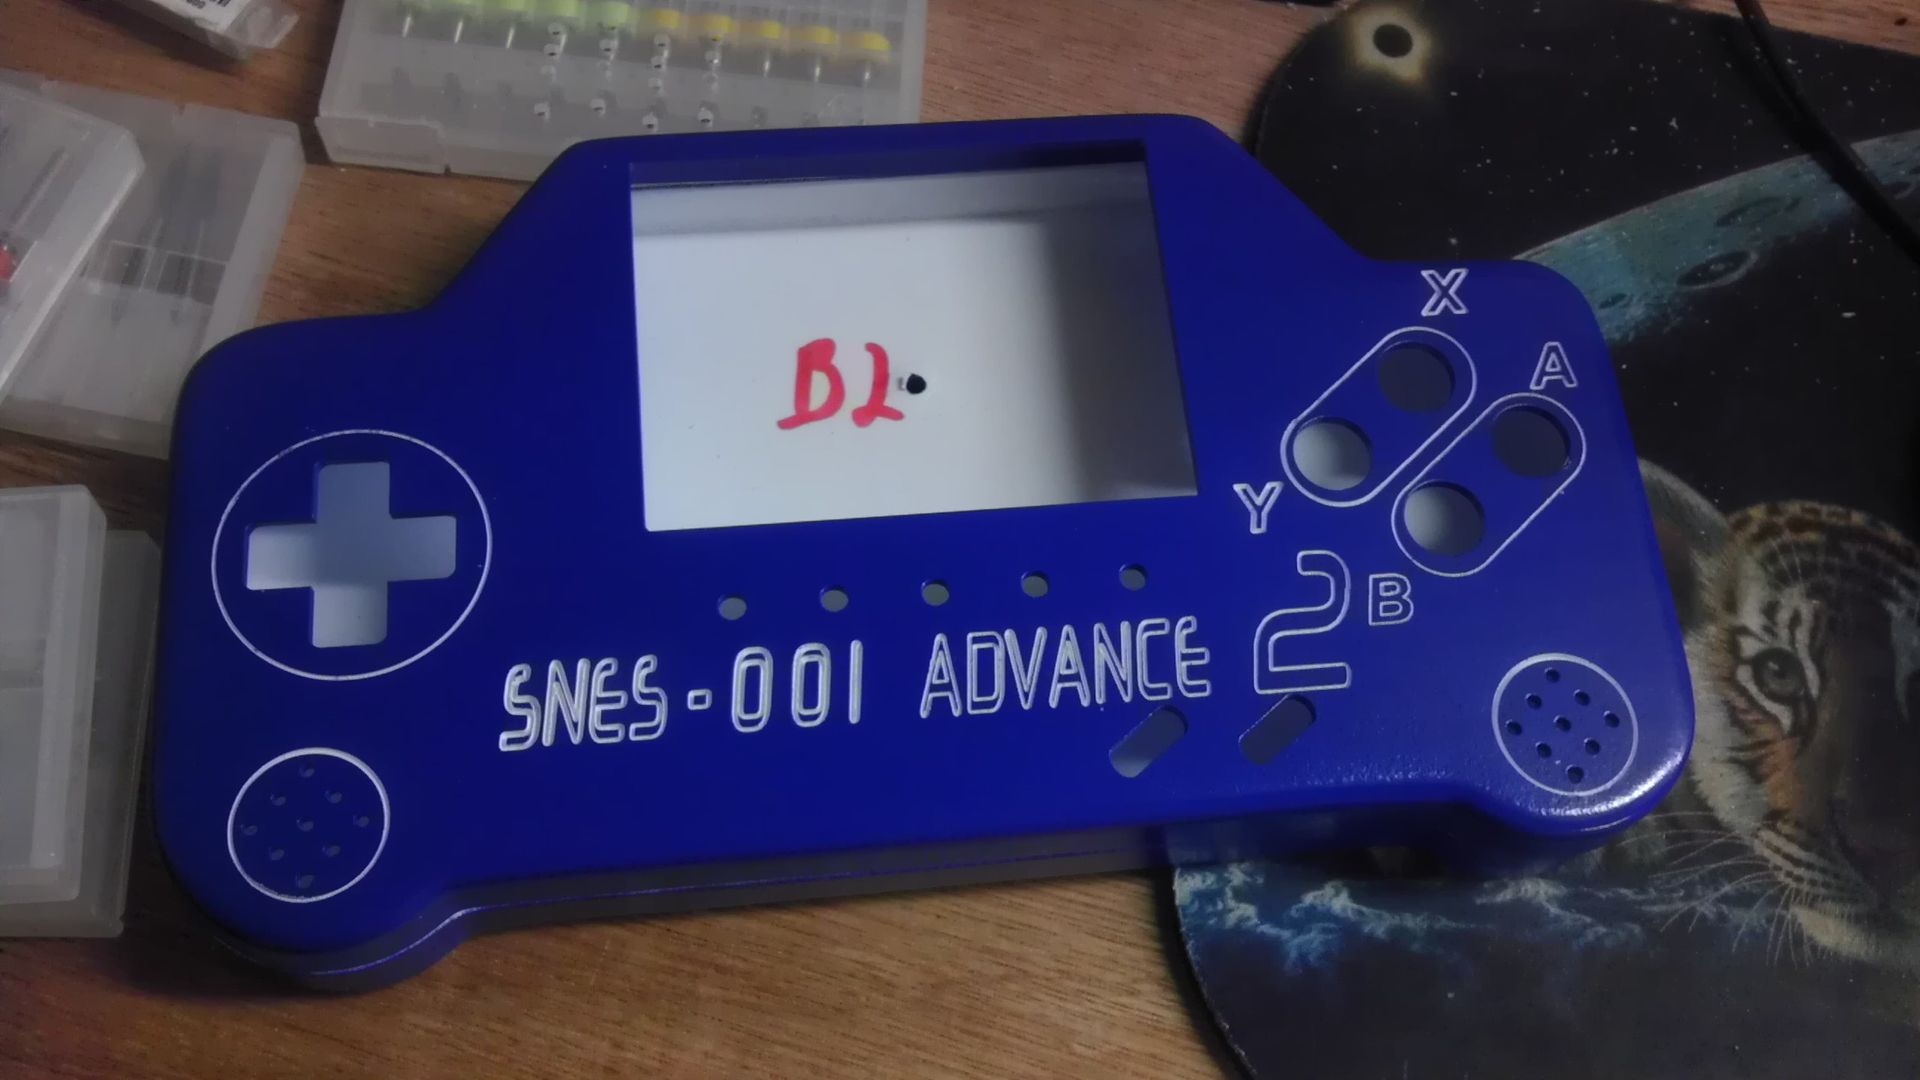
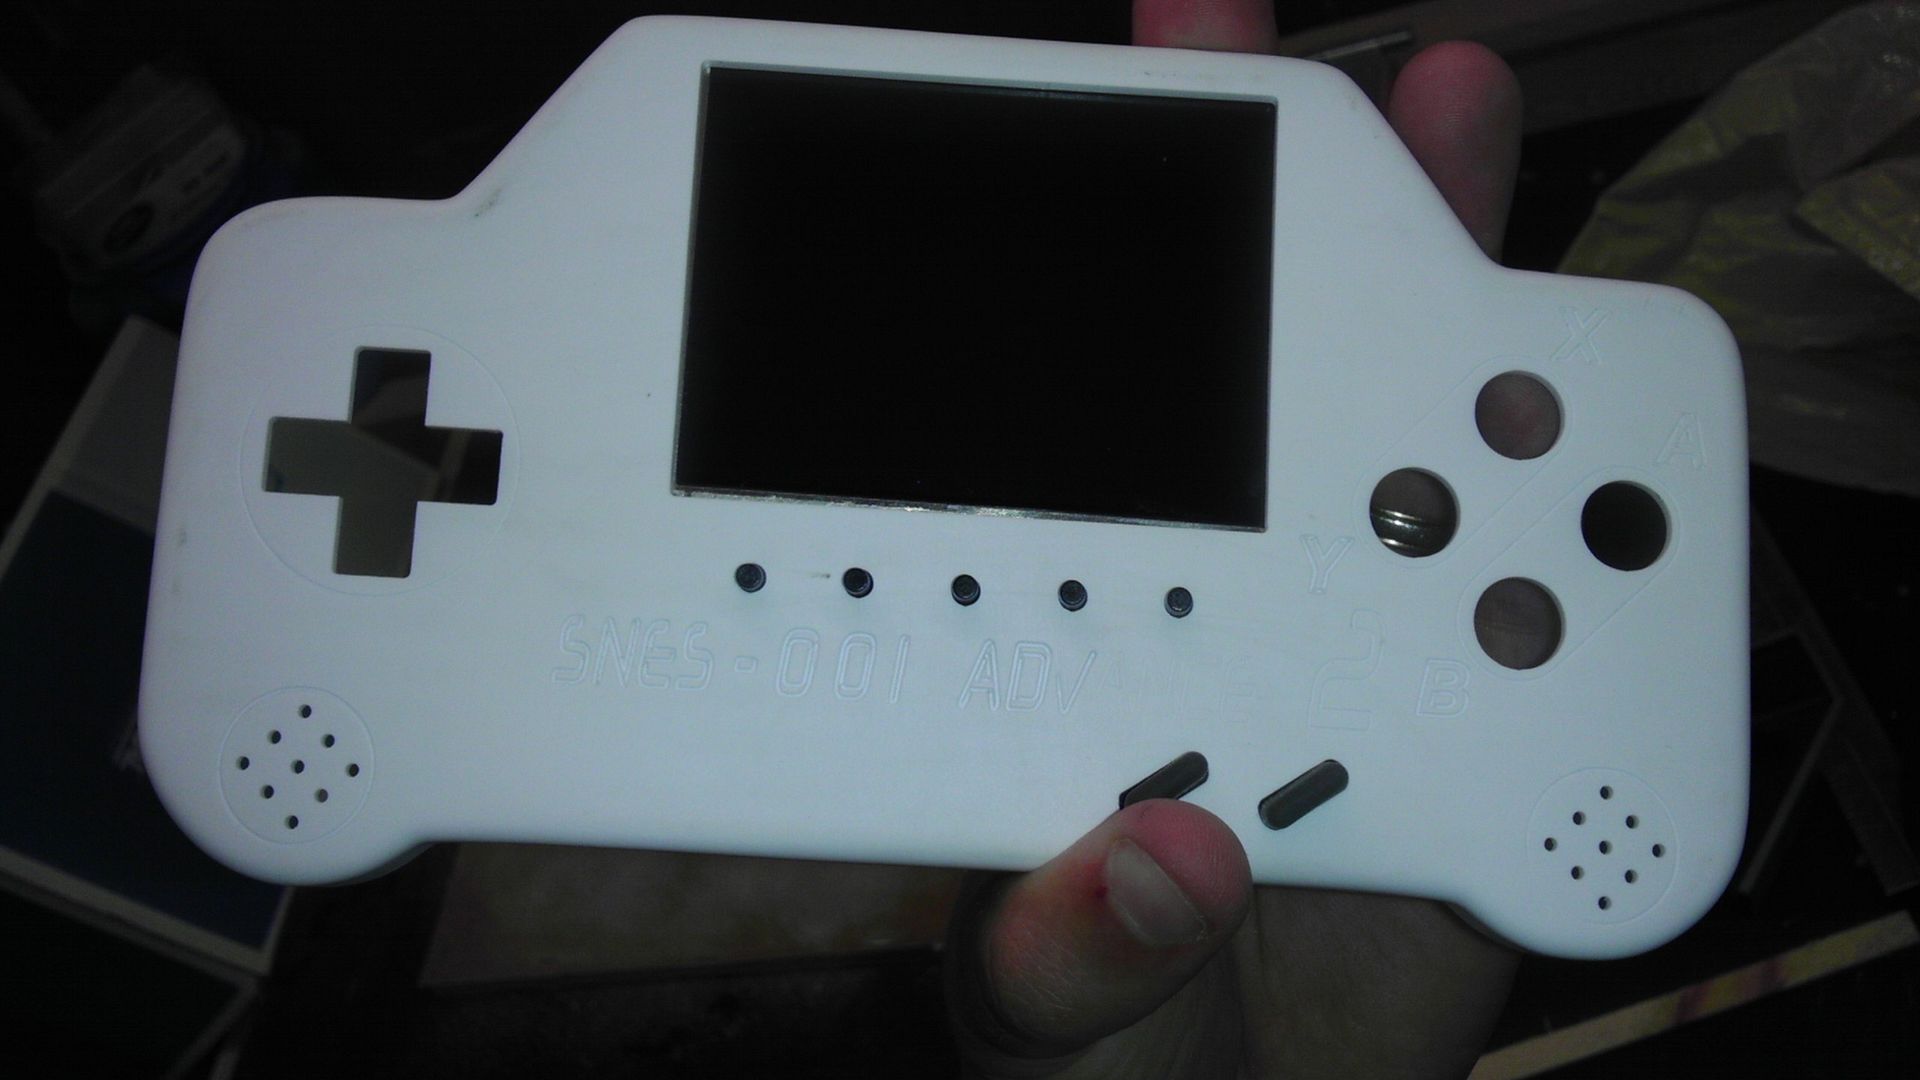
Here is an example of the controller cut. Though you can't see the engraving on this so much, I'll post pics later when it's done so you get the feel for what CNC can do for a project like this. That said, everything on this controller was cut/drilled using my new machine and the cutting only took about 5 minutes. However, the designing phase tool well over 10 hours to get just right as when you design in CAD, you can't just design the face cuts, you have to design everything underneath it if you're going to be using custom PCB's like I did and I'll show you in the next pic. You pretty much have to have your whole project planned before you make the first cut and you'll see why.
Image

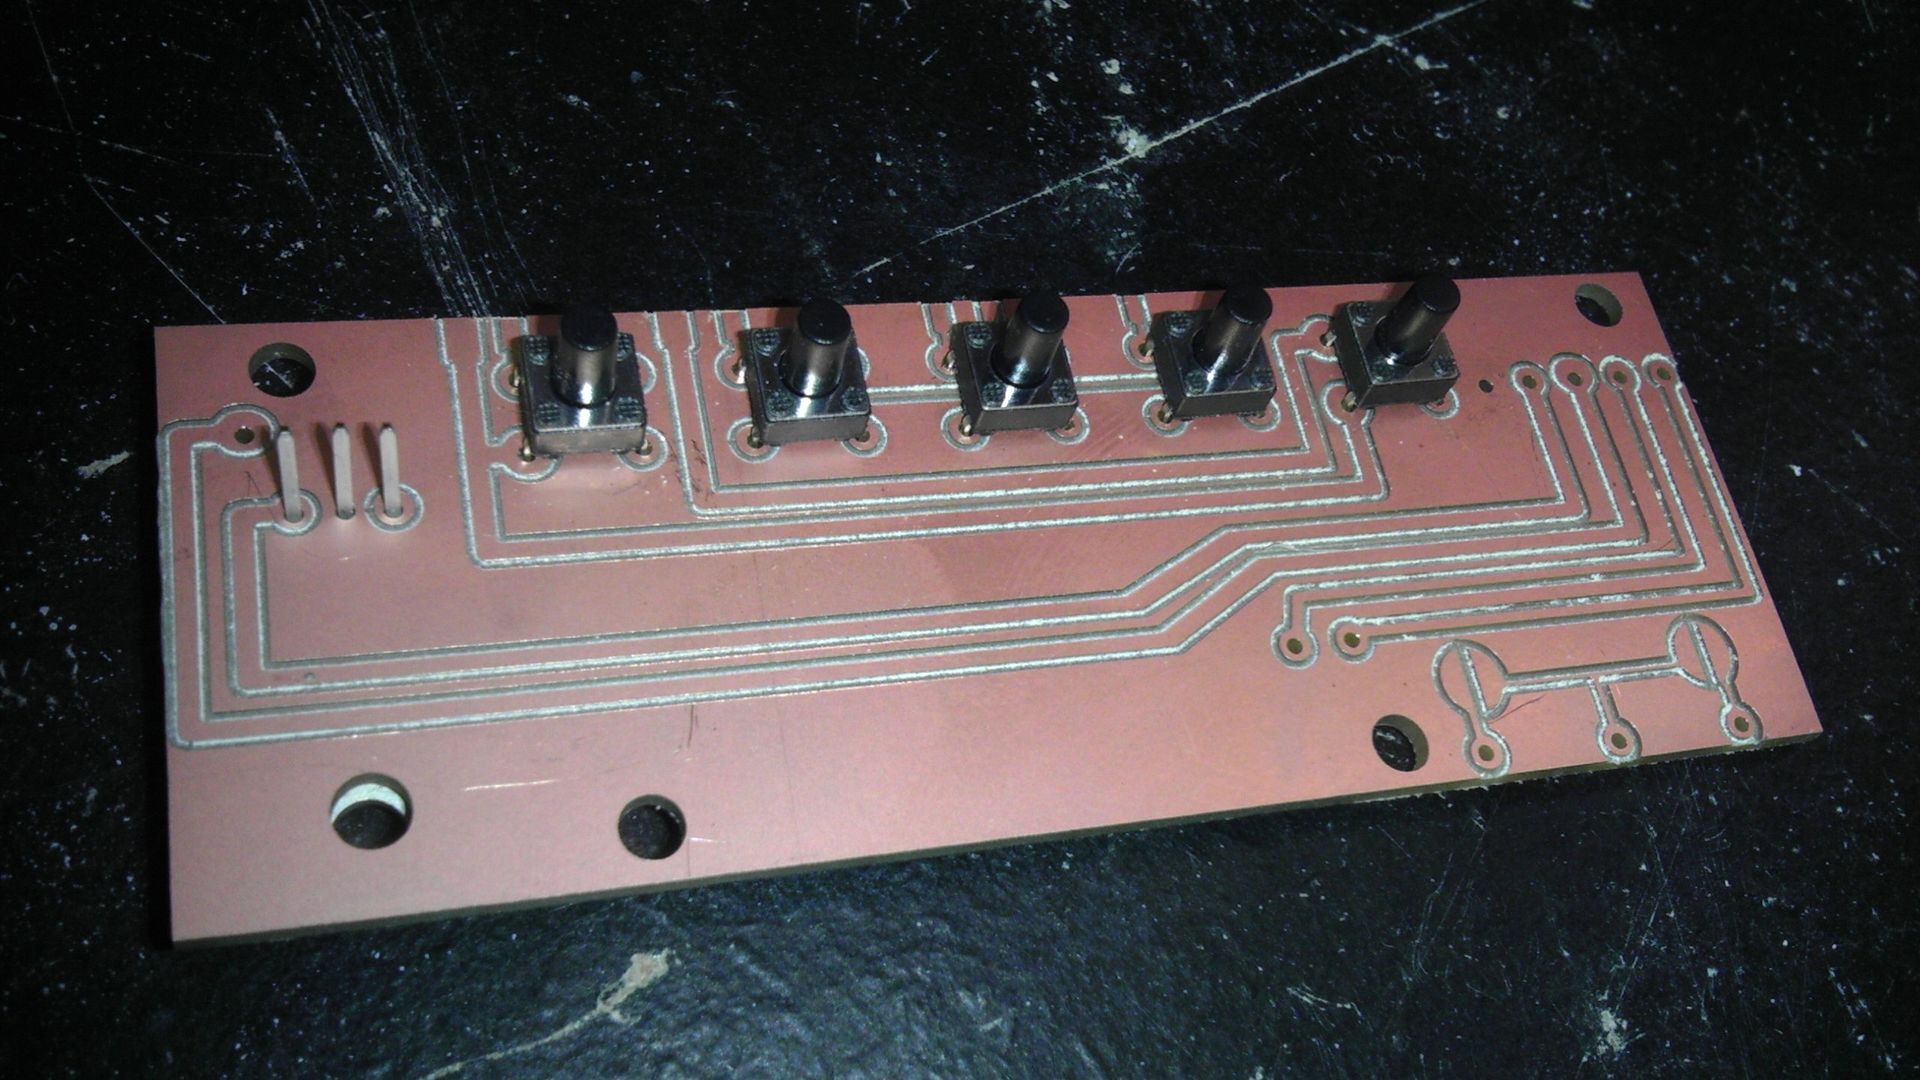
This PCB is the main junction where all the parts of the project come together. The 12v power line along with Video/Audio and Ground all meet up here and are sent to their proper destinations. The audio amp and a 7805 regulator are glued to the back. The 5 tact switches on the top control audio volume +/- and the screen options menu, +/-. The video signal is taken from the right and moved to the left as that's where the input is on the screen. The screen is powered off the input and ground of the 7805 and the audio amp is powered form the output of the 7805 and ground. The start and select pads are also located on the bottom right.
Image

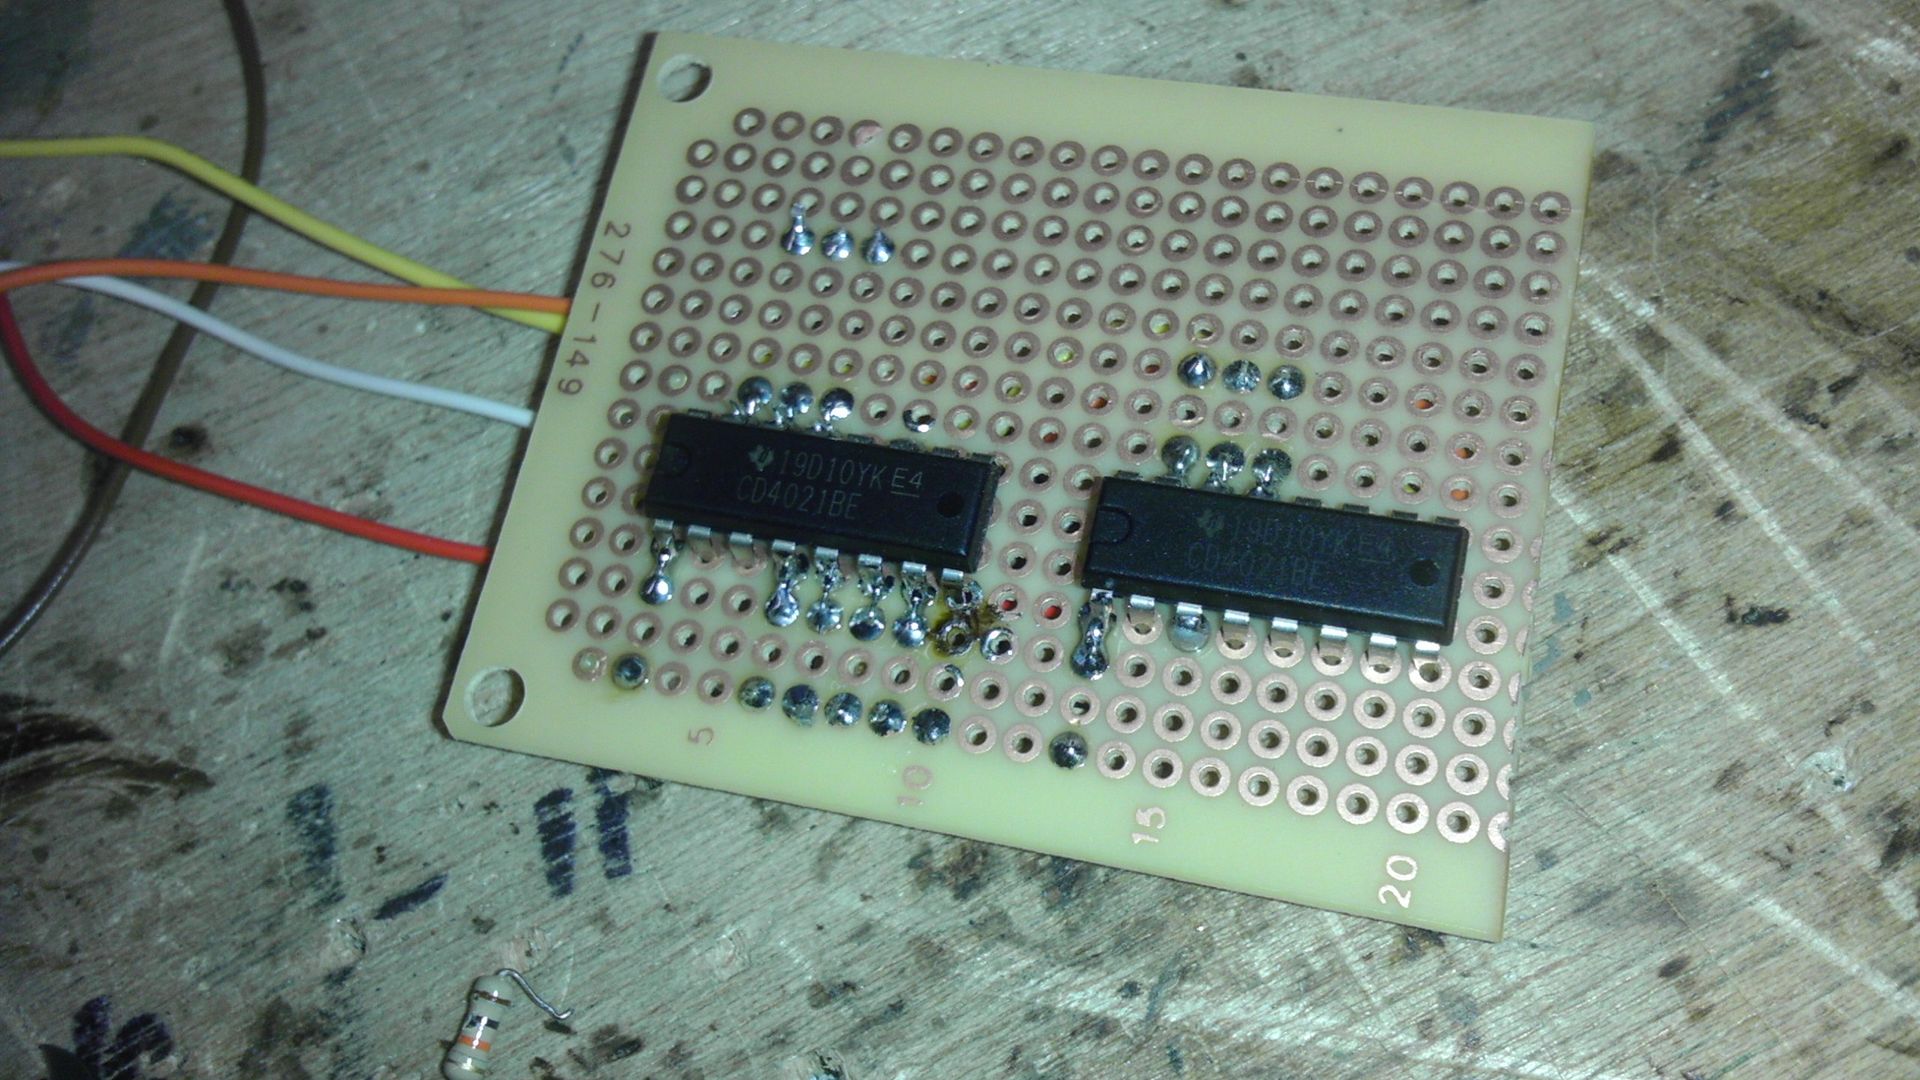
The other big difference is that I'm not using an actual SNES controller for this, I'm building my own using a series of 4021 Shift Registers and 10K Ohm resistors which is what the NES controller used. This apparently is not that difficult though I'm not quite far enough into the project to test it yet. Once I do though I'll post my findings as this combined with making my own PCB's mean's I won't have to hack old controllers anymore. Now if I could only find a source for replacement contact pads I'd be golden!
Image

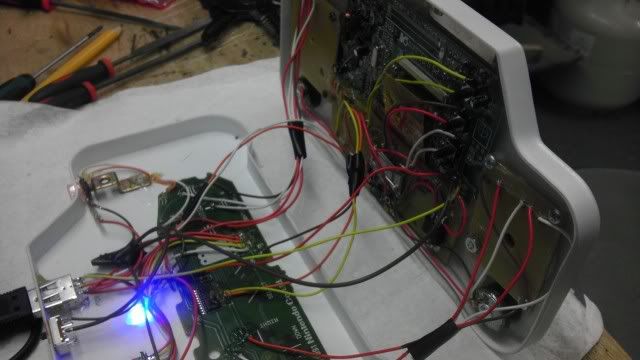
And last, you're looking at the reason why the SNES does not need to be modded. I'm not going to get to far into this yet as I've got some plans that I want to try out for it first, but I will keep you updated.
Image

But anyway, that's where I'm at now and I'll try and post more than I have been. Stay tuned for more updates!
Last edited by Downing on Sat Dec 29, 2012 9:50 am, edited 1 time in total.
Image
Hey guys, check out my new website and project showcase!
Also this is where my Case Making Guide can be found!
Downing
24-bit
Posts: 138
Joined: Mon Dec 06, 2010 8:34 pm
Location: Capital City, NH
Contact:

Re: Downing's SNES-001 Advance II

Post by Downing »

Here are the results of the days worth of work. Will not have time until probably Monday to get back to it, all that's left to be done is to wire up the screens tact switches and see if my homebrew version of a SNES controller actually performs. Should be interesting to see because if this works, well it's a stepping stone in the right direction for a wide variety of projects I have planned.

Anyway, here are the pics.

Everything but the screen tacts are wired up. Time for some testing.
Image

Here's a better close up of the engraving. You'll also notice the tact switches in the Start/Select spaces. I had to do this because my PCB cut was too big as the St/Sl button pads are very small and they weren't making the connection. Not the way I wanted to do it, but this way I know will work just fine every time.
Image

More updates as I get them.
Image
Hey guys, check out my new website and project showcase!
Also this is where my Case Making Guide can be found!
User avatar
zoki64
16-bit
Posts: 63
Joined: Mon Jan 18, 2010 11:51 am

Re: Downing's SNES-001 Advance II

Post by zoki64 »

Damn, this is amazing! What CAD program did you use?
Downing
24-bit
Posts: 138
Joined: Mon Dec 06, 2010 8:34 pm
Location: Capital City, NH
Contact:

Re: Downing's SNES-001 Advance II

Post by Downing »

zoki64 wrote:Damn, this is amazing! What CAD program did you use?


Thanks! Glad you like it! Right now I'm using 2D Design as the CAD program and Mach3 as the CAM program. Pretty standard for home PC based machines. I haven't gotten to much into 3D machining yet though as I'm currently working on leaning the basics of Solid Works. Then things should really get interesting. haha.
Image
Hey guys, check out my new website and project showcase!
Also this is where my Case Making Guide can be found!
Downing
24-bit
Posts: 138
Joined: Mon Dec 06, 2010 8:34 pm
Location: Capital City, NH
Contact:

Re: Downing's SNES-001 Advance II

Post by Downing »

Finally got back to test my SNES-001 II controller after nearly a month with it on the back burner. Work and my workshop upgrades (more on that later) have taken their toll on my time, but now that the shop is just about complete, here is a progress update from today on the system.

As mentioned before, I was trying to use the 4021 shift registers to make the SNES controller work the way the original hardware intended, but without the factory made PCB. It seems theory is sometimes far from actuality. Though I did get response in the controls from it, that was about the extent of it as I could not move or jump with any consistency. Seems the use of these chips requires a very precise amount soldering and I'm sure something bridged somewhere causing the issues.

But, because I wanted to get this done, I removed the homemade version and replaced with an actual first party controller. Worked great upon the rewire. I also had a problem with the screen as there were maybe two dozen lines streaking through it. In trouble shooting I found that the LCD itself was to blame and I had to swap out the screen. Audio was also an issue. The amp was powered but I was getting nothing from the speakers. Turns out the amp was faulty (which I suspected when I put it in there). So I replaced that and got the audio back.

I also added a switch to the top of the controller so I could turn the screen and audio off if I wanted. To do this though I had to make a ground cutoff as I did not have a TPST switch on hand. This worked fine though.

So once everything was working and in place again, I cut some teeth, glued them in place and secured the halves together with screws. Very happy with how this came out! Pics and a video!

Image
Image
Image
Image

http://www.youtube.com/watch?v=Aqr8UlrYVac
Image
Hey guys, check out my new website and project showcase!
Also this is where my Case Making Guide can be found!
Downing
24-bit
Posts: 138
Joined: Mon Dec 06, 2010 8:34 pm
Location: Capital City, NH
Contact:

Re: Downing's SNES-001 Advance II

Post by Downing »

Controller 2 is cut, painted and engraved. I don't know why I didn't think of this method earlier. I mean you have a solid color plastic as your base. Paint the thing a different color first, then engrave and boom! The text and everything else just POPS right out!

With that said, my X/Y zero was not quite perfect so this cause a bit of a misalignment with the first controller but fortunately it's a livable mistake that will not affect anything. But more progress reports tomorrow as I start to cut the PCB for the BAYX buttons and redesign the PCB for the tact switches and ST/SL buttons. This is so cool! haha.

Image
Image
Hey guys, check out my new website and project showcase!
Also this is where my Case Making Guide can be found!
User avatar
Drakon
64-bit
Posts: 306
Joined: Tue Apr 29, 2008 7:58 pm
Location: Toronto Canada
Contact:

Re: Downing's SNES-001 Advance II

Post by Drakon »

I like the look of the controller. Not to keen on the console paint job though.
http://16bitgamer.forumotion.ca/

Older games are better
Simonrayner-uk
8-bit
Posts: 38
Joined: Thu Dec 13, 2012 2:41 pm

Re: Downing's SNES-001 Advance II

Post by Simonrayner-uk »

Hi would you be interested in doing some custom paint jobs on 3 super nintendos ??

2 pal & 1 NTSC ??
Downing
24-bit
Posts: 138
Joined: Mon Dec 06, 2010 8:34 pm
Location: Capital City, NH
Contact:

Re: Downing's SNES-001 Advance II

Post by Downing »

Hey guys! The system is done! Edited the first post with an update and video! Hope you enjoy.

Oh, and I'm sorry I didn't get your last message Simonrayner-UK until just now. For some reason I haven't been getting notifications about these new posts. If you still need those painted let me know and we can go from there!
Image
Hey guys, check out my new website and project showcase!
Also this is where my Case Making Guide can be found!
AppleQueso

Re: Downing's SNES-001 Advance II

Post by AppleQueso »

In hindsight this isn't all that different from the Wii U...
Post Reply