
Atari 2600, Nintendo NES and Sega Genesis Game Carts

A guide on cleaning video game carts. I posted info on Nintendo NES, Sega Genesis and Atari 2600 game carts for examples. You can use the same technique for other game carts.
Related articles:
Polishing Scratched Discs - Removing Marker Stickers Guide
NES Capacitor Repair 10NES Chip Disable Tengen Tetris Guide
Gyromite NES Import Adapter Guide
Tools and Supplies
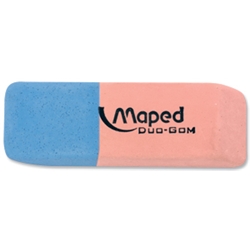
Eraser - Ink and Pencil Erasers have different hardness. Pencil erasers are easier on the contacts.

Magnifying Glass - For a close inspection, a small flashlight helps too.
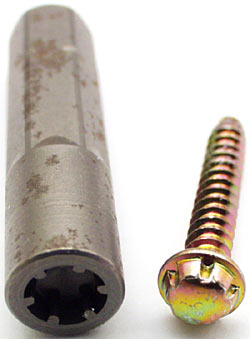
3.8mm, 4.5mm Game Bit and a small Screwdriver Set
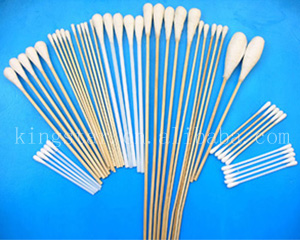
Cotton Swabs or QTips - Various lengths are available.
Isopropyl or Rubbing Alcohol - 99% Isopropyl, but the lower 70% is fine.
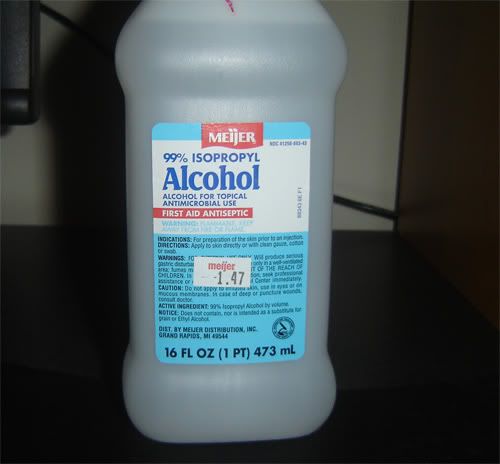
Ziggy587 wrote:Rubbing alcohol is a common household item. Maybe not the 99% Isopropyl, but surely every one has a bottle of rubbing alcohol in the house.
Alcohol is all that's needed 99% of the time. The only time you might want to consider something else, like an eraser, is if there's excessive build up on the contacts. In that case, alcohol would still be fine, but using something abrasive would kill some of the scrubbing time if you were to use just alcohol alone. Otherwise, just scrub them with some alcohol. If you're opening the carts up to clean them, then skip the compressed air as well. Opening the carts to clean them will definitely give you a much better opportunity. Instead of having to shove a Q-Tip in there, and not getting proper leverage, you'll have full access to the pins. I recommend using alcohol and an old cotton t-shirt (preferably a while one).
The alcohol will lift dirt and grim when you scrub with it, but depending how dirty the contacts are, when the alcohol dries (which is very quickly) some of the dirt and grime will dry back onto the contacts. So you wanna wipe the alcohol off for that reason, not so much because you wanna remove the alcohol, but because you wanna remove as much of the dirt and grime as possible in one pass. Alcohol evaporates very quickly, so you can pretty much ignore that fact that you're wetting the pins.
If the contacts are badly corroded
Electrical Contact Cleaner - Any hardware or electrical supply store.
Scotchbrite Scrub Pads - Scrub pad sponge used for washing dishes.

CRTGAMER wrote:A few words on H2O
Corrosion occurs when three things combine. Air or Oxygen - Metal - Moisture. The metal and air cannot be removed, so it is best to not introduce any water or water based cleaners. Stick with petroleum based cleaners to minimize the moisture. Dry components immediately after any cleaner is applied.
AVOID CLEANERS AND POLISH THAT LEAVE A CONTAMINATING RESIDUE.

Cleaning the game cart contacts
You can clean without disassembling, if the cart contacts are in good condition with just little dirt or film buildup. It is not the best method, but this is the choice if one does not want to remove the label on Atari carts or have a special game bit for the three screw NES carts.
NES Game Cart - 3.8mm Game Bit and Phillips Screws
Pour a little bit of alcohol into the bottle cap. Dip the QTip in the solution then rub the game cart contacts on both sides. Wipe clean with a dry cotton swab.
A better method is to take the NES cart apart. If a five screw cart, use a small jewelers screwdriver. If a hinged three screw cart then you will need to use a 3.8mm gamebit. Take the cart apart, observe which way the internal PCB faces. Note how the hinged carts swivel apart, the reverse will need to be done when reassembling. Remove the PCB from the cart shell.
You can use the QTips and Alcohol mentioned earlier or just use a Rubber Eraser. An Ink Eraser is harder rubber, it might come in handy for real dirty contacts. Most of the time a regular pencil Rubber Eraser is all that is needed. Be careful of any electronic components, notably any resistor sticking out. Support the cart edge with a folded rag or lay the the PCB edge against you pants leg. Rub the eraser against the grain of the contacts, you don't want to bump the chips of any other components soldered on the PCB. After the scrubbing wipe off with a rag or small clean paint brush. Avoid the temptation to blow off the rubber particles, you want to avoid adding moisture or spit. Wiping the contacts off with your fingers is also not recommended, skin oil can contaminate the contacts. Reassemble the cart and test out the game in the NES.
CRTGAMER wrote:Have care when reassembling the game cart. Scrutinize which way the PCB chip side faces in relation to the top half of the game cart shell. Start all screws before tightening any. To avoid over tightening, avoid using a large screwdriver. In the case of the Game Bit, use it without a driver handle attached.
Some third party games such as Captain Comic by Color Dreams have one of the screws hidden by a label in the back. Since the cart is different with a blue case, I did not want to damage it. Before disassembly, note the cart connector height exposed inside the shell. Remove the four corner screws with a regular phillips driver. The fifth center screw can be left in since it does not hold the PCB in place. Carefully pry the cart apart just enough to slide the PCB out on the connector side. The plastic will flex, but could crack if pulled apart too much so go easy. Note which side has the chips, which is normally the front label side. Once the PCB is out, clean the connectors with your preferred method. Reinstall by flexing the shells apart, be sure the PCB chips are on the front label side. The contacts will be the only part of the PCB exposed inside the shell at the bottom.
Cleaned the bottom half of the contact pins with just a pencil eraser, no chemicals used! The cart contacts are shined off, not scrubbed to the point of removing the gold plating. DO NOT USE THE HARDENED INK SIDE OF THE ERASER. USE ONLY IF THE CONTACTS HAVE VERY HEAVY BUILDUP.
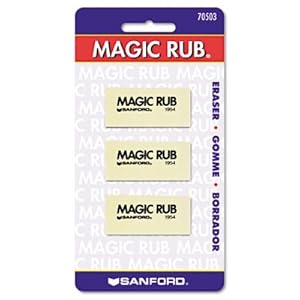
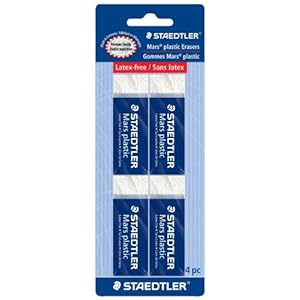
Hobie-wan wrote:A pink eraser is ok, but better to use a grey or white plastic/vinyl eraser. I use a Sanford Magic Rub, but any one should do. Sometimes they're labeled as for use on vellum too.
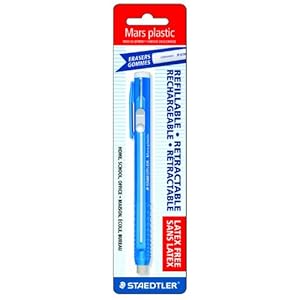
The white retractable erasers are fine too.
CRTGAMER wrote:Very dirty or corroded contacts
Remove the game PCB from the cart shell. Try cleaning the contacts with a Pencil eraser first, only use the Ink eraser side if the contacts have heavy buildup. Electrical Contact Cleaner can also be used and if necessary, a Scotch Brite Scrub pad. DO NOT USE SANDPAPER WHICH REMOVES TOO MUCH MATERIAL. After the scrubbing, wipe clean with a paper towel or rag. Be sure the PCB is dry before reassembly.
Famicom Game Cart - No screws just plastic tabs
Most Famicom and and Famicom bootleg carts do not have any screws. There are internal tabs that lock the two cart shells together. Attempting with a screwdriver to press in the tabs will mar up the sides. I found the no tool approach a better method. Pull apart the Famicom cart halves using both hands with three fingers augmented by thumbs as "pry bars" on each side of the game PCB connector slot. There is a risk of cracking the decades old plastic, keep an eye as prying apart. I have had pretty good luck due to the malleability of the plastic, maybe due to made overseas and before required by OSHA fire retardant in the plastic?
Right Click for a larger view
Pull open the two cart shell halves just enough to clear the two side tabs. There are two additional lock tabs at the top, these can be swiveled clear just like a 3 screw NES game cart.
Once the cart shells are apart, the game PCB can easily be removed for cleaning. Note which way the chips on the PCB are facing. Again I use a pencil eraser for a non chemical easy clean. Dust off with can of air or small soft brush.
Right Click for a larger view
With the cart shells apart, (lower shell with PCB pictured above) the tabs are easier to see. To ease cart disassembly at a later date for a future cleaning, I filed down the side tabs. Note that the two top tabs do not need modified, they can be swiveled clear, a hinge effect as in three screw NES carts. Leave just a bit of notch on the two side tabs so it will still lock the cart halves together with a light click.
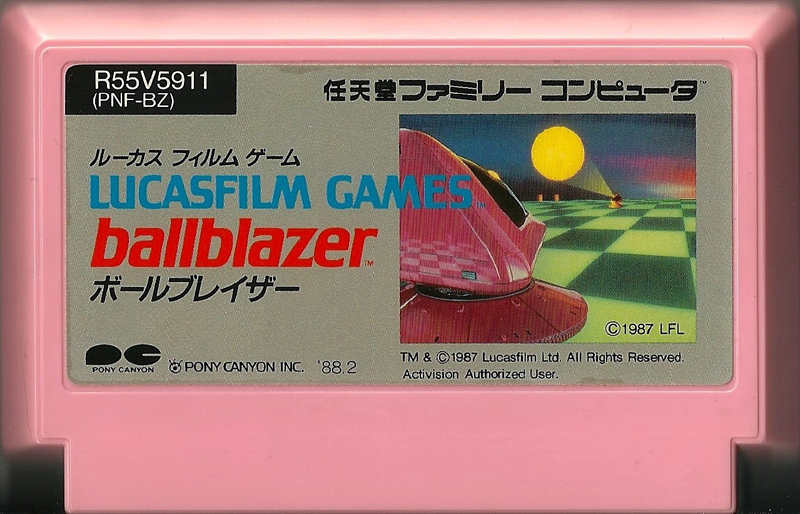
Take a guess what a Pink Cart Famicom title might be and no this is not Hello Kitty!


Sega Genesis Game Cart - 4.5mm Game Bit
This is one of the easiest carts to take apart. Unlike the NES game caret, the Genesis game cart requires the larger 4.5mm Game Bit. Remove the two screws and game cart shells. Note that the PCB chip inside faces towards the front cart label.
As in the NES PCB described above, clean the PCB contacts with a soft pencil eraser. Go with chemicals only if the contacts cannot be cleaned with an eraser. Due to the staggered layout of the screws and the plastic notch in the cart shell, it is very easy to figure out which way the PCB goes.
Atari Cart 2600 Game Cart - Phillips Screw
Some 7800 carts have exposed contacts, others have covers that can easily slide in. The 2600 and 5200 carts have a sliding lock cover. A novel design that keeps out the dust. Use a small screwdriver or pencil to release the tab by pressing in either hole and pushing the cover in. DO NOT PUSH THE COVER ALL THE WAY INSIDE, the spring might pop out inside. Just hold the cover in enough to clean with a QTip cotton swab. If the cover does not return, then the spring might have popped out inside. The cart will have to be taken apart so the spring will not short out the PCB.
Atari Age wrote:http://www.atariage.com/howto/clean_cartridges.html
Normally when you insert a cartridge into the console, plastic prongs fit into the two slots and open the hinge, allowing the system to have contact with the cartridge board. In order to clean these, you will need a thin narrow object (for example, a letter opener), which you will need to insert into one of the two slots that you see. Then you will be able to push the cover back and clean the board.
Atari Guide wrote:http://www.atariguide.com/help/care.htm
First, try turning off the system, wiggling the cartridge, and turning the system back on. You might find that the game has to be sitting at a slight angle to work right. This is because the contacts are not aligned perfectly, or are dirty or corroded. (The contacts are the metal strips on the little circuit board of the game where it fits into the system). If after doing this several times, you're not still not getting any kind of discernable picture, you probably have only one course of action. Clean the contacts with a Q-tip and some Anhydrous (100% pure, water free) Isopropyl Alcohol. For some games (mostly by Atari), you'll need to slide back the protective cover of the cartridge to get to the contacts - you can do this by sticking a pencil into the hole in the back of the cartridge. Be sure to clean both sides of the cartridges contacts. If that still doesn't work, the chip is probably dead, and the game can not be salvaged. Before giving up completely, try it on a different atari console.

Disassembling an Atari game cart
The Atari game carts are normally only held together by one screw. Unfortunately the screw is behind the label. If you are lucky, the label might already be peeling which usually is the case on older 2600 game carts. If the label is really stuck on there, you can try a putty knife and work very carefully. Pull the label taught while peeling, working the putty knife at the same time. The end label will need to be removed also since it is covering both halves of the 2600 cart.
- Atari 2600 Cart Inside 01.jpg (209.29 KiB) Viewed 42470 times
Once the labels are removed, remove the screw with a small screwdriver. The cart halves have lock tabs, usually the top half of the cart has the tabs and locks into the notches of the bottom half. Grab the crevice inside the connector end and pry apart. Observe which half has the lock tab and which has a notch. Squeeze the tabbed sides inward while pulling the notched half sides outwards. At the same time pry apart, working your way around. Some force is needed to pry both shells apart from each other.
Once the Atari cart is apart, observe the direction the PCB is facing and remove. Clean the contacts the same way as described earlier for the NES PCB. I prefer to use an eraser when I have the PCB contacts exposed.
- Atari 2600 Cart Inside 02.jpg (164.59 KiB) Viewed 42468 times
To reassemble, first place the two pieces of the sliding cover together. Hold the spring curved tips inside the groove of the hinged plastic sliding cover. While keeping the spring and cover pieces together, place back in the cover half. Work the spring bent "circle" inside the back tab inside the two tiny plastic pins of the cover.
In the picture below, the PCB contacts to the right have not been cleaned yet. Any buildup on a game cart contact can contaminate the console connector which is harder to clean.
- Atari 2600 Cart Inside 03.jpg (196.19 KiB) Viewed 42463 times
Slide the connector cover and observe the spring tips stay in the groove of the plastic. Replace the PCB, in the notched holder, the connector tip will align once the other half of the cart is snapped back on. Check the connector cover slides in by releasing the lock tab with a small screwdriver. Replace the screw.
Test the game cart works in the console. Once everything checks out, glue the labels back in place. I prefer double sided tape or non ridged carpet tape cut to size. It is less messy and no risk of glue seeping thru the label ink.
Preferred Cart Cleaning Method
Any pencil eraser for me works fine with the cart open up, easier then using messy chemicals. Just don't use Ink erasers that will "sandpaper" away the connector. Any residue left behind just puts resistance in the electrical connection. Leaving a chemical coating for corrosion prevention is not needed in a climate controlled environment such as your living room.
Alcohol is another way to clean, wipe wet then wipe off to prevent if any dirt left behind. Most of the carts I come across need just that little bit more since the alcohol does not bring out the shine. An unfortunate affect of buying most of the games at Swap Meets or Thrift Stores. Not really oxidized in most cases, just needs that extra scrub with the pencil eraser.
RF Shielding
Some game carts such as the N64 have a small RF Sheild inside.
Vencabot wrote:I have a question regarding the metal bits near the contacts in a closed N64 cartridge, which I've just recently learned is an RF shield. It seems like, when I've cleaned my N64 carts with a Qtip and Rubbing Alcohol with the cart all closed up, the Qtip will (of course) graze the revealed surfaces of the shield, and, in my experiences, no matter how many Qtips I use or even erasers the shield will continue to blacken whatever I'm using to clean it.
At first, I figured that this was just some property of the metal or something, and maybe it is, but I read, today, that the RF shields are 'coated' to make them more effective? Is the coating what I'm rubbing off? Would I actually be doing damage by cleaning the shield with rubbing alcohol because I'd be rubbing off some kind of coating?
Also, I've heard from different parties that using a small amount of alcohol will either
A.) not leave residue on the contacts.
B.) that the residue is somehow beneficial to the long-term cleanliness of the contacts.
I have see zinc coating on Simpson construction brackets and older Atari 2600 console shields turn black in some spots. The black discoloration is caused by the cathode to anode process aggravated by the alcohol as a catalyst. Not sure if the zinc coating or change in properties affects the RF shielding aspect, but the original anode ready state has to be better for at least the metal it is sealing.
Best not to aggravate the protective nature of the zinc, just leave the RF shield alone other then a quick wipe. A very light coat of oil will help, but at the risk of contaminating the electrics.
Ziggy587 wrote:As for the shielding on the N64 carts, that's interesting. To be honest, I've never bothered trying to clean them before. If you keep removing black from them, then there must be some sort of coating. In that case, I would say just a swipe to remove any dust would be enough. They're not as imperative to clean as the pins are. Really, since they're all ground, only one of them has to make sufficient contact with the outside of the console cart slot for the entire shield to be grounded.
Game Console Contacts
Clean every game cart PCB contact by taking apart the shell, best way to clean. This will prevent contaminating the NES connector.
I prefer trying to repair the original NES console connector over a replacement due to replacements have the notoriety of kill the ZIF function. First by cleaning and if need be, slightly bending each pin just a little to maintain the ZIF function in the up position. If it still does not work a replacement is not all that bad. Its not like the NES will get the milage of inserts since it is not the only console sitting on the shelf. Just don't leave any cart inserted in the down position when not played for a while.
Every time a cart is pressed down the springs get pushed out a little. I suspect the original Nintendo brand has the better quality in the metal properties, may stay sprung to its original position longer? Most replacement connectors tend to be on the tight side, the game might run if left in the up position.
CRTGAMER wrote:Unplug the power cord, then press the power button on and off a few times to discharge any residual electricity
The Atari console connector is not too hard to reach, but the NES cart connector is buried deep inside. Nintendo and a few third party vendors put out various cleaning kits with the easiest to use looking similiar to a NES game cart.
Nintendo Cleaning Kit NES-30
The black cart is taller the a NES game cart and has a handle on the end for pulling it back and forth..

Reading the cart instructions embossed on the plastic:
Nintendo wrote:INSERT CLEANER INTO CONTROL DECK. PUSH INTO DOWN POSITION AND MOVE CLEANER IN AND OUT 5-10 TIMES. ALLOW TO POP UP THEN REMOVE.
That sounds easy enough, does not even mention using any cleaning solution. The pad is smooth with an almost wax paper surface, appears that any cleaning solution would not saturate.
Opening the Cleaning cart reveals game cart cleaning pads inside. :idea
Disassemble the console for cleaning
The Cleaning Kit is not easy to come by, besides a closer inspection is better anyways. You can use extra long QTips, but it is easier to remove the NES cover for easier access. There are screws on the bottom and an internal RF shield that needs removed.
Clean each console contact prong with an alcohol dampened QTip, followed by the dry end. Another method is a alcohol dampened cardboard cut to the width of the connector. Again follow thru with the dry end of the cardboard. Before powering back on, ensure the contacts are completely dry.
Hobie-wan wrote:That sounds more like dirty carts/connector if you're actually getting scrambled graphics like that. To clean the cart slot, disconnect the system and get a piece of clean cardboard from a food box. Cut it to fit the width of the slot and fold it brown side out so you have double or triple thickness that is about the same as the board sticking out of the cart. Dampen it with the alcohol and then insert and remove it like a cart several times. If it comes out visibly dirty, cut another piece and do it again. Prop the flap open and let the system dry for at least 30 minutes to an hour before you hook it up and give it another shot.
Zing wrote:I'd also suggest being very careful when trying to "clean" the pins with folded paper. The first time I tried that, I ended up bending one of the top pins inside
The NES console connector can be disassembled for better access. It is better to clean and repair the pins over an inferior quality replacement.

KDub wrote:While I usually post my RetroActive videos in my designated thread I felt like this one would be more beneficial here in the long run.
http://www.youtube.com/watch?v=sWbMhs_2OAM
In this video I show the steps on taking apart the NES and refurbishing the current pin connector

Restoring corroded or damaged cart pinsCRTGAMER wrote:Never leave a game cart plugged in when not in use for a long time. Any console's connector springs will "remember" the new tension, with the NES Toploader putting the worse pressure. Just clean any cart contact you buy before you pop them in. For the Top Loader, just leave a game in the up position when the console will not be played for a while. For other consoles, just pop the cart up a little off the connector. The game cart can act as a dust shield for consoles such as the Atari 2600 that do not have dust flaps.
Game Genie Damages Console Cart Slot
The Game Genie Connector is almost twice as thick as a NES Game cart connector. Never use the Game Genie unless you want to permanently damage your console or portable NES connector. The only way to fix a Game Genie cart is to build a thinner PCB cannibalized from a NES cart PCB.
Dr Mario NES Cart Connector Thickness -.04"
Galoob Game Genie Connector Thickness - .07"
If a cart connector pins are badly corroded or damaged, it can be repaired by adding a thin coating of solder. Keep in mind solder is softer then the connector metal. A small chance of the solder scraping off over time and possibly damaging the console. This should only be done on a rare game cart that is hard to replace and making the decision if worth the risk.
This method should only be used if the contacts are damaged to the point of pitting or corrosion and not just surface grime. A solder coating which is softer metal will not be as durable as the connector pins. In honesty, the game cart in the pictures below just needed a good cleaning. Shown to give an idea how to go the solder repair route.
Retro MMGN wrote:http://retro.mmgn.com/NES/Articles/Restoring-NES-game-cartridge
Add a little bit of flux to the pins. <EDIT Be careful not to get any flux between the contacts. Additional flux is not needed when using rosin core solder.> Then you start adding the solder. They're all done? Now the other side!
Now there is a mountain of solder on the pins. You'll want to get rid of most of it with some desolder wick.
All that burnt flux has made it dirty. Oh well, lets clean it up. A good source of alcohol or
<EDIT Electrical Contact Cleaner> will to the job. Ooohhh... SHINY!!


Ziggy587 wrote:I would recommend trying to remove any gold finish that is left. From what I've read on the following Wiki page, the gold plating will react negatively with solder. In short, it makes the solder brittle.
http://en.wikipedia.org/wiki/Gold_plating#Soldering_issues
Also, I know of an easier way to tin the pins. Just apply some flux to the pin, tin the tip of the iron (with very little solder) then drag the iron tip all over the pin to spread the solder out. After that, you can use a desoldering braid to remove any excess solder. Doing it this way, you'll avoid huge bulges of solder that you have to remove. Another thing, you should thoroughly clean the pin(s) before tinning them. I can see in the pics posted that the pins are visibly dirty before tinning. They should be cleaned as best as they can. Of course, I know you'll only resort to tinning a pin that has been heavily damage, but you should still clean it as best as possible. And of course, it should be cleaned thoroughly after tinning as well.
References and other Mods
http://www.atariguide.com/help/care.htm
http://www.atariguide.com/help/care.htm
http://www.raphnet.net/electronique/nes_mod/nes_mod_en.php
http://retro.mmgn.com/NES/Articles/Restoring-NES-game-cartridge
http://www.mmmonkey.co.uk/index.htm

