This is a tutorial on creating a cable to link the Genesis Model 1 with a standard 32x console. It borrows from numerous listed sources and provides plenty of pictures of the process. It also explains a problem with the common pinout references found online. It also details an attempt to connect stereo audio to the 32x via the Sega CD outputs.
A Brief History
Anyone who has tried to acquire a Sega 32x for their Genesis is painfully aware of how expensive a complete unit can be. Though many people are selling the core unit, it is often missing the crossover cable. This simple plug connects the Genesis video out to the 32x and is essential to be able to play games on the system. This is due to the fact that the Genesis and 32x each generate their own video layers which are combined in the 32x. Many people have lost or thrown away these cables over the years. Due to their rarity, complete 32x's demand a premium, ironic considering SEGA had to liquidate them in the mid 90's due to lack of demand. As hard as this cable is to find, It is even harder to find the patch cable. The patch cable was an adapter that allowed for the 32x to speak to the original, larger Genesis model which had a different video connector. Since many people didn't need this adapter, it was even more common for them to have been lost or thrown away.
The Problem
I received a Genesis for my Birthday last year, and have developed a strong obsession with it. As a hardware collector, I had been tirelessly searching for a 32x that wasn't overpriced. I finally found one locally which I purchased for $20 with an official power brick and the standard crossover cable. The only problem is I have a genesis Model 1, which requires that I have the patch cable. I could easily find a cheap model 2 genesis, but I prefer the aesthetics of the original. A quick check online showed that ebay sellers demand $15+ for 3rd party patch cables (and shipping was extra). As far as I'm concerned this is extortion, similar to the USB cable markups at big name stores. I decided that I was going to build my own cable instead. I enjoy little projects like this, and I was excited to be able to know that I put some of my own elbow grease into my genesis. I must warn prospective builders: I spent around $10-$15 on parts for this cable, and several hours of my time. I already have a background in soldering and electronics, so it wasn't a big learning experience. For most people, just save your time and money and buy one online.
The Process
For this project you need several key materials. I have seen people substituting these parts online with paper clips and other miscellaneous materials. I am more interested in my console looking good and being safe, so I prefer to buy standard parts.
Materials:
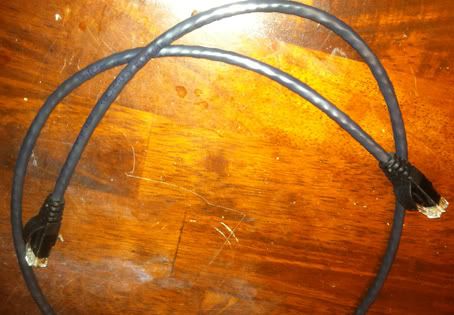
1 Standard Network Cable Cat5e
One foot in length is more than adequate, it really can be how ever long you need it. Its going to reach from your genesis to your 32x, which is only a few inches.
9 pin mini-Din Connector
At the moment, this type of connector is still relativley common. You can find it at most electronic stores or Radio Shacks. They are cheap, so don't spend alot on them. This will be the connector that plugs into the 32x
Soldering Iron and Solder
Hot Glue gun and Glue
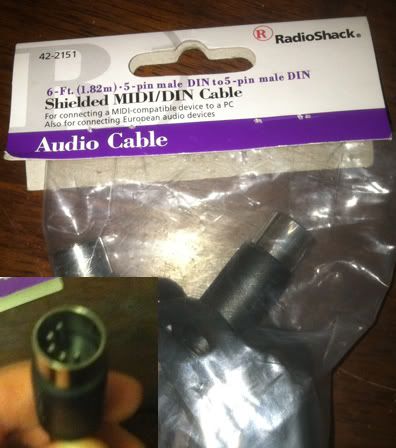
5 pin MIDI / Din Cable
These can be found at radioshack and most electronic stores. Don't waste your time on the 8 pin Din, they are expensive, hard to find, and the Genesis uses a 'U shaped' variant that is even harder to find.
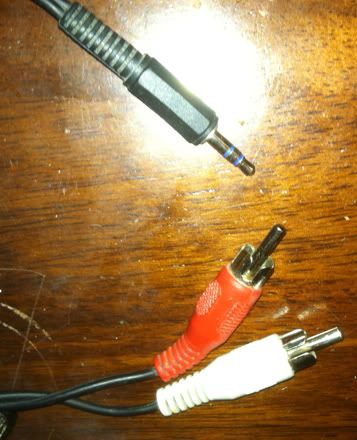
Optional Audio Equipment
I also attempted (with mixed results) to get the stereo audio from the sega cd to get mixed in the 32x. I will demonstrate how I did this, but it doesn't seem to work, and suggestions are encouraged. I know the 32x has an audio processor, so either the audio is sent to the genesis via the cartridge port, or there is missing audio if you don't connect the 32x audio cables. I used a rca to stereo jack cable.
Get Started:
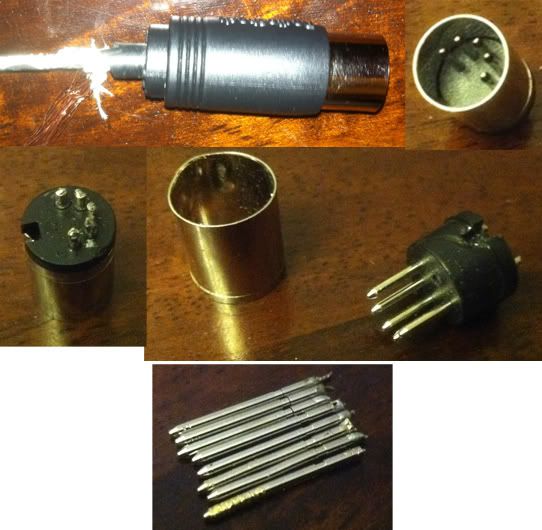
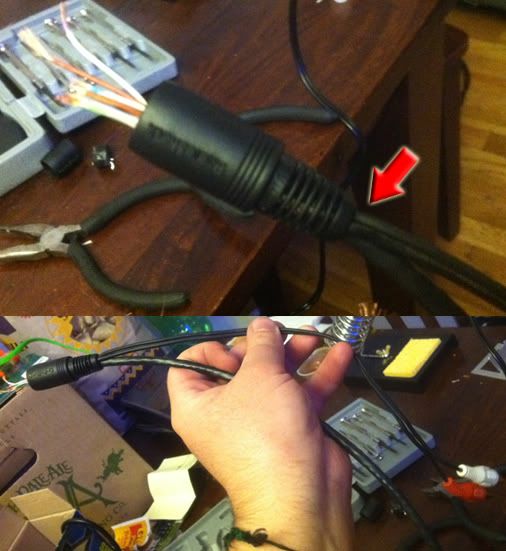
The first thing you need to do is cannibalize the Midi DIN. Even though the genesis has an 8 pin port, for the 32x, we are only going to be using 5 of the outputs: Red, Green, Blue, Sync, and Ground. The only problem is these 5 pins aren't in the right place. You could spend a lot of time trying to reposition them, but its just not worth it. You can either pull the cable out of the plug or cut it off, either way, we don't need the cord.
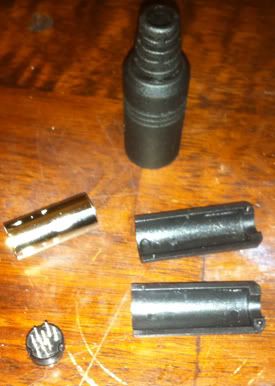
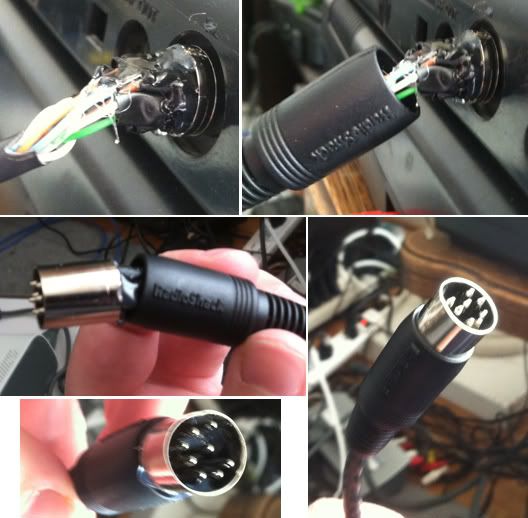
Then using pliers remove the metal cylinder from the rubber casing. Keep this casing, it will be used for aesthetics later. You should have a metal cylinder with a black plastic end that has the 5 pins wedged inside. Using whatever method you deem necessary, remove the black plastic segment. Keep the metal cylinder for later. These pins can be really difficult to remove. If you try using pliers, you could actually break the pins. The best way to remove them is with a soldering iron. Hold the soldering iron on the pin until you notice the plastic beginning to melt at the base. Then using pliers, pull the pin out. If you did this right, the pin should slide out without any trouble. Repeat this with the other four pins. In my picture you will notice I have 8 pins, this is because I cannibalized both sides since I plan on making my plug all 8 pins, but you shouldn't do that, just worry about the main 5.
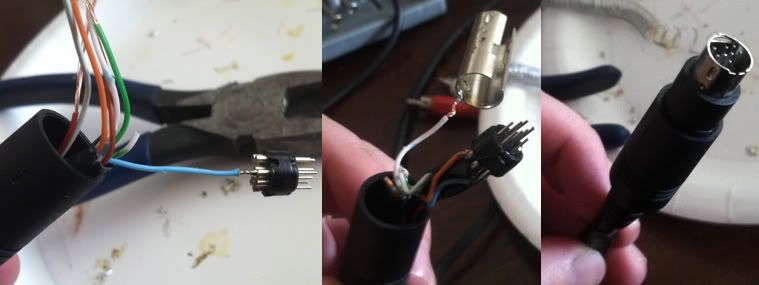
Next, cut the ends off of the network cable and cut down the casing an inch or so. Then separate the wires within, and strip the very tips off of each cable. Then place the rubber end we removed from the midi cable, as well as the one that comes with the mini din plug and place them on this network cable.
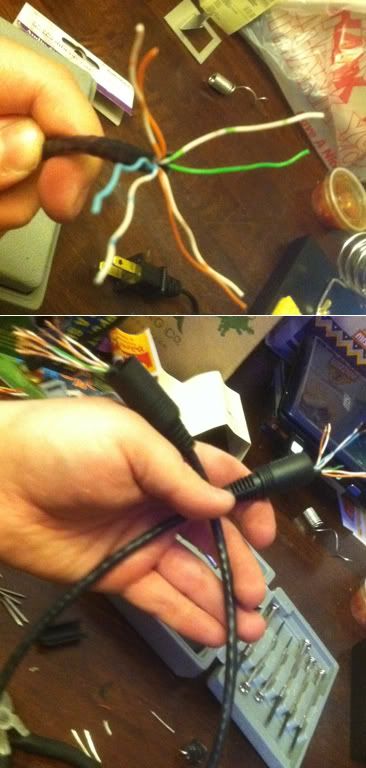
Your going to need to remember which colors in the network cable you use so you can match both ends with the proper ports. Whatever color matching works for you is fine. Here is what I did though:
Blue wire - Blue
Orange Wire - Red
Green Wire - Green
Brown Wire - Sync
White w/ Brown Stripe Wire - Ground
Write down whatever you choose so you don't forget. For the three colors you aren't using, trim them back to the edge of the casing. The next step is to solder the pins you removed from the DIN connector to the ends of these 5 cables.
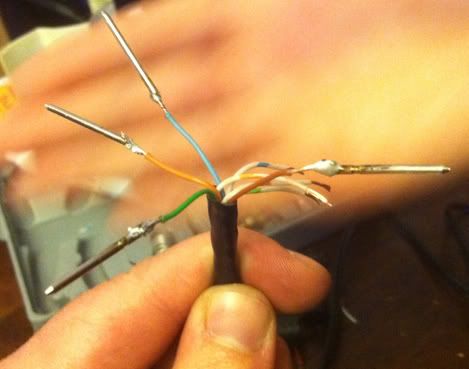
If your a little messy at soldering like me, wrap some electrical tape around the bulbous regions to ensure that they don't touch when they are close together.
Next, Slide the metal cylinder you removed from the DIN cable earlier over the end of the cable.
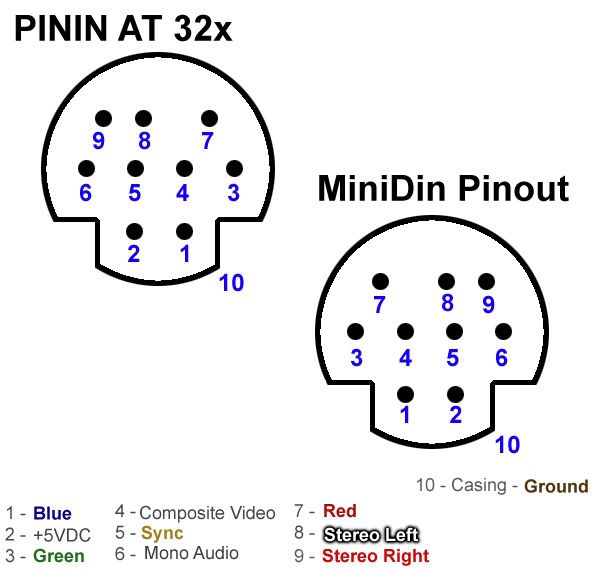
Then using my Genesis Pinout image (Below), slide each of the pins into the correct socket. Warning, my pinout image is correct, and demonstrates how the back of the Genesis looks. There are many images of the Genesis model 1 pinout online, but they often have the REVERSED order, and show the cable side (PININ), not the console side (PINOUT).
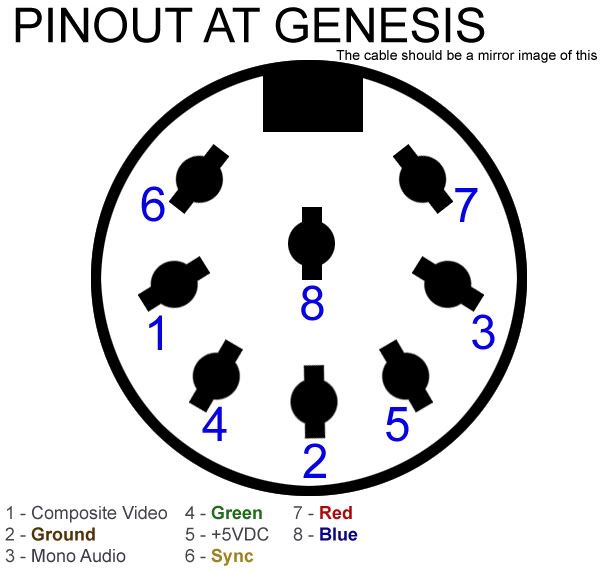
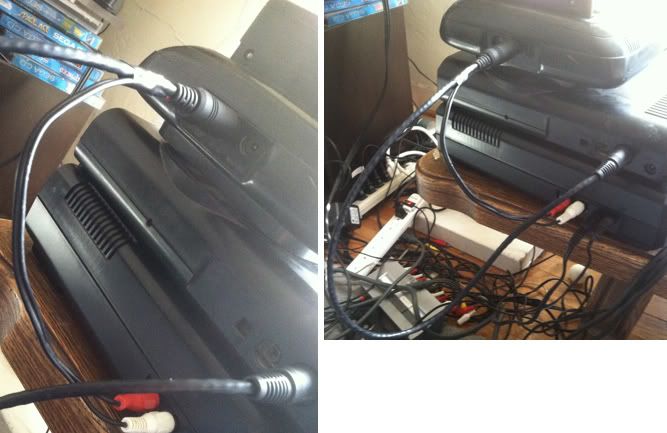
Once the 5 cables (red, green, blue, sync, ground) are inserted appropriately, slide the metal cylinder back up the cable to where it is plugged into the genesis. This cylinder also plugs into the genesis around all of the pin plugs (like the regular video cable).
Now, get ready for the weird part. Using a hot glue gun, shoot small amounts of glue around the pins and cables. Once it hardens, the pins will be kept in place, and kept attached to the cylinder. Give it a while to cool down completely (15 minutes). Then using pliers, grab a hold of the cylinder and pull the plug out of the genesis. You can now slide the rubber end over the edge of the cylinder, which gives you a secure and attractive looking cable. Once again, I will have all 8 pins, you should only have 5.
You can now plug in and unplug the cable with ease, but be gentle, hot glue is not super rigid, and the pins can move.
If your feeling adventuresome, here is your next step. Otherwise skip down a ways (untill the Start Again Here Lable). This area allows me to use a seperate audio cable to bring in stereo sound from either the Sega cd rca jacks, or the stereo output from the front of the genesis. You can get full stereo sound by using a cable from either of these ports and sending it to a TV instead of using the 32x audio cables. I, however, was interested in seeing if I could send the audio to the 32x so that I could output everything through a single cable.
Take the audio cable and trim off the end, and strip down the casing exposing the under wires.
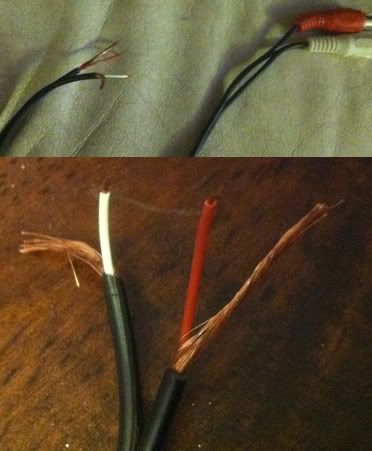
Then slide these wires under the rubber casing on the MiniDin side so that the cables match up with the stripped network cables.
START AGAIN HERE
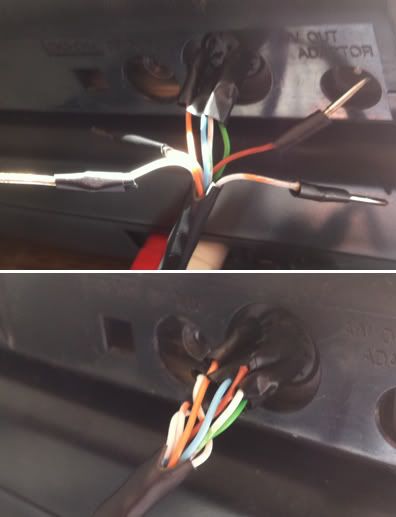
Using my Mini-Din diagram, take the other end of the network cable and begin to solder the appropriate colors to the appropriate pins. Also, cut back the unused wires. It is very easy to get turned around backwords, so I tried to put both views for you. The PININ at 32x image shows the holes on the 32x system. The Cable Pinout shows what each pin is if you were looking at the plug head on.
Remember, the Ground wire isn't a pin on the MiniDIN, its actually the Cylinder like object around all of the pins, so solder the ground wire to this, not a pin.
Feel free to cut off the +5VDC pin. If you don't solder to the pin it doesnt matter either way.
If you were being adventuresome, make sure to also solder the 2 extra audio cables to the appropriate pins.
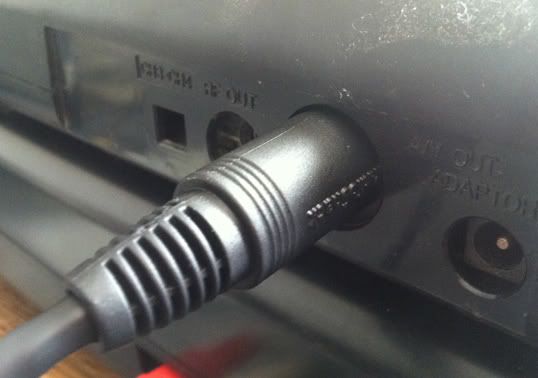
Then reassemble the MiniDin Case around the soldered pins. Then Slide the rubber end over it to keep it in place.
You now have a working Model 1 to 32x Patch Cable!
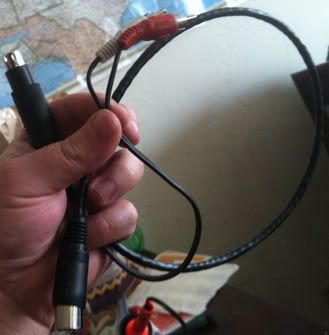
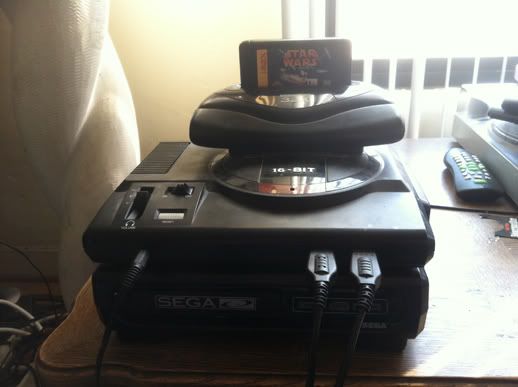
I finally have completed my "Tower of DOOM!"
Problems:
Despite proper soldering, my Audio cable addition does not work properly. Audio is still being transferred, however, it is at a very low volume. I am not sure why this is yet, and comments are encouraged. So for the time being, I am using a direct RCA to TV connection from the Sega CD outputs.
I'm not sure why this is, I know that the Sega 32x has its own audio hardware, but I hear it is rarely used. I'm not sure how the audio pipeline works, but It seems to me as though I am missing out on some potential 32x added sound effects when I bypass the audio input. The 32x manual instructs Genesis 1 owners to bypass the 32x for the audio.
Thanks for your time, I doubt this will help anybody, but who knows. Its always nice to have pictures for these kinds of projects.
-CptFishStick
Acknowledgments:
I used several resources in compiling this tutorial.
http://pinouts.ru/Game/sega2_pinout.shtml
http://pinouts.ru/Game/sega1_pinout.shtml
http://www.gamesx.com/
And sonic412781's guide on building a connector.


