mjmjr25's Custom Wood Arcade Cabinet - DONE! 6/17/12

Discuss Your Gaming Environments and AV Setups
Post Reply
mjmjr25

mjmjr25's Custom Wood Arcade Cabinet - DONE! 6/17/12

Post by mjmjr25 »

Hello and thank you for taking the time to view my new arcade cabinet. This thread is a work in progress and will be completed in about a week.

Eventually I will do a step by step and write-up.

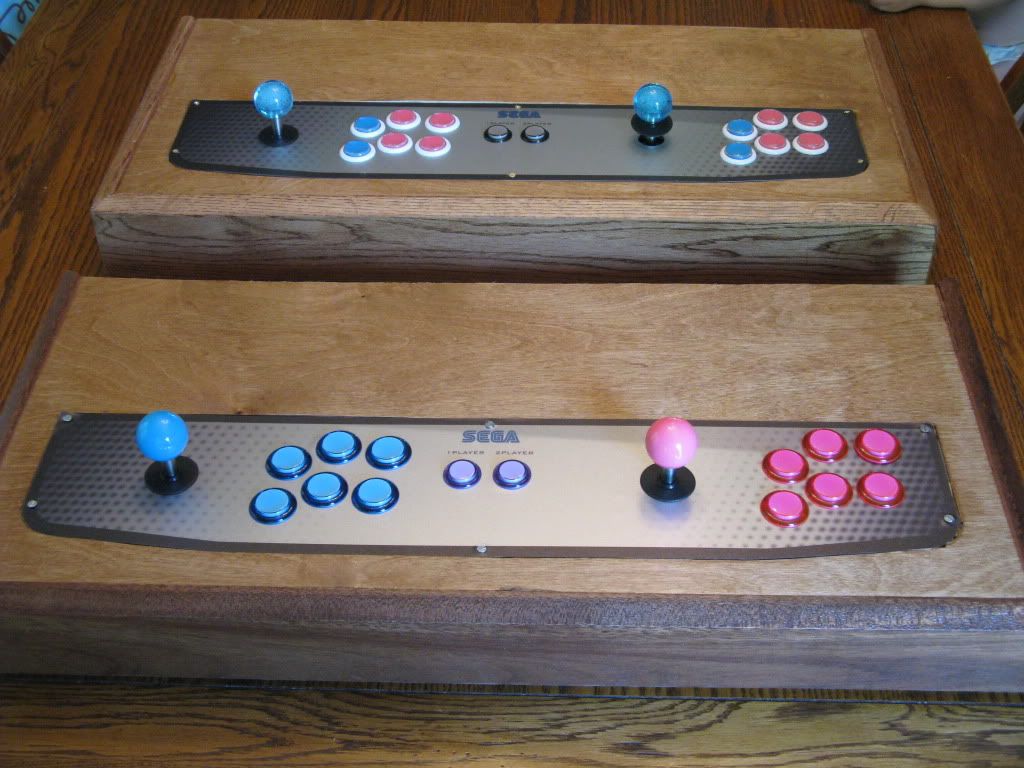
For now, i'll just be posting a couple pics of the arcade sticks that are inlayed / locked-in to the cabinet. Technically, I only needed one of these, but I like the idea of experimenting with different woods and button/stick color combinations.

The woodwork was done by me, the aluminum control panel, panel overlay, buttons, sticks, pcb's, and ethernet Cat 6 / R-45 jacks connectors were all purchased at various places.

Sticks are Seimitsu LS-32's, buttons are Sanwa 30mm / 24mm screw-ins.

PCB's are McC's. Connection is via ethernet Cat 6 cable leading to a R-45 jack. Sticks are compatible with all of my consoles except PS3 and N64. I currently have cables for SNES, NES, SAT, DC, GCN, PS1 and 2.

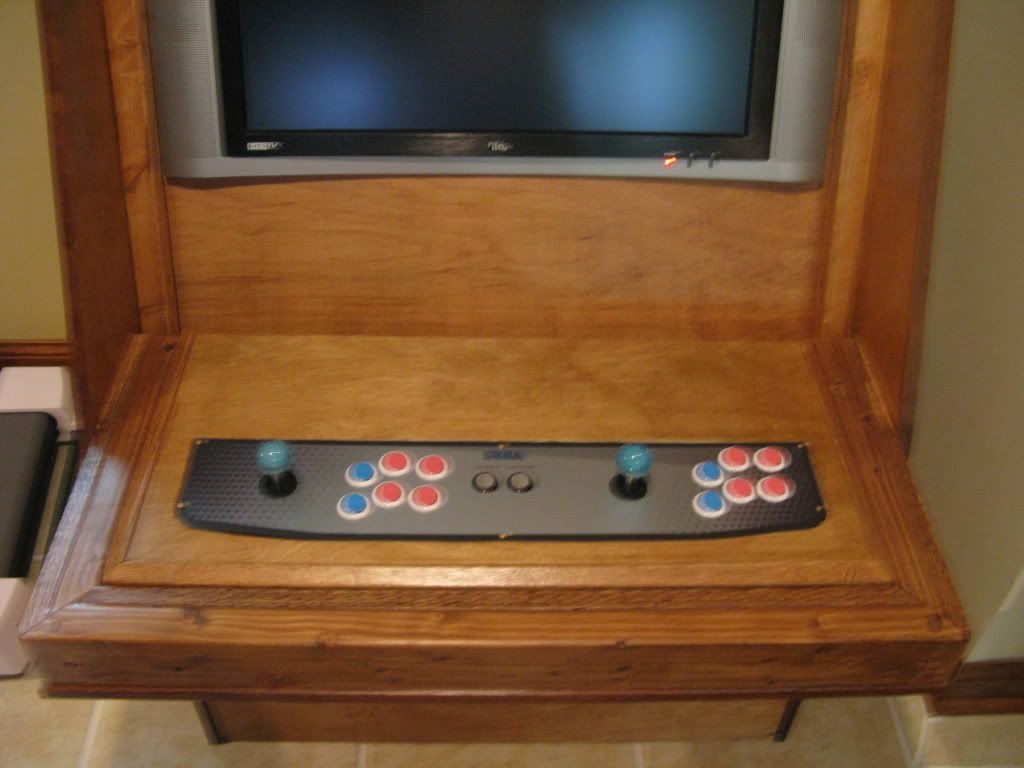
EDIT: Here is the cab, in the house as of today, 6/17/12:

To note, the monitor is inlaid into the bezel - the bezel is TATEable for JAMMA vert games, by simply sliding the bezel out of the rails, 1/4 rotation, drop back in.

Both control panels obviously fit into the cab - I'm using the Red Oak one for now. The Mahogany looks a bit better and can serve as a stand alone stick upstairs or elsewhere, etc. But it is great to have a backup!

I used a semi-gloss poly (5 coats, sanding between...). It is great - no tack, no fingerprints, yet very smooth on the wrists / arms.

Image

Image

Image

Image

Here are the sticks:

Image

Image


Problems so far?:

1) I completely spaced attaching the panels into the wood stock (it inlays into the 3/8" birch plywood and rests on some scrap stock, positioned at the (6) screw holes). So...I used a generic screw on each of them and don't like them at all. I need to pick of something that will sit more flush and be more aesthetically pleasing.

2) There are some small gaps between the panel and the birch overlay - I anticipated this and have some matching caulk that I can fill-in from underneath. I used a jigsaw to cut out the panel inlays, and while it was very close, there are some very slight variances that I wish were better - you can see them in the last 2 pics.
User avatar
foxhound1022
Next-Gen
Posts: 2282
Joined: Wed Jan 25, 2012 7:20 pm
Location: The mean streets of SouthTown

Re: mjmjr25's Custom Arcade Cabinet...(almost done...)

Post by foxhound1022 »

Looks great, man.

What material are the control overlays?
dedalusdedalus
Next-Gen
Posts: 1465
Joined: Wed Dec 03, 2008 9:38 pm

Re: mjmjr25's Custom Arcade Cabinet...(almost done...)

Post by dedalusdedalus »

Quite a nice marriage of arcade know-how and classic woodworking. I love machines that can pass for furniture, since they add to the decor rather than distracting from it.

Excellent work!
mjmjr25

Re: mjmjr25's Custom Arcade Cabinet...(almost done...)

Post by mjmjr25 »

They are 1/16" vinyl. High Quality print job and very sticky (you only get one shot).

They come uncut and this stuff doesn't cut with a scissor, super tough stuff. Basically you apply it to the aluminum panel and then use a boxcutter to cut out the button holes, etc.

They were $19 ea for the overlays plus ship. Bought them from Ken @ the gameroom http://www.ebay.com/itm/Control-Panel-B ... 612wt_1037

I found the aluminum panels for $195 shipped for (3) which was slightly cheaper than the above link.
User avatar
CRTGAMER
Next-Gen
Posts: 11933
Joined: Tue Jan 05, 2010 11:59 am
Location: Southern California

Re: mjmjr25's Custom Arcade Cabinet...(almost done...)

Post by CRTGAMER »

:shock: Very nice! A Well thought design with the connecters. Have you gutted any console controllers PCBs yet? Maybe hit the PS1 first, then try adapters? This will save on having to custom build some of the extra PCBs.
Last edited by CRTGAMER on Sun Jun 17, 2012 3:44 pm, edited 3 times in total.
Image
CRT vs LCD - Hardware Mods - HDAdvance - Custom Controllers - Game Storage - Wii Gamecube and other Guides:
CRTGAMER Guides in Board Guides Index: http://www.racketboy.com/forum/viewtopic.php?p=1109425#p1109425

Image
Image
AppleQueso

Re: mjmjr25's Custom Arcade Cabinet...(almost done...)

Post by AppleQueso »

CRTGAMER wrote::shock: Very nice! A Well thought design with the connecters. Have you gutted any console controllers PCBs yet? Maybe hit the PS1 first, then try adapters? This will save on having to custom build some of the extra PCBs.

He owns a lot of arcade PCBs, I'm assuming this is for them.
mjmjr25

Re: mjmjr25's Custom Arcade Cabinet...(almost done...)

Post by mjmjr25 »

CRTGAMER wrote::shock: Very nice! A Well thought design with the connecters. Have you gutted any console controllers PCBs yet? Maybe hit the PS1 first, then try adapters? This will save on having to custom build some of the extra PCBs.


The PCB installed is a multi-console chtulhu - compatible w/nearly every retro system, save N64. This stick as it is is compatible with everything I own (except ps3 / N64) as it is.

It has a universal R45 jack. Then I have controller cables for all my systems, simply removed from the controller, one end is the original input - the other end is wired to a CAT 6 connector - i'll snap some pics in a few, but yeah, basically the stick is done - no pad hacks needed, no exposed wires or clutter.
User avatar
CRTGAMER
Next-Gen
Posts: 11933
Joined: Tue Jan 05, 2010 11:59 am
Location: Southern California

Re: mjmjr25's Custom Arcade Cabinet...(almost done...)

Post by CRTGAMER »

mjmjr25 wrote:
CRTGAMER wrote::shock: Very nice! A Well thought design with the connecters. Have you gutted any console controllers PCBs yet? Maybe hit the PS1 first, then try adapters? This will save on having to custom build some of the extra PCBs.


The PCB installed is a multi-console chtulhu - compatible w/nearly every retro system, save N64. This stick as it is is compatible with everything I own (except ps3 / N64) as it is.

It has a universal R45 jack. Then I have controller cables for all my systems, simply removed from the controller, one end is the original input - the other end is wired to a CAT 6 connector - i'll snap some pics in a few, but yeah, basically the stick is done - no pad hacks needed, no exposed wires or clutter.

Sweet! Looking forward to the pics.

Maybe also try that twin stick mod? Toggle switch in the second joystick to the primary player one face buttons.
Image
CRT vs LCD - Hardware Mods - HDAdvance - Custom Controllers - Game Storage - Wii Gamecube and other Guides:
CRTGAMER Guides in Board Guides Index: http://www.racketboy.com/forum/viewtopic.php?p=1109425#p1109425

Image
Image
AppleQueso

Re: mjmjr25's Custom Arcade Cabinet...(almost done...)

Post by AppleQueso »

I ASSUMED INCORRECTLY
mjmjr25

Re: mjmjr25's Custom Arcade Cabinet...(almost done...)

Post by mjmjr25 »

Yeah, this cab will play anything JAMMA via a supergun, but more importantly, it will play my Super Nintendo, Saturn, Dreamcast, etc - all compatible with the sticks, simply unplug the CAT 6 connector, plug in the one from the system you want to play, and done.

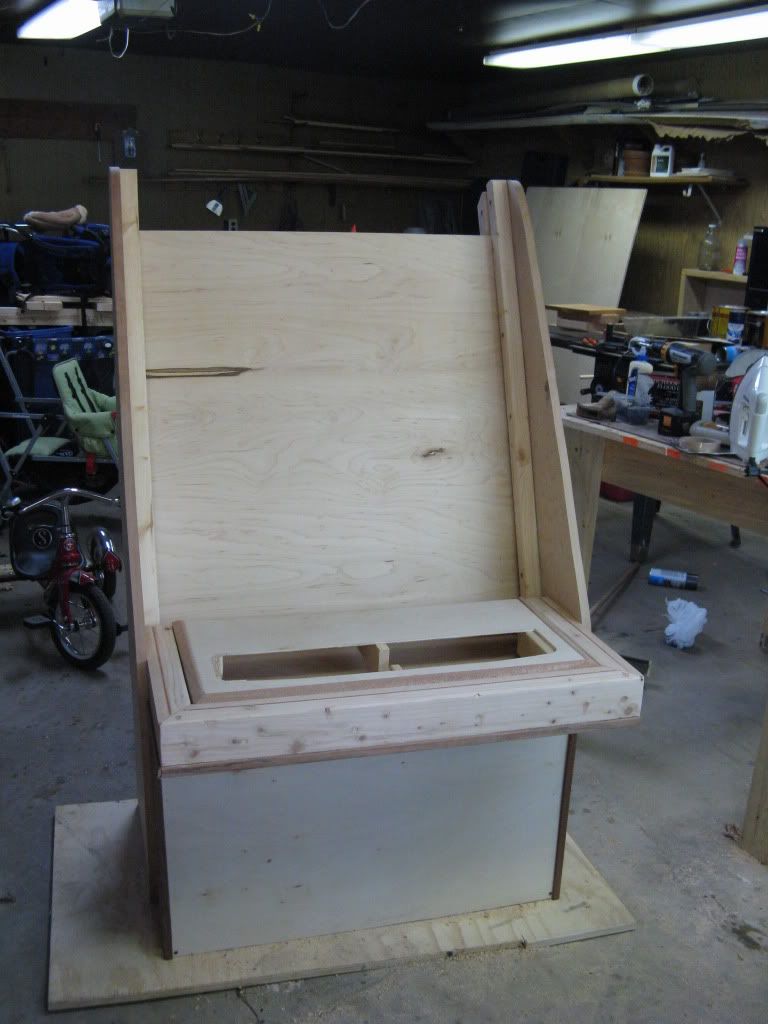
Here it is last week, unstained. You can see the control panel "set in" to the base in this pic. The bezel is now cut and TV is installed.

Image
Post Reply